Automated campaigns
Set up campaigns that mail on their own, with follow-up touches and a budget.
Overview
An automated campaign keeps mailing each home as it qualifies. A rule or a source starts each mailing. The campaign mails inside the budget that you set, until you pause it.
You can use automated campaigns to:
- Mail homes after a storm, a power outage or a property signal.
- Mail the new homes of an area each month.
- Mail your CRM customers, your store customers or your website visitors.
- Send follow-up cards to each home, on a schedule that you set.
How automated campaigns work
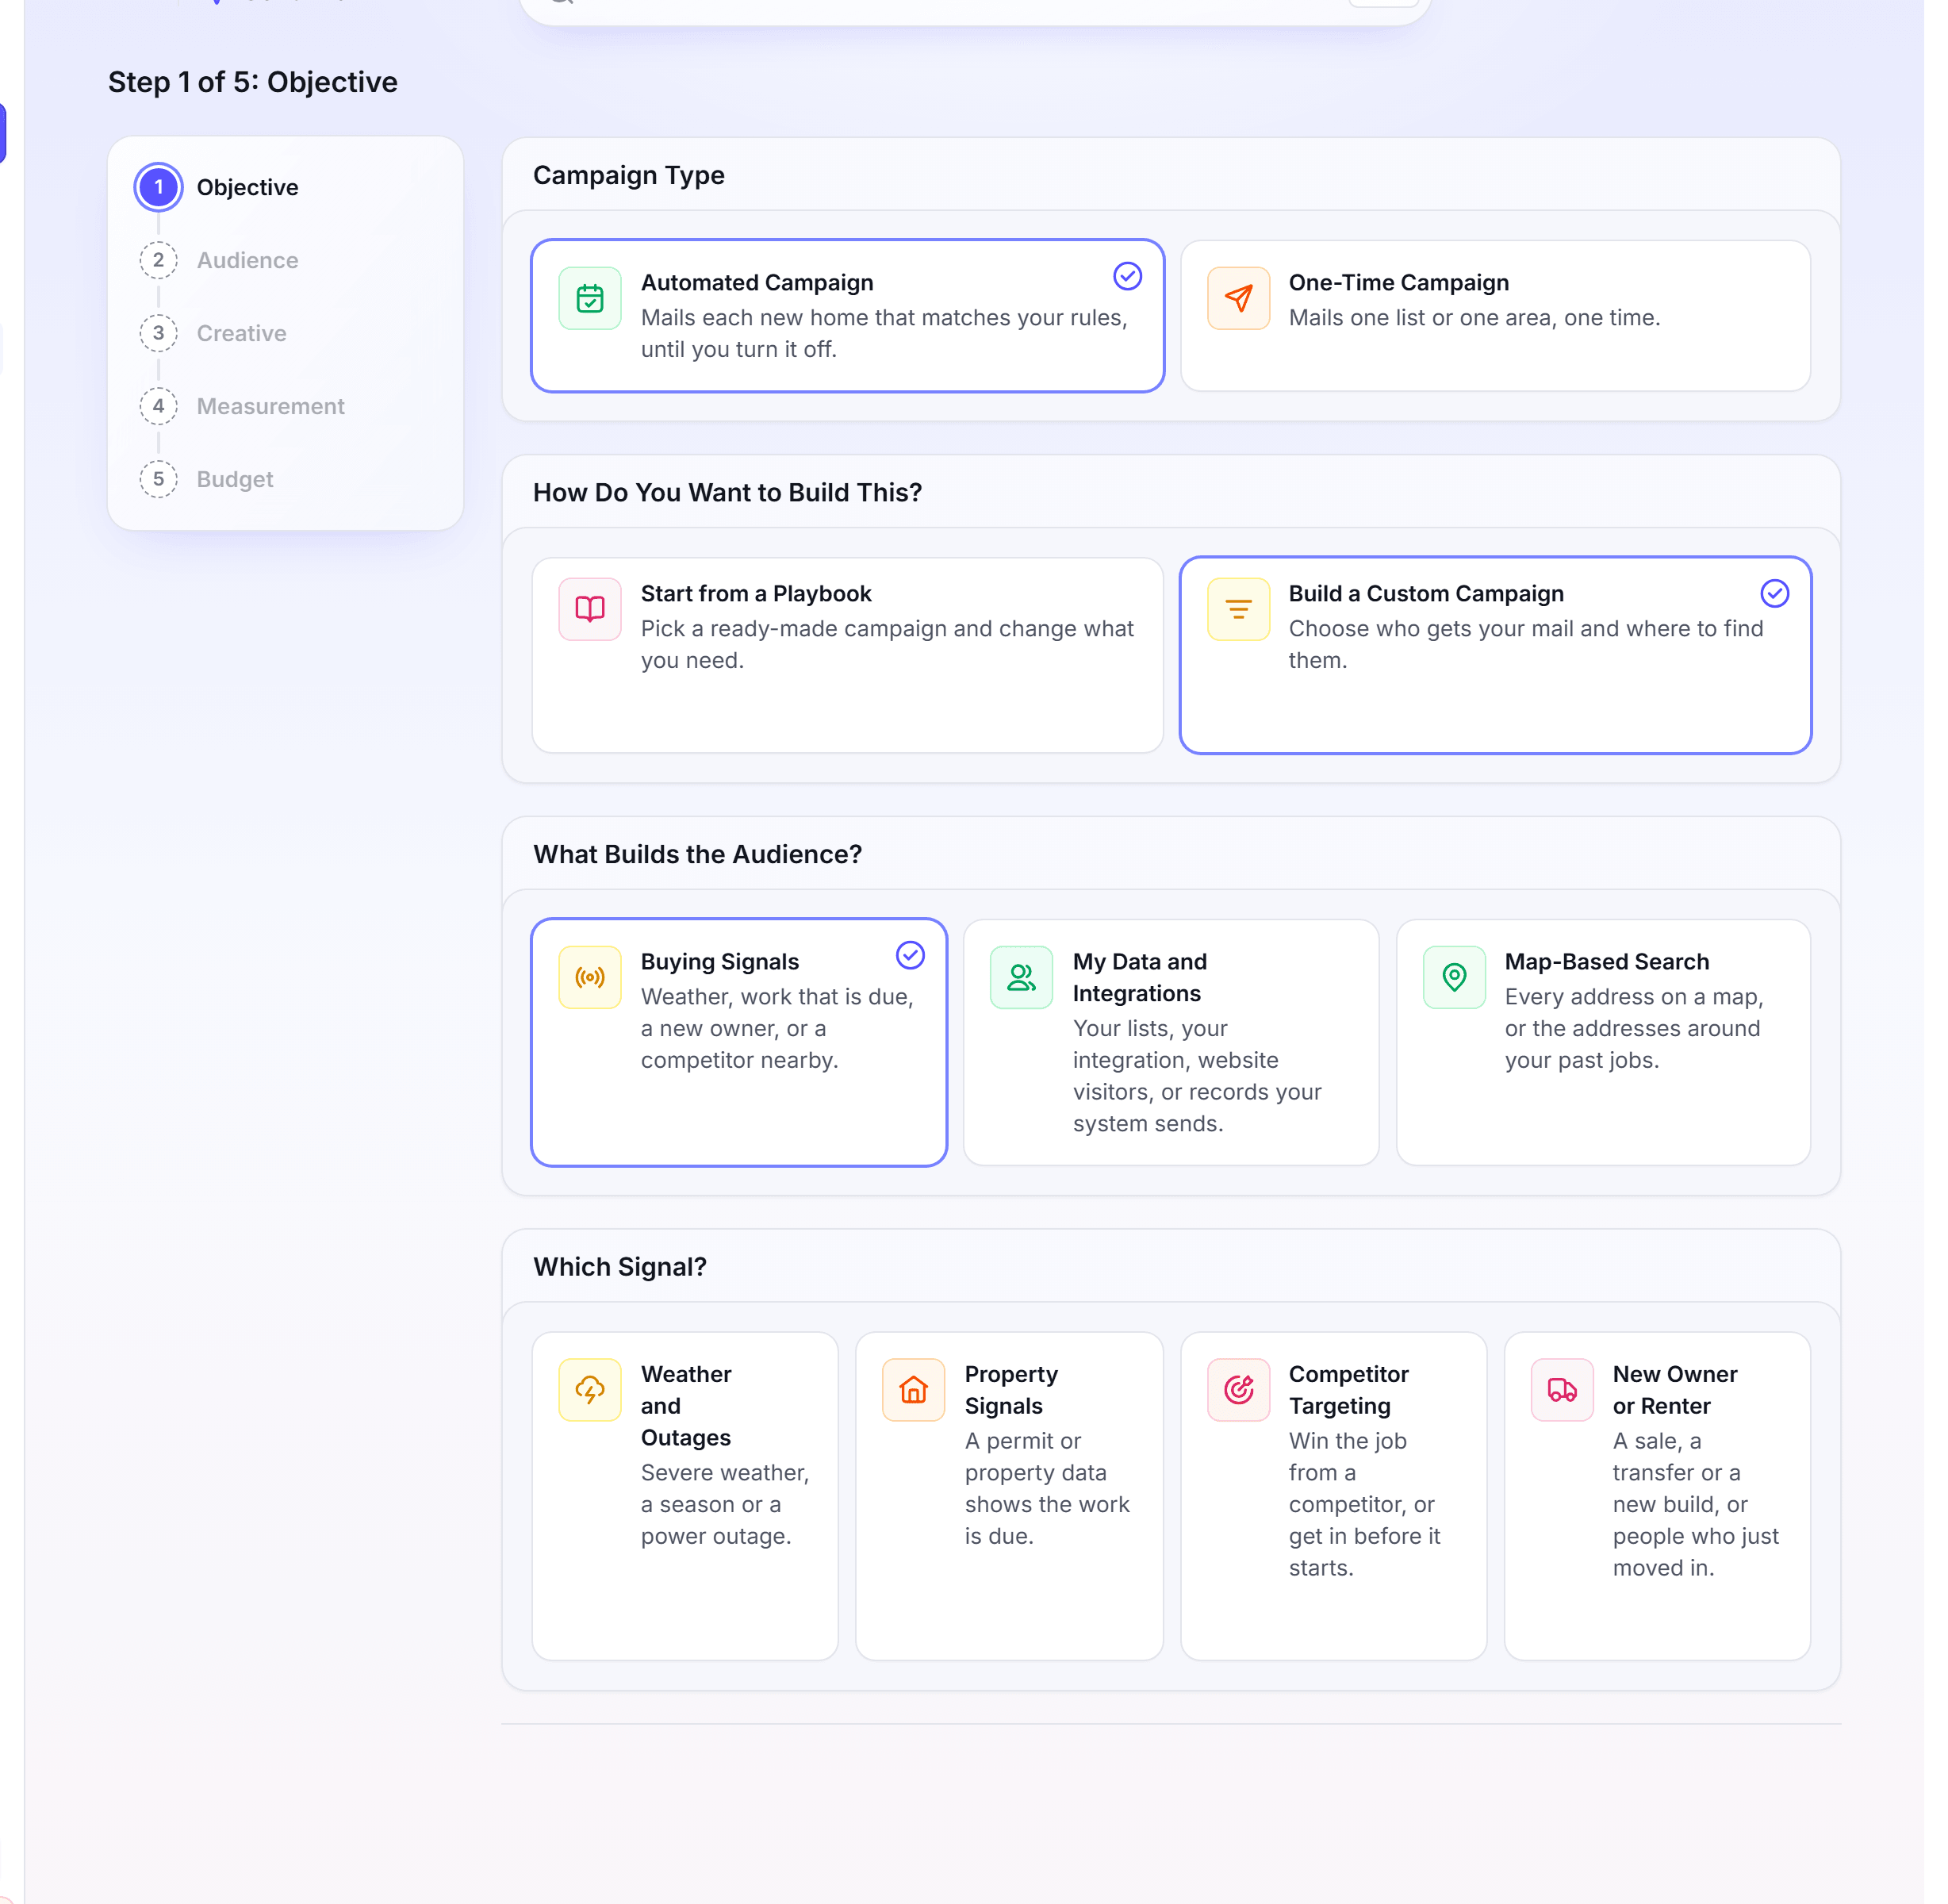
Each automated campaign starts in Send Mail. Under Campaign Type, click Automated Campaign. Then click Start from a Playbook to start from a ready-made campaign, or Build a Custom Campaign.
Under What Builds the Audience?, you pick where the homes come from:
| Choice | What it mails | Page |
|---|---|---|
| Buying Signals | Homes after weather or an outage, homes with work that is due, new movers and homes near competitor permits | Weather and outages, Property signals and movers |
| My Data and Integrations | Your CRM or store customers, your website visitors, and what your systems send | CRM and store customers |
| Map-Based Search | The homes of an area, or the homes around your jobs | Area and radius mail |
The steps after Objective are the same for each campaign: Audience, Creative, Measurement and Budget. The Budget step ends with the Review.
These words describe how an automation mails:
| Word | What it means |
|---|---|
| Run | One mailing of the automation. A run finds the homes, pays, and then mails. |
| Touch | One card of the sequence that each home gets. Touch 1 mails first. |
| Approval | Approve each run holds each run until you approve it. Auto-approve mails it when it is ready. |
| Held touch | A touch that waits for you, for example after a failed payment. |
| Event limit | The most homes that one weather event or outage mails. |
You can see each run on the Batches tab of the campaign page. Campaigns gives each campaign status and each run status.
Add follow-up touches
Do this when you want each home to get more than one card. Each touch has its own template, postage and wait.
In Send Mail, go to the Creative step.
Under Pick your first touch, click a template, then click Use this design.
Under touch 1, click Add second touch. The design picker opens.
Click a template for touch 2, then click Use this design.
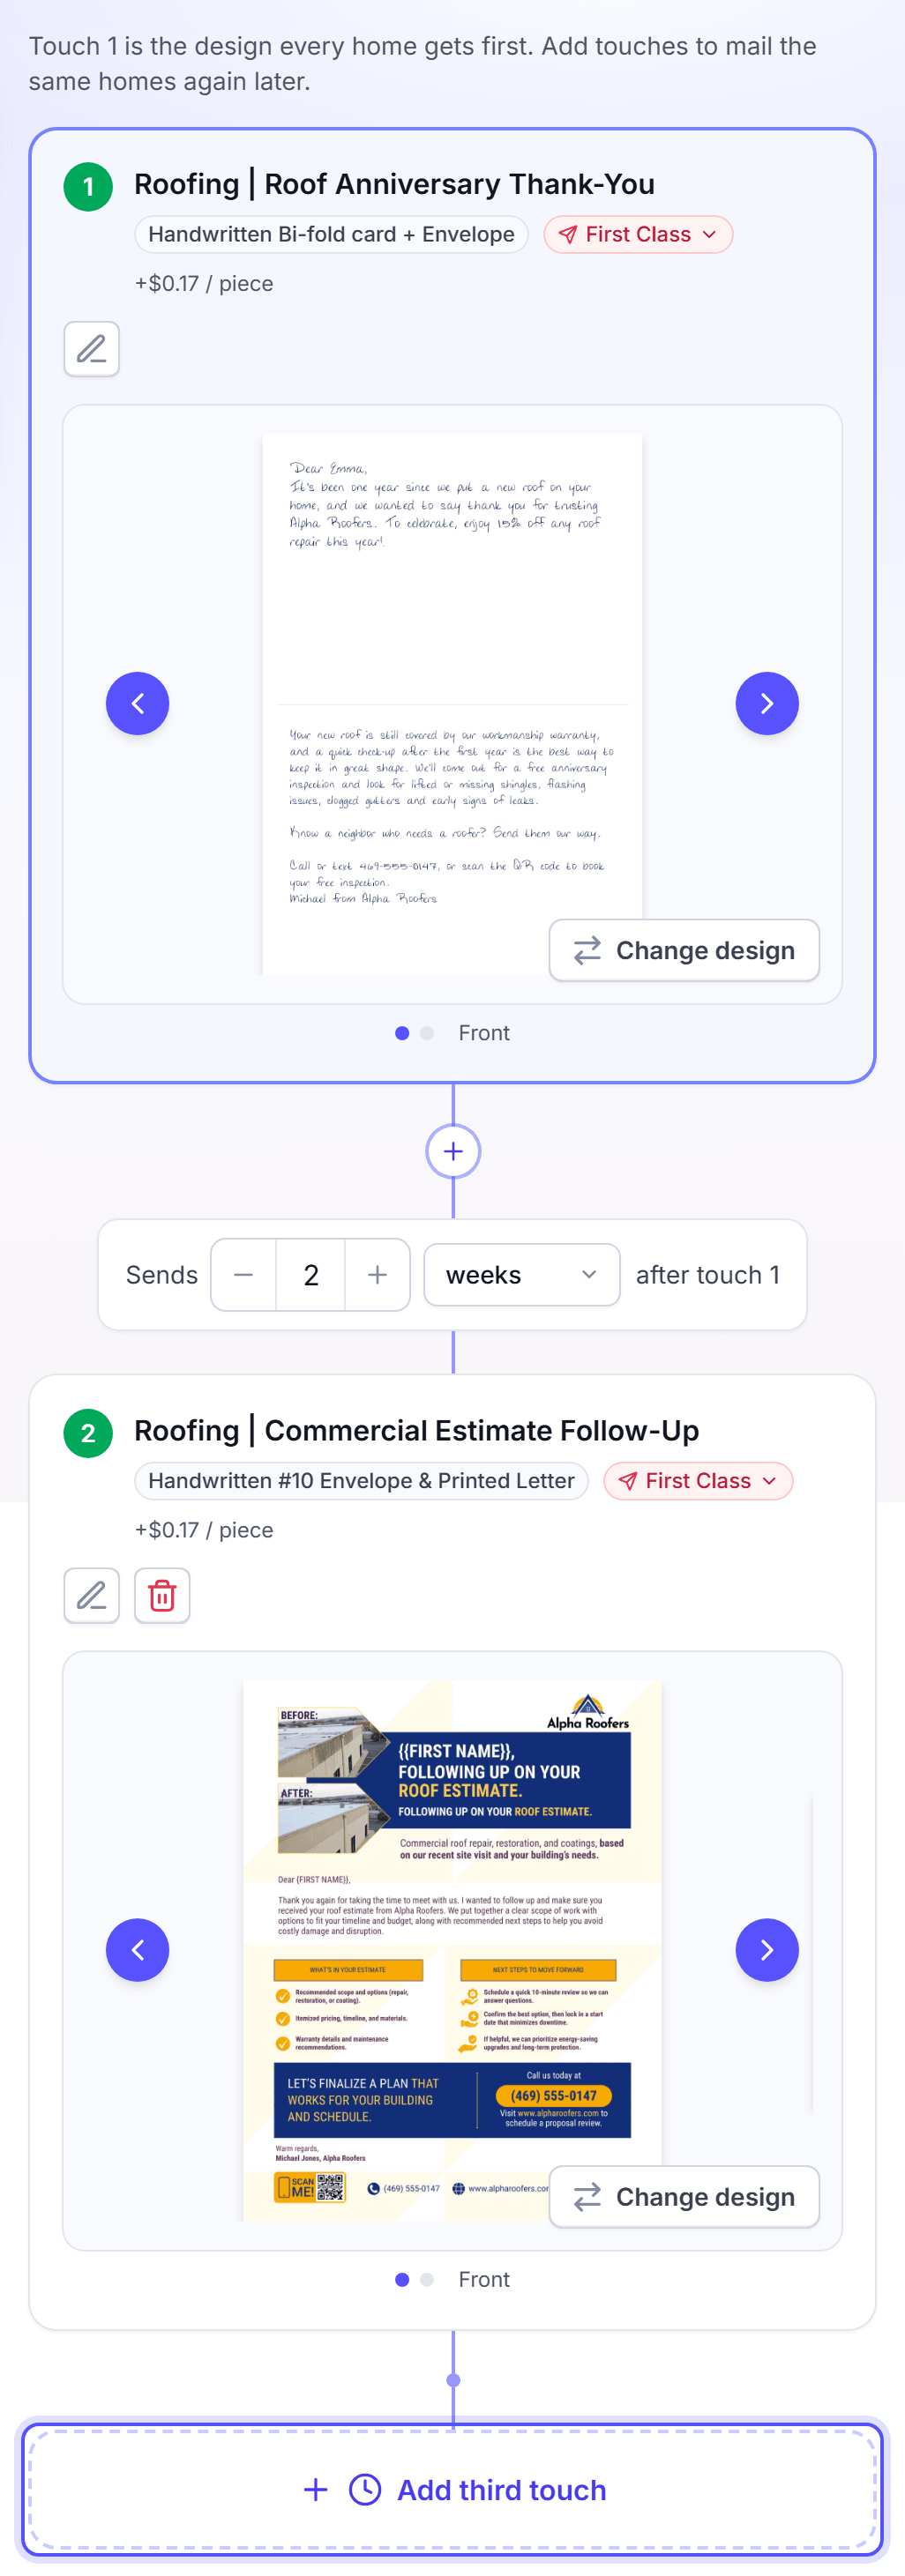
On the line above touch 2, set when it sends: a number, then days, weeks or months after touch 1.
Optional: Click the postage tag of a touch, and select First Class or Standard.
Optional: In Mailing and timing, select a Production speed: Standard, Faster or Fastest.
A new touch sends 2 weeks after the touch before it, by default. To change a design, click Change design on the touch. To remove a touch, click its Remove touch button. A campaign holds 10 touches at most.
A forecast weather rule also shows When it mails. As it triggers mails each home when the rule fires. As the event happens times the card to land when the weather comes.
You're done when each touch shows a template. Nothing is charged until a run mails.
Set a budget and turn the automation on
Do this at the end of Send Mail, to set what the automation can spend and to start it.
Go to the Budget step.
In Budget, select Monthly Budget, and enter an amount from 10,000,000. Or select No limit.
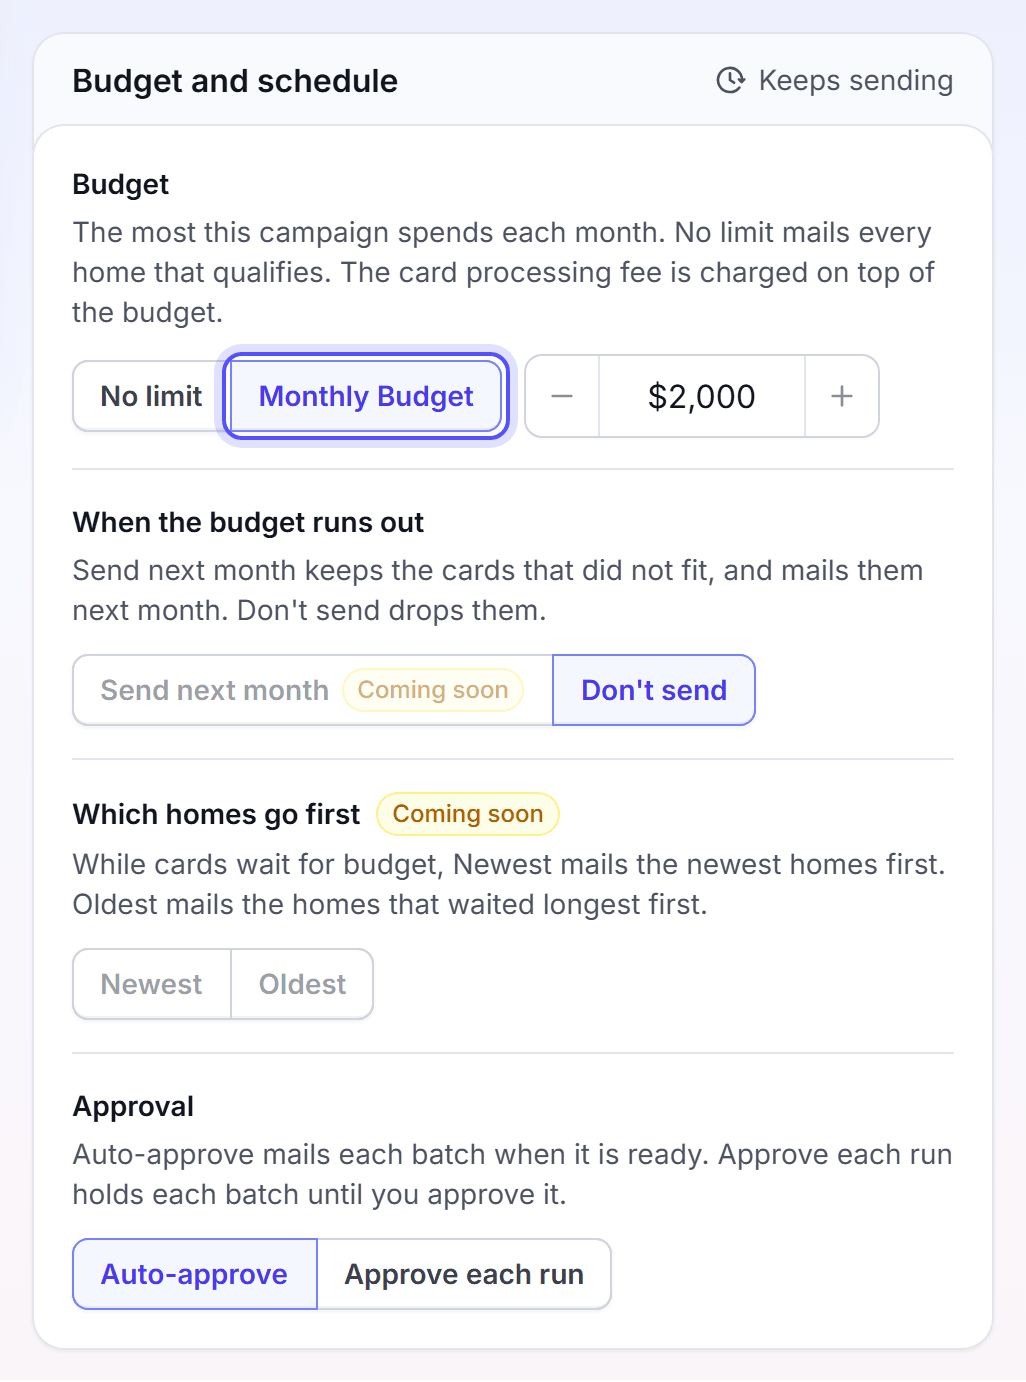
In When the budget runs out, select Don't send.
Read the Review, then click Turn it on.
In the Name your campaign dialog, keep or change the Name. Then click Turn it on.
The Budget step changes with the source:
| Source | What the Budget step asks |
|---|---|
| Area mail | A monthly budget. No limit is not offered. |
| Weather and power outages | A monthly budget or no limit, Approval, and an Event Limit. |
| CRM, store, new movers, website visitors and webhooks | A Monthly limit: the most first touches the automation mails each month. Leave it empty for no limit. |
When you select No limit, a dialog says "This automation has no spending limit." Click Set a limit to go back. Click Activate with no limit to turn it on.
A CRM, store, new mover, website visitor or webhook campaign opens the Enable Automation dialog. Click Enable Automation. A new mover campaign also runs a checkout in this dialog. Select a payment method there.
You're done when the message "Your automation is on" shows. A CRM, store, new mover, website visitor or webhook campaign shows the message "is created" and opens its page. The campaign shows on the Automations tab of Campaigns with the status Active. You can pause it at any time.
When you pause a campaign with scheduled follow-up touches, the pause dialog shows Also cancel the scheduled follow-up touches. The box is clear by default. Select it to cancel those touches and return their reserved budget.
Edit an automated campaign
Do this to change the rule, the area, the touches, the budget or the approval of an automation.
Open the campaign page. Click Actions, then click Edit.
Open the section that you want to change, such as Mailing or Budget.
Make the change.
Click Save changes.
The edit page has these sections: Name and purpose, Trigger and audience, Where and which homes, Keep out, Mailing, Mailing and timing, Budget and Experiments. An older CRM automation shows its own sections, such as CRM source and filters and Monthly limit. To leave with no change, click Discard changes.
To add or change the holdout, open the campaign page and click Actions. Click Add a holdout or Change the holdout. A holdout keeps a share of each next batch unmailed, so the results show the lift of the mail.
You're done when the message "Campaign saved" shows. The changes apply to the next run. Runs and orders that exist keep the old design.
Retry or cancel a held or scheduled touch
Do this when a touch waits for you, or when you want to stop a touch that is scheduled.
Open the campaign page. A warning shows for each held touch, such as "Touch 2 of run 118 is on hold: Payment failed".
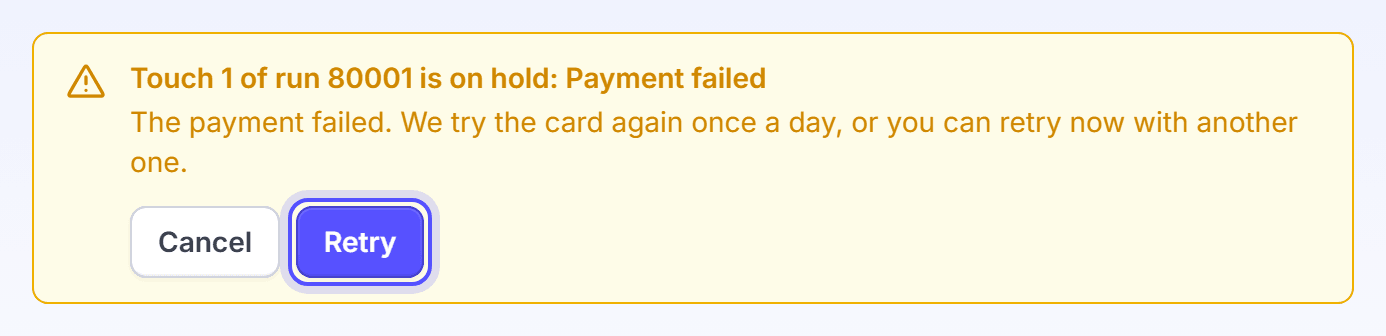
To mail the touch, click Retry. In Pay with, select a payment method, then click Retry now.
To stop the touch, click Cancel. Optional: In Why do you cancel it?, enter a reason. Then click Cancel the touch.
Some holds need a fix before a retry. For "Not enough discount codes", click Add coupons. For "Merge field missing", click Edit the campaign and add a fallback. A hold of "No home to mail" has no Retry, so cancel it.
To cancel a touch that is scheduled, open the Batches tab. In the run, click Cancel on the touch. In the dialog, click the cancel button, such as Cancel touch 2. A touch that is in production already cannot be canceled.
A run that waits for approval shows an alert icon on its row in Campaigns. Click the icon to open the run on the Approvals page.
You're done when the message "Retry started" or "Touch canceled" shows. To keep the touch as it is, click Keep it on hold or Keep the touch.
Change several automations at once, or process one now
Do this to turn on, pause, move or delete many automations in one step.
In Campaigns, click the Automations tab.
Select two or more automations.
In the bar at the bottom, click Activate, Deactivate, Move to section or Delete.
Bulk edit is not available yet. The edit action of the bar is off and reads "Bulk edit is not available yet." To edit an automation, open its campaign page.
To start a run now, open the row menu of the automation and click Process now. You can also click the Process now button beside the queued count on the campaign page. Process now works only on an active automation that mails a CRM or a list.
You're done when the message "The run is queued" shows. The next cycle picks its homes within the hour. With Approve each run, the message "The run waits for your approval" shows.
Use the tools of an older automation
Some automations were made before Send Mail, or launch as an older automation. They keep their own tools on the campaign page.
Open the campaign page of the older automation.
Click a tool in the action bar: Analytics, Duplicate, Manage cadences or Process now.
To change the status, open the status menu and click Active, Test mode or Paused.
In the confirm dialog, click the button to confirm, such as Pause Automation.
Test mode collects the people that the automation finds. It mails nothing until you activate it. Analytics shows the recipients, the cadence and the export. Manage cadences shows the follow-up touches that are in progress.
The tools that show depend on the kind of automation. Relaunch to a new audience and Add a holdout are not offered on an older automation.
You're done when the status shows the new value.
FAQ
Related
Area and radius mail
Mail the new homes in an area each month, or the homes around each job.
Weather and outages
Mail the homes that a storm or a power outage hit, soon after the event.
Property signals and movers
Mail homes on a property signal, new movers, and homes near competitor permits.
CRM and store customers
Mail your customers when your CRM or store records a job or a sale.
Approvals
Approve or skip the runs that wait for you.
Steps checked 2026-11-16.