How attribution works
How LettrLabs connects a sale to your mail, and how to set the rules.
Overview
Attribution connects a sale or a lead to the mail that reached that household. LettrLabs compares each record from your sources with the mail pieces it delivered. A record counts for a piece when it starts inside the attribution window of that piece.
You can use attribution to:
- See which campaigns bring jobs, leads and revenue.
- Choose how LettrLabs matches a sale to a household.
- Set how long after delivery a sale still counts.
- Measure the lift of your mail with a holdout.
How a sale counts for your mail
LettrLabs reads the records your sources send: jobs, estimates, invoices, orders, leads and uploaded sales. For each record, it looks for a delivered mail piece at the same household. The match types decide how LettrLabs finds that household.
| Match type | When a record matches |
|---|---|
| The customer's email is on the mailing list. | |
| Phone | The customer's phone number is on the mailing list. |
| Coupon | The customer used the coupon code of the mail piece. |
| Address | The service address is a mailed address. |
A household counts for a piece when its job or lead starts within the window after that piece is delivered. The later stages of that job still count, with no limit. A piece is mature when its window closes. Only mature pieces count in ROAS.
Each figure has a basis. You pick the basis on the toolbar of Dashboards.
| Basis | What it counts |
|---|---|
| Influenced | Each record that the mail reached. |
| Generated | Only a record whose opportunity was created after the mail arrived, inside the attribution window. |
Where revenue counts depends on the lifecycle of the record. The LettrLabs default lifecycle is for records you send by CSV upload, the API or a webhook. It counts revenue at the conversion.
Choose how sales match to mail
Change the match types when one way of matching gives wrong results for your business. For example, turn off Phone when many customers share one office phone.
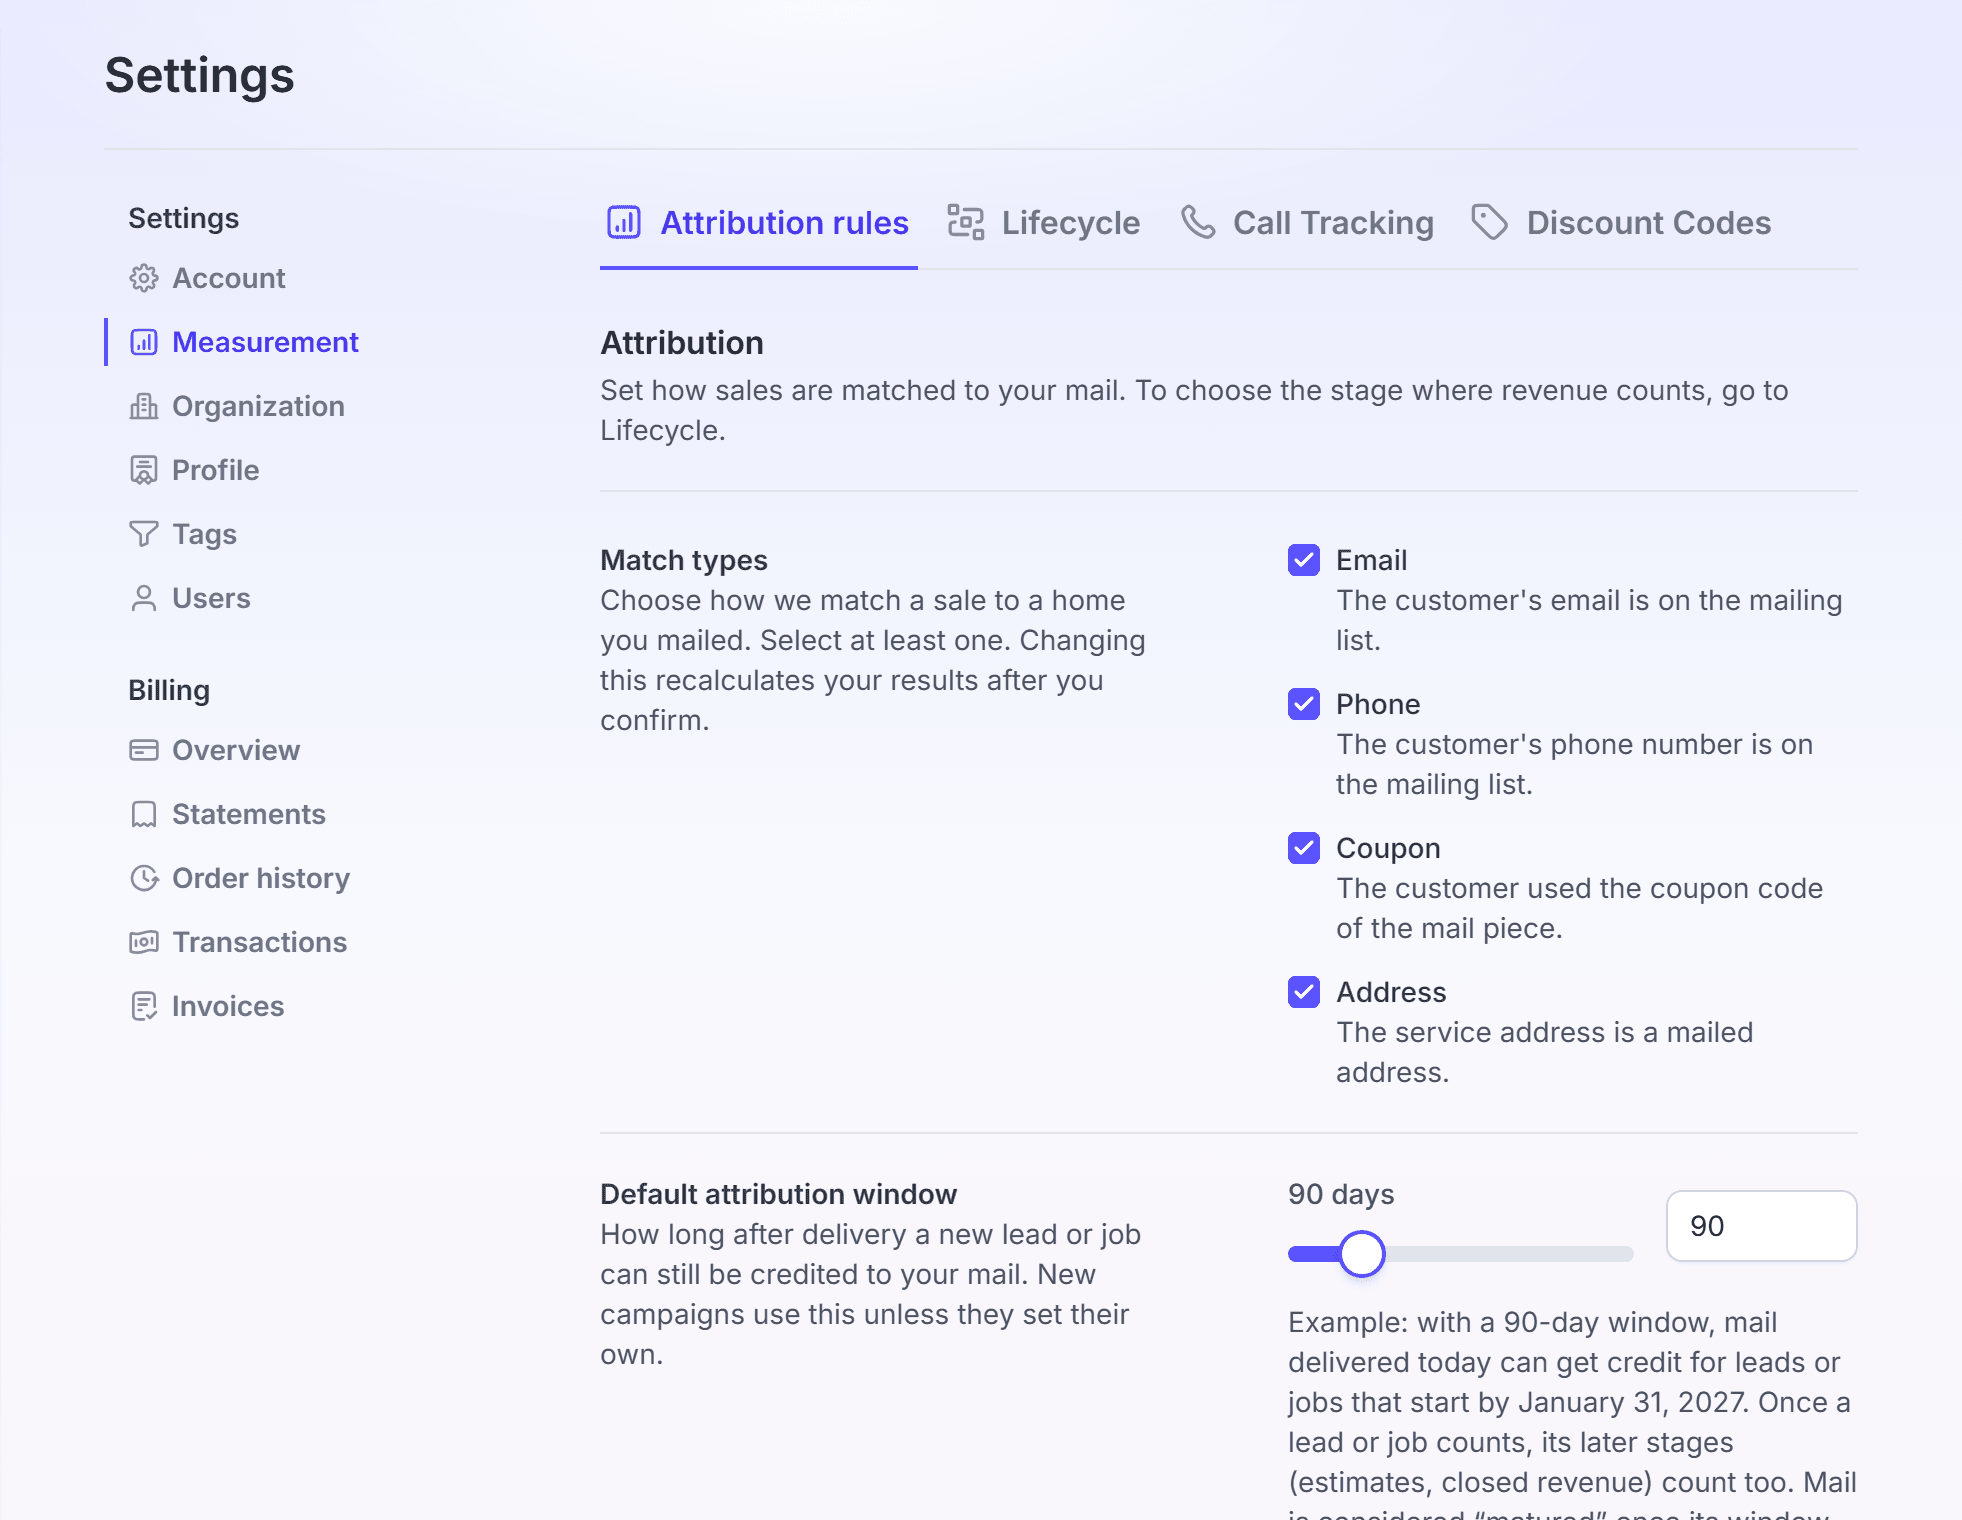
Click Settings, then click Measurement. The Attribution rules tab opens.
Under Match types, select each match type you want to use. You must select at least one.
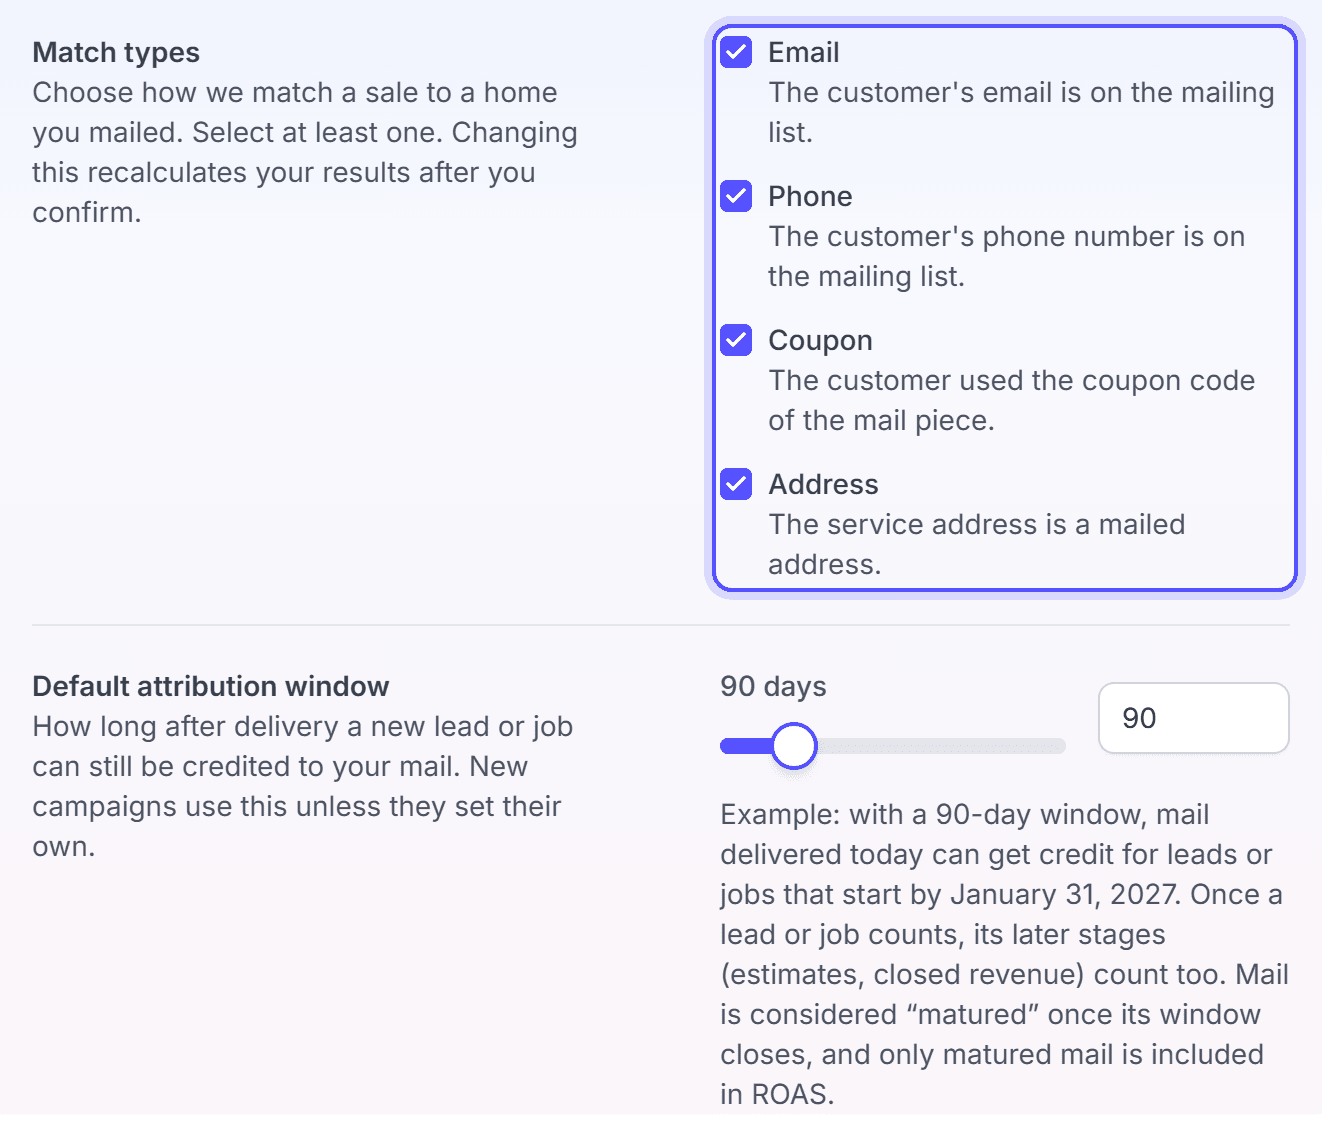
Click Save. The Match Type Update dialog opens.
Click Confirm.
You're done when the message "The match types are saved. The figures update within about 4 hours." shows. The new figures show when the run ends. You can change the match types again after the run.
Set the default attribution window
The default attribution window is the window that a new campaign gets when it does not set its own. It is how long after delivery a job or lead can start and still count for the mail.
Click Settings, then click Measurement. The Attribution rules tab opens.
Under Default attribution window, move the slider. Or type the number of days in the box. The window is 14 to 365 days.
Read the line under the slider. It gives the date that the window closes for a piece delivered today.
Click Save.
You're done when the message "The default window is now N days" shows, with your number. The figures update within about 4 hours. While the run continues, Save stays off.
Set the window of one campaign
A campaign can have its own window. Set it when you create the campaign, or change it later on the campaign page.
To set it when you create the campaign:
In Send Mail, go to the Measurement step.
In the Attribution box, under Attribution window, select 90 days, 120 days or 180 days.
To use a different length, select Custom, then type 30 to 365 days.
Some campaign paths do not show the Attribution box. Those campaigns use the default window.
To change the window of a campaign that exists:
Open the campaign. On its Overview, click the attribution window button. It reads, for example, "90-day attribution window (account default)".
In Days, type a number from 14 to 365.
Click Save.
To go back to the default window, open the same button and click Use the account window.
You're done when the button shows the new number of days. The figures update within about 4 hours. If the button shows text only, your sign-in cannot change attribution settings.
Measure lift with a holdout
A holdout keeps a share of the homes unmailed. The homes that got no card show the lift that the mail brings. Use a holdout when you want to prove that the mail caused the sales.
To add a holdout when you create the campaign:
In Send Mail, go to the Measurement step.
In the Lift Analysis box, under Holdout, select 25%, 30%, 40% or 50%.
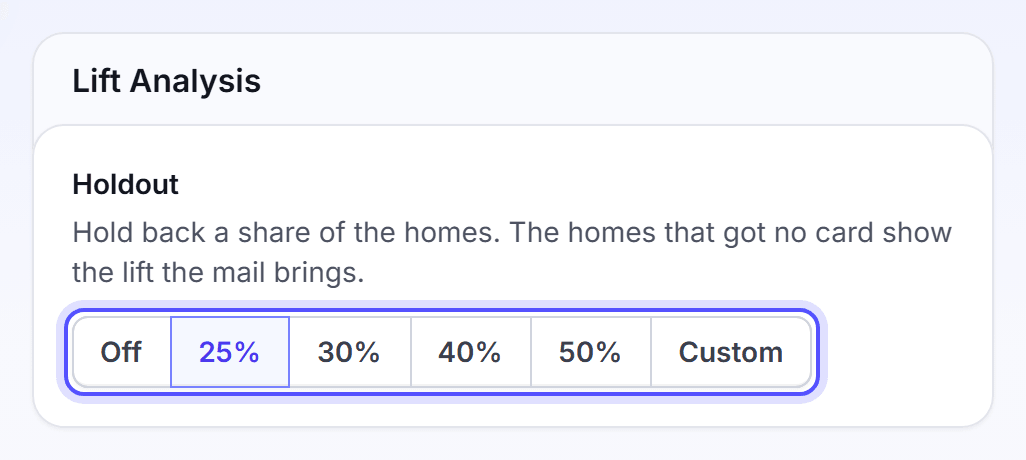
To use a different share, select Custom, then type a share from 5% to 50%.
In Quick send, the Lift Analysis box is on the Checkout step.
To add or change the holdout of an automated campaign:
Open the campaign. On the Holdout card, click Add a holdout or Change the holdout. You can also find the same item in the Actions menu of the campaign.
Select a share, then click Save.
To stop the holdout, click Remove holdout in the same dialog. A change applies to each next batch. It does not change the batches that already mailed.
You're done when the Holdout card shows the share "of each next batch".
Read the incremental figures
The incremental figures compare the mailed homes with the holdout homes. They show the sales that the mail caused, not only the sales that it reached. A campaign with no holdout has no incremental figures.
| Figure | What it tells you |
|---|---|
| iRevenue | The revenue of the mailed homes, less the revenue that the holdout rate predicts for the same number of homes. |
| iROAS | The iRevenue divided by the spend. For example, 1.2x means 1 spent. |
| Incremental conversions | The conversions of the mailed homes, less the conversions that the holdout rate predicts. |
| Conversion lift | The conversion rate of the mailed homes, less the rate of the holdout homes, in points. |
| Relative lift | How much higher the mailed rate is than the holdout rate, in percent. |
| Incremental CPA | The spend divided by the incremental conversions. |
A figure can be negative. A negative figure tells you that the holdout homes did better than the mailed homes.
You find the figures in two places:
- The Campaigns list. Open the column menu, and turn on iROAS, iRevenue or another figure. These columns are off by default.
- The order details. Click Settings, then Order history. On the row of an order, click the Order details icon. The Holdout Testing card of the order shows Holdout Size, iRevenue, Conversion Lift, Revenue Lift and iROAS. The campaign page does not show this card.
The figures use mature pieces only, on both sides. A figure shows a dash, not 0, until one holdout piece is mature. Before that, the card shows the date that the first piece matures. While only some pieces are mature, the card reads "From the mature pieces only. The figures can change."
The incremental figures are estimates. LettrLabs sets no minimum size for a holdout, and a small holdout gives figures that can change a lot.
Choose where revenue counts
The Lifecycle tab shows the stages that your records move through, from lead to sale. For ServiceTitan jobs, you can choose the stage where revenue counts.
Click Settings, then click Measurement. Click the Lifecycle tab.
Find the lifecycle of your ServiceTitan jobs. Each stage shows in order. The Conversion · revenue counts here badge marks the stage where revenue counts.
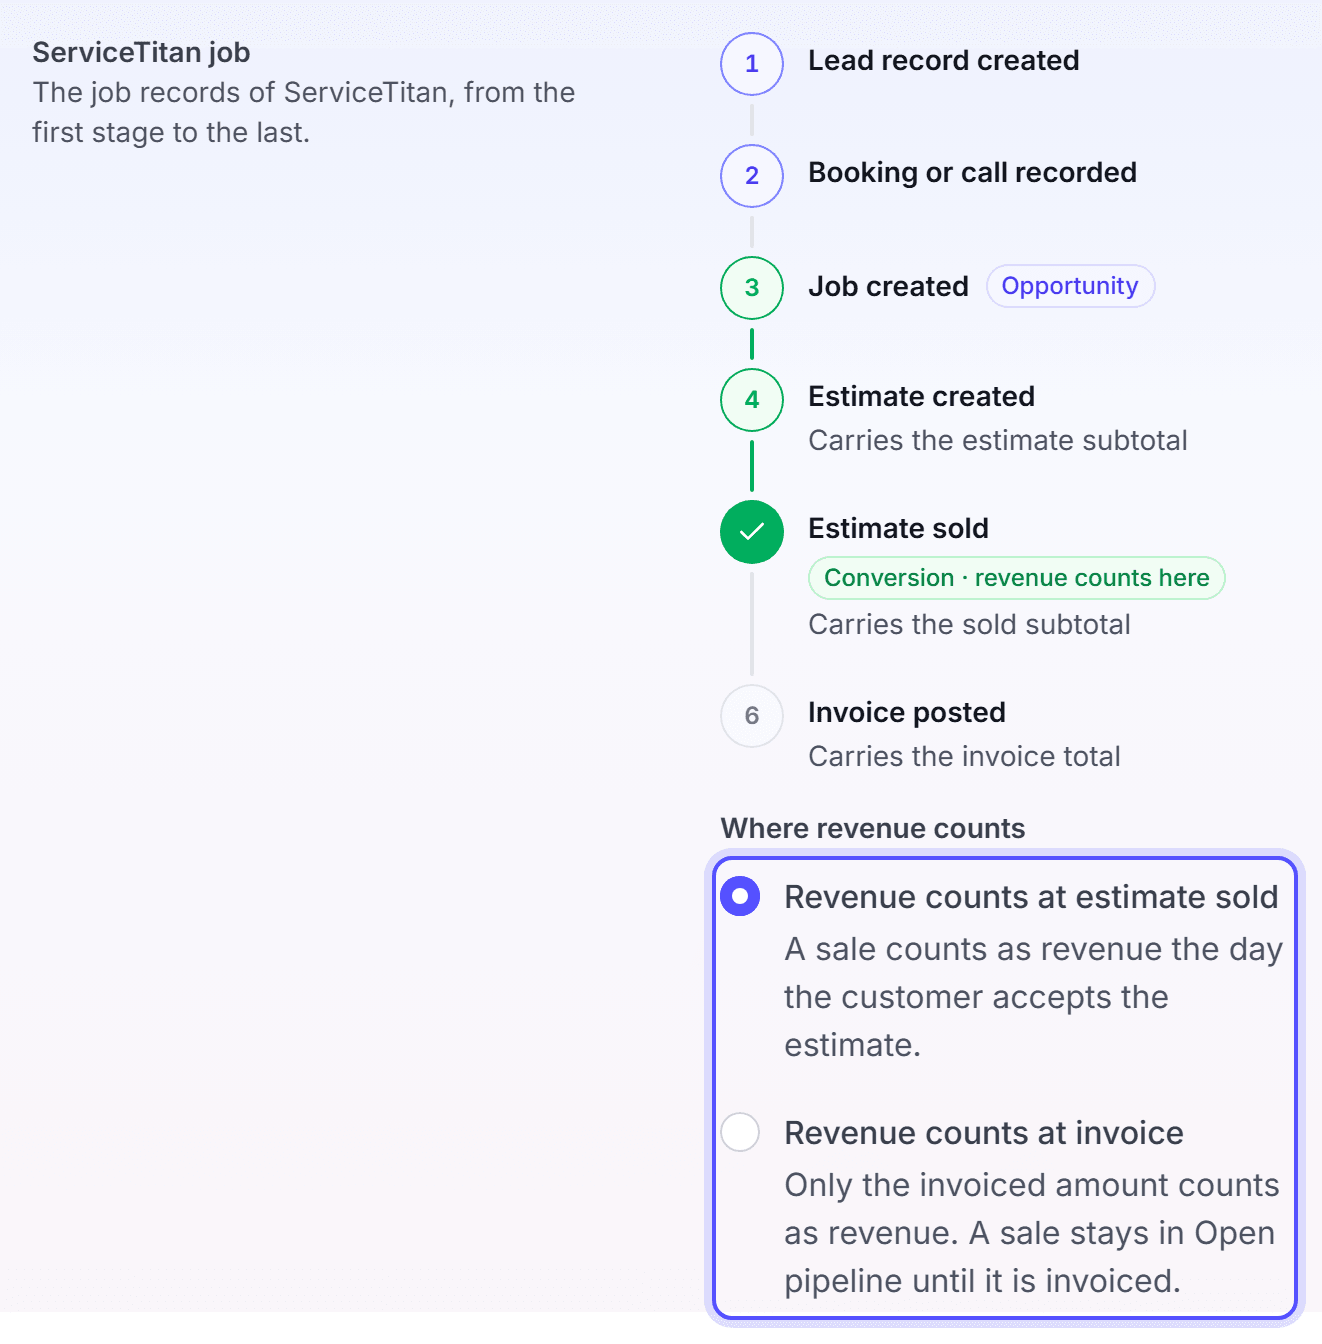
Under Where revenue counts, select Revenue counts at estimate sold or Revenue counts at invoice.
Revenue counts at estimate sold counts a sale the day the customer accepts the estimate. Revenue counts at invoice counts only the invoiced amount. A sale stays in Open pipeline until it is invoiced.
The choice saves at once. You're done when the message "Revenue now counts at estimate sold. Every figure follows it." or the same message for the invoice shows. If you see one line of text in place of the choices, your sign-in cannot change this setting.
Troubleshoot results and attribution
Most questions about attribution have one of these causes.
| Symptom | Cause | What to do |
|---|---|---|
| The figures did not change after a settings change. | Attribution runs again after each change. It can take about 4 hours. | Wait for the run to end. The notice at the top of the page goes away. |
| A sale does not count for your mail. | It does not match, or it started outside the window. | Open the record in Attribution Data and read its attribution trail. |
| ROAS is lower than the revenue suggests. | Only mature pieces count in ROAS. | Wait until the window of the recent pieces closes. |
| A source shows no records. | Records show after the first sync and the next attribution run. | Wait up to one day after you connect the source. |
FAQ
Related
Attribution Data
See each record and why it counts for your mail.
Dashboards
Read the pipeline, revenue and ROAS of your mail.
ServiceTitan
Connect ServiceTitan to send your jobs and invoices.
Steps checked 2026-11-16.