One-time campaigns
Mail a list, the people in your Address Book, or every home in an area once, and see the results after delivery.
Overview
A one-time campaign mails once, then you see the results. You pick who to mail, the template, the postage and the send date. Then you pay at checkout, and LettrLabs prints and mails the cards.
You can use one-time campaigns to:
- Mail a list that you upload, or one person that you add by hand.
- Mail people that you pick in your Address Book.
- Mail every home in your service areas, or in an area that you draw.
- Keep people out of a campaign, such as people that you mailed recently.
Send your first campaign walks you through the full first send, step by step.
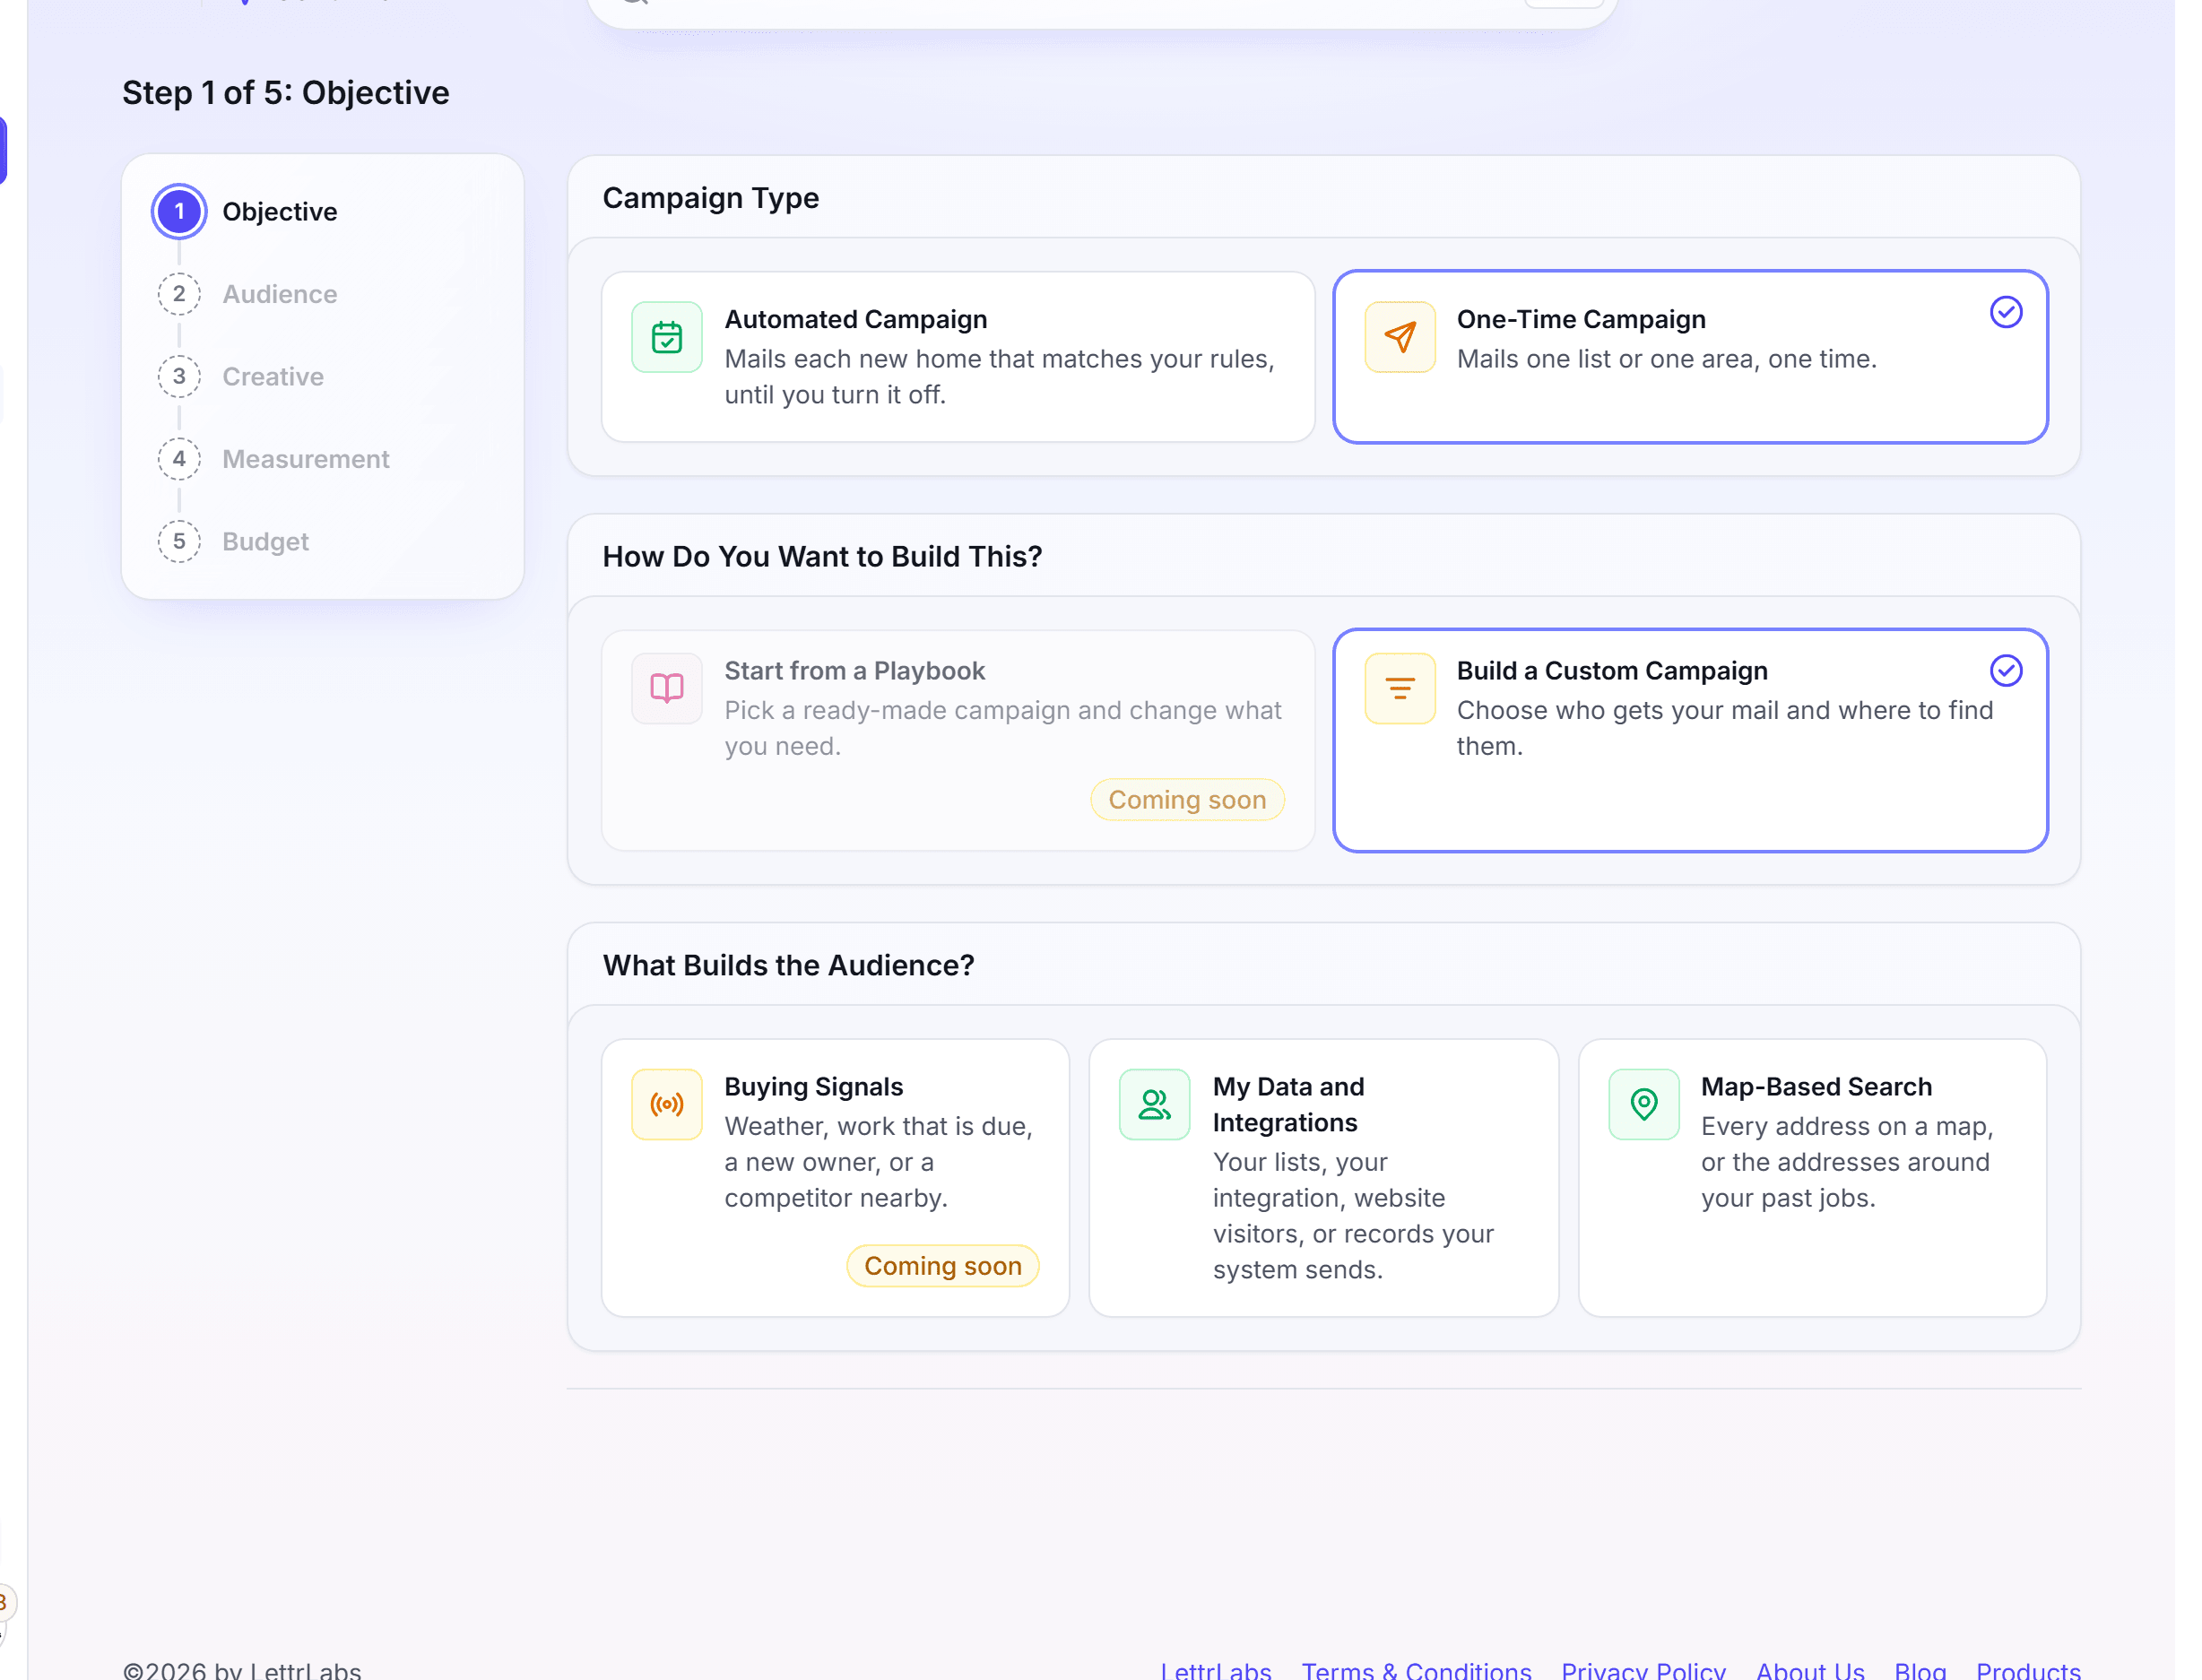
How campaigns work: send types and sources
Each campaign starts in Send Mail. The first step, Objective, asks for the send type and the source.
The send type sets how often the campaign mails:
| Send type | What it does |
|---|---|
| One-Time Campaign | Mails once, then you see the results. You pay at checkout. |
| Automated Campaign | Keeps mailing each home as it qualifies, inside a monthly budget. |
The source is where the people come from. A one-time campaign takes one of three sources:
You upload a CSV or Excel file, or you add people by hand. LettrLabs checks each row before it mails. Pick My Data and Integrations, then My List or Address Book.
You pick people that you saved in your Address Book. The campaign mails each one, with no file. Pick My Data and Integrations, then My List or Address Book.
LettrLabs finds the homes and their addresses for you. You set the area and filters on the homes. Pick Map-Based Search, then Targeted Prospecting.
A one-time campaign can also mail the homes around addresses that you upload. Area and radius mail gives the steps.
After Objective, each campaign goes through the same steps: Audience, Creative, Measurement and Budget. Then you review it and go to checkout.
Quick send to your own list
Do this when you have a list of people in a file, and you want to mail them once.
In the left navigation, open the menu beside Send Mail, and click Quick send. Quick send opens at the Design step.
Under Pick your first touch, pick a template for your card. Then click Next. The Recipients step opens.
Under Upload a file, click Click to upload. Or drop the file into the drop zone.
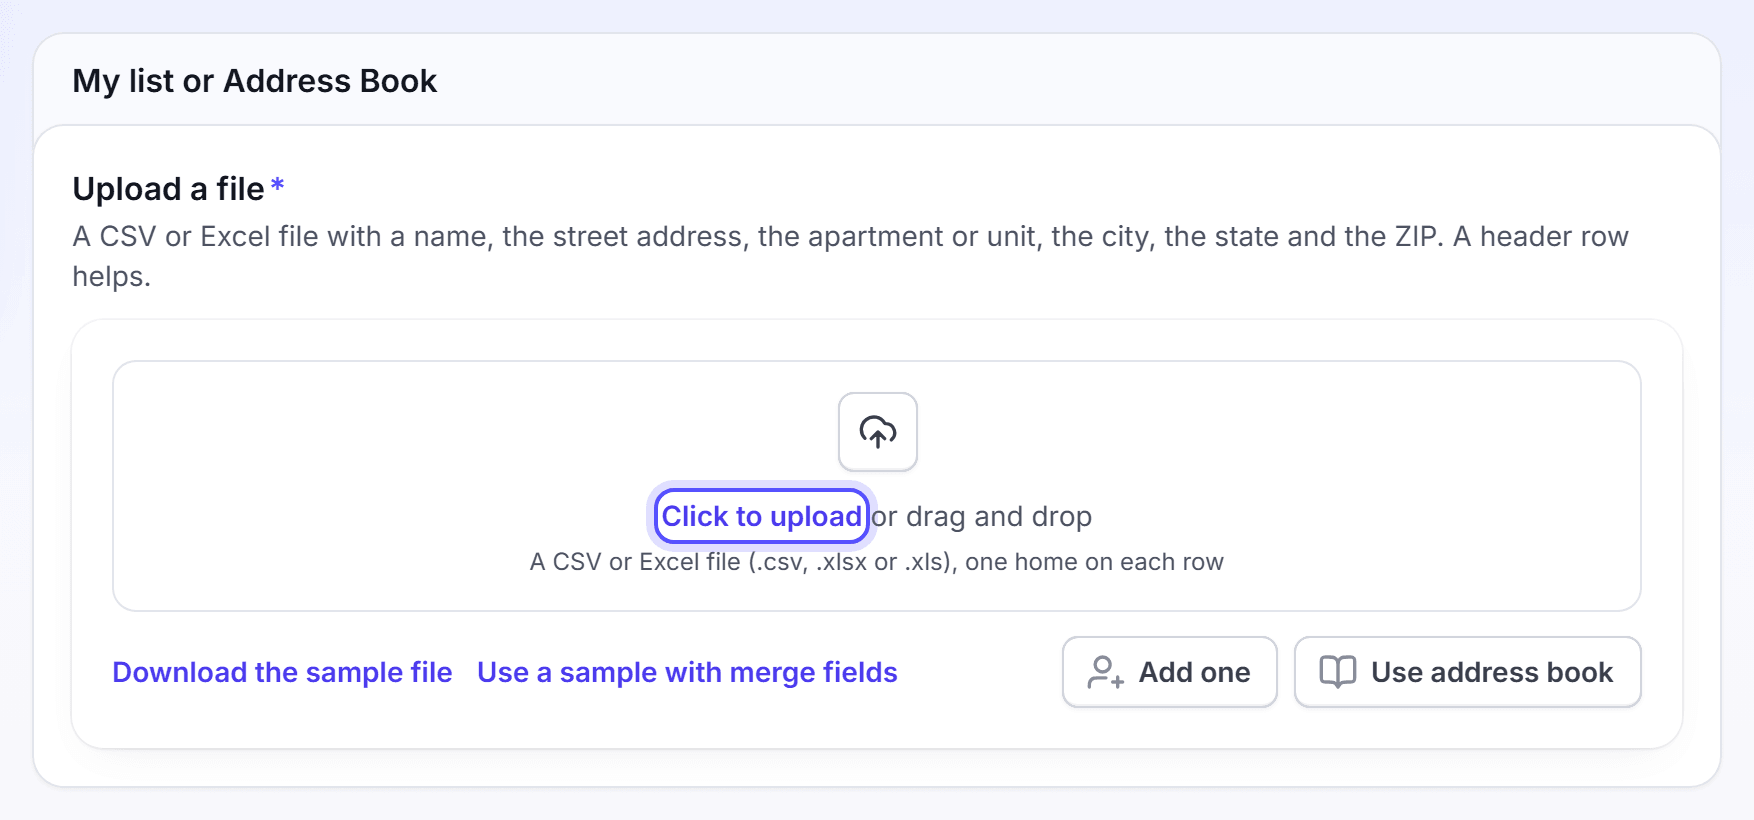
Select a CSV or Excel file (.csv, .xlsx or .xls), with one home on each row.
In the Map your columns dialog, check the field that each column fills. Then click Use this mapping.
Optional: To add a person by hand, click Add one. After an upload, open Add recipients and click Add one person.
Fix each row that the list check marks as bad, or remove it.
Click Next. When the dialog "Some rows will not be mailed" opens, click I understand, continue.
On the Checkout step, set Mailing and timing, the holdout and the budget. Then read the Review, and click Go to checkout.
Quick send has three steps: Design, Recipients and Checkout. It always makes a one-time campaign to your list, so it does not show the Objective step.
On the Templates page, Quick Order on a template card also opens Quick send. The Design step then holds that template.
A file needs a name, the street address, the apartment or unit, the city, the state and the ZIP. A header row helps. To see the format, click Download the sample file.
Duplicate rows merge into one card for each home. Homes on your exclusion lists are taken out.
You're done when the message "is launched" shows with the campaign name. Checkout charges the order. The campaign mails on the send date.
Mail people in your Address Book
Do this when the people that you want to mail are already in your Address Book.
In the left navigation, click Address Book.
Select the people that you want to mail.
Click Send Mail. The dialog "Send mail to these contacts?" opens.
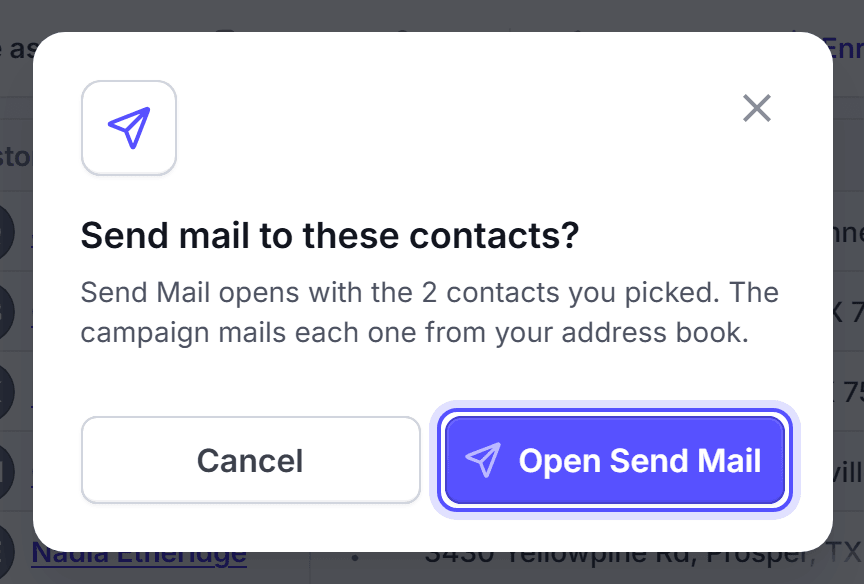
Click Open Send Mail. Send Mail opens with the people that you picked.
Finish the steps of Send Mail, then click Go to checkout.
You can pick up to 10,000 contacts one by one. To mail more, select all that match a search.
You can also start in Send Mail. Pick My Data and Integrations, then My List or Address Book. On the Audience step, click Use address book.
You're done when the message "is launched" shows with the campaign name. Checkout charges the order. The campaign mails on the send date.
Mail every home in an area
Do this to reach new people near your business, such as every homeowner in two ZIP codes. You do not need a list.
In the left navigation, click Send Mail.
Under Campaign Type, click One-Time Campaign.
Under How Do You Want to Build This?, click Build a Custom Campaign.
Under What Builds the Audience?, click Map-Based Search.
Under Where on the Map?, click Targeted Prospecting.
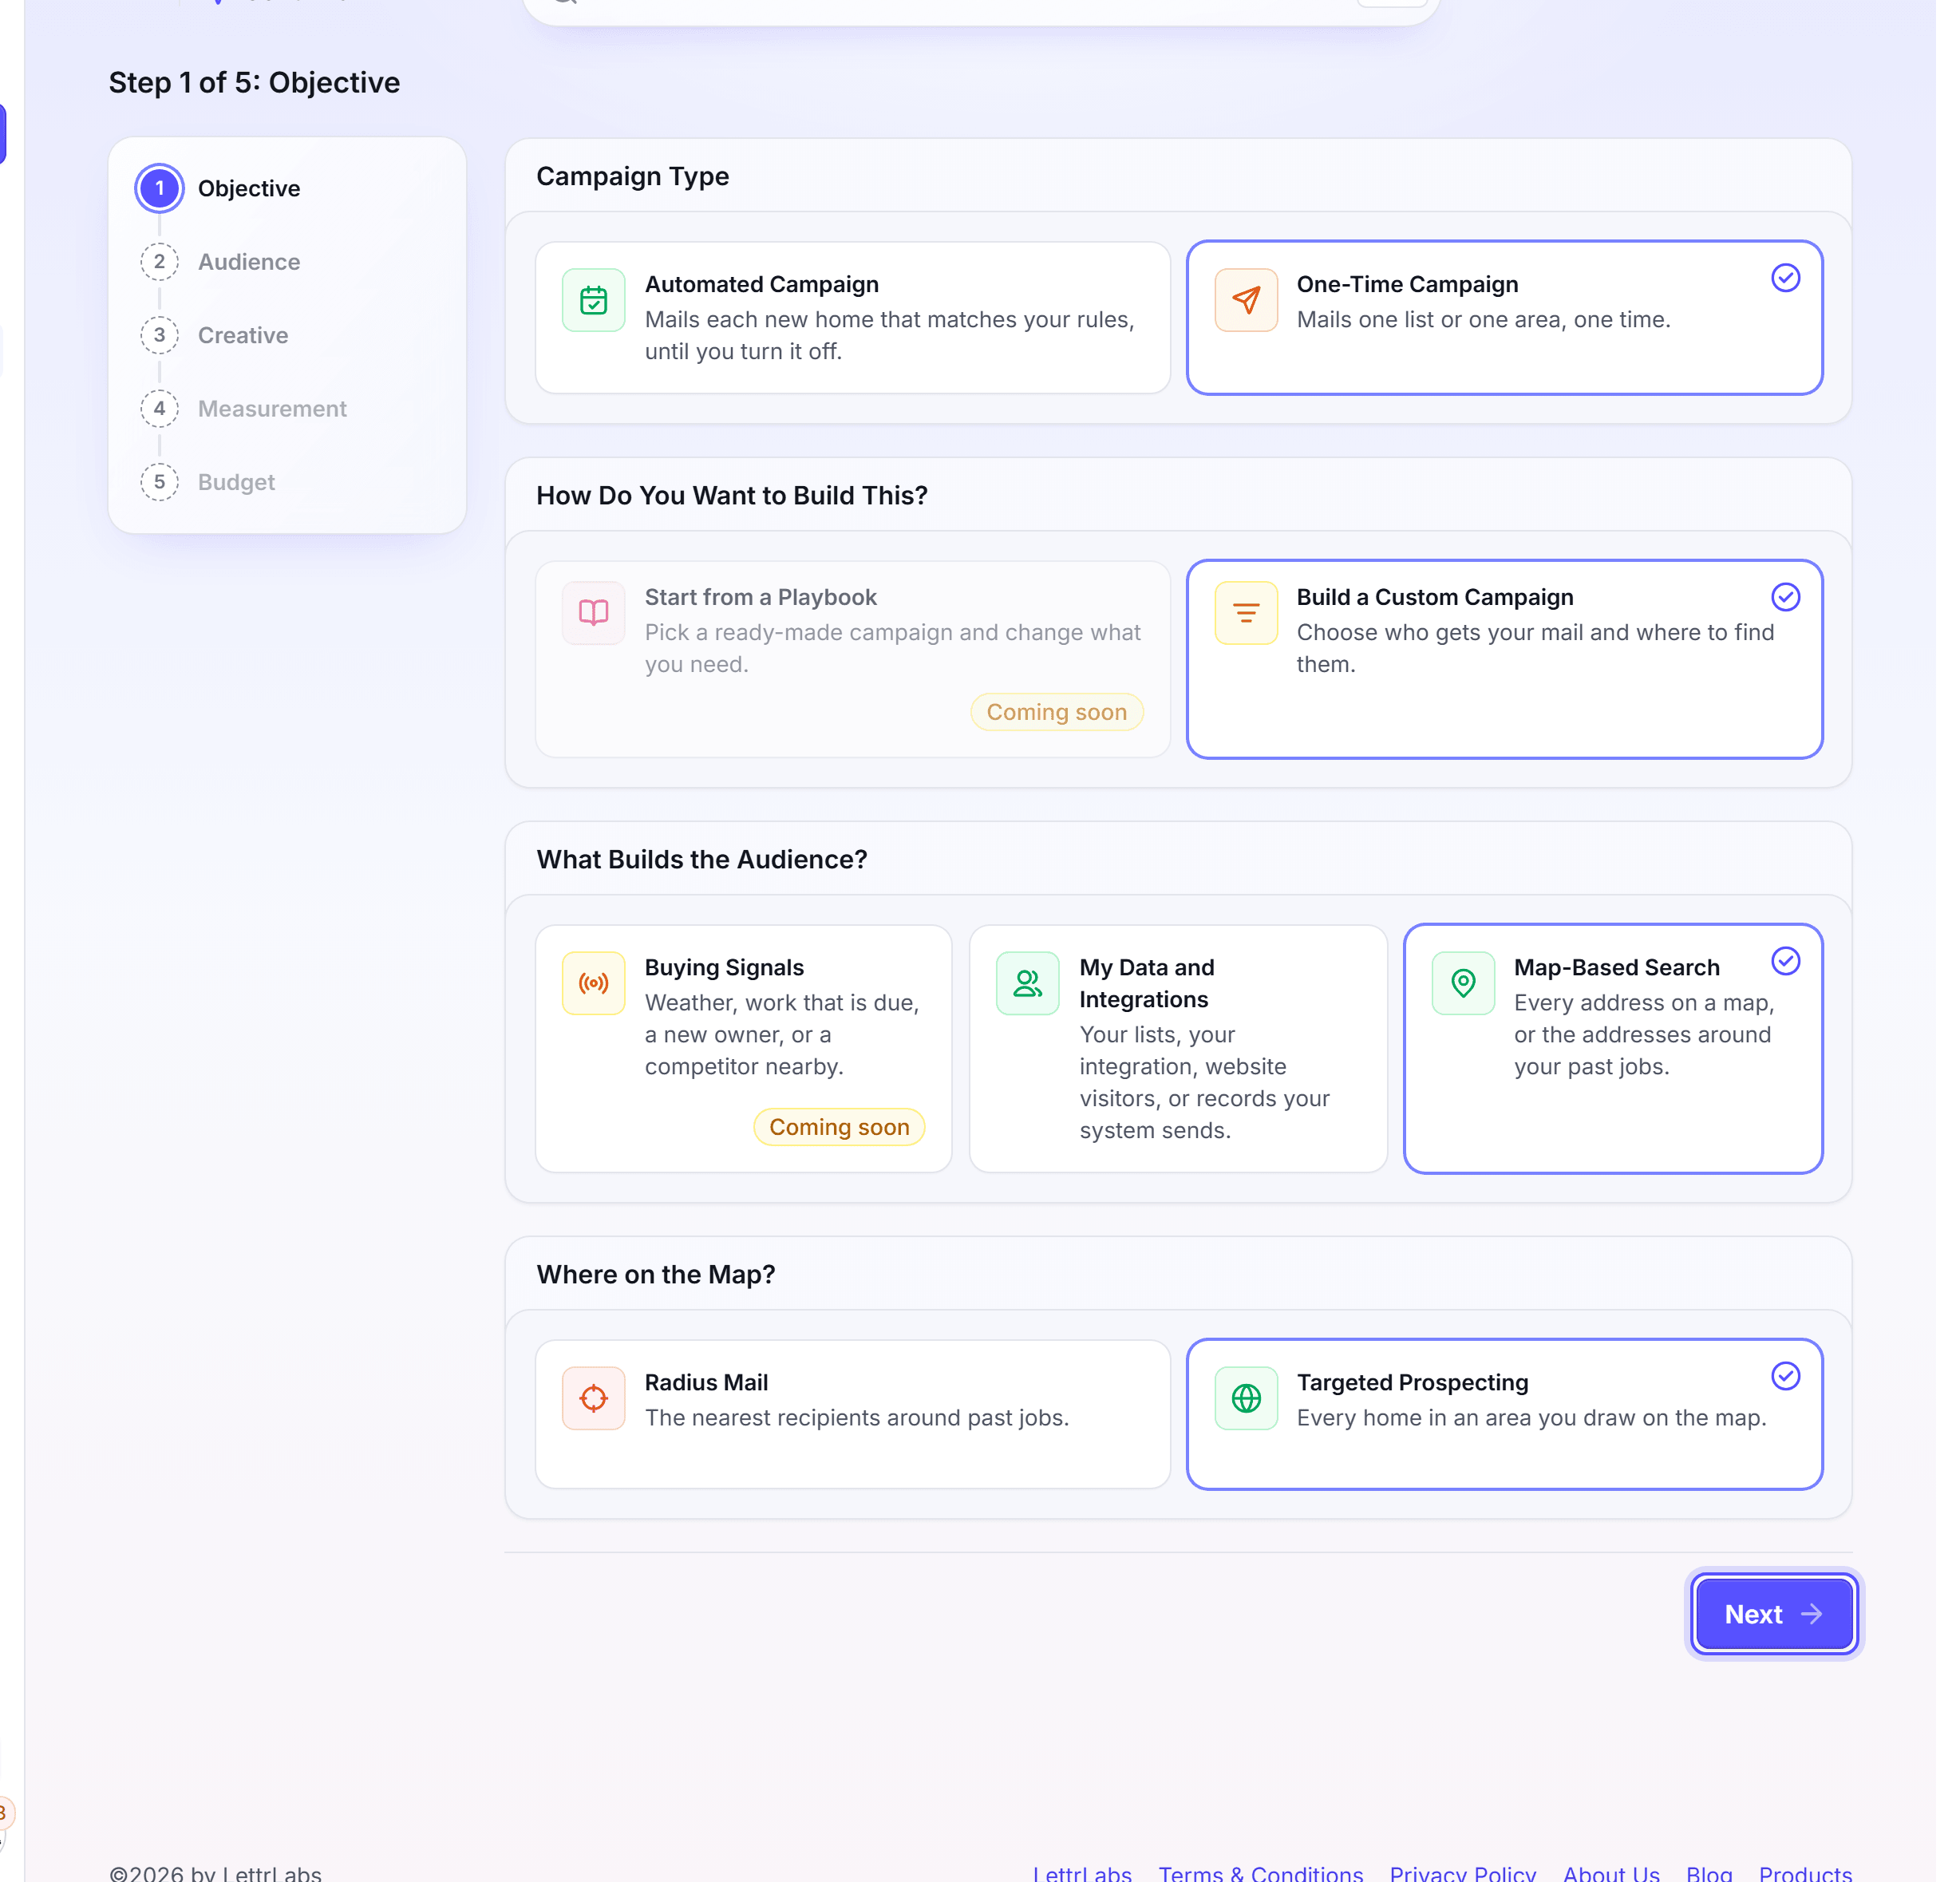
Click Next. The Audience step opens.
On the Filters page, set who gets the card and the property type.
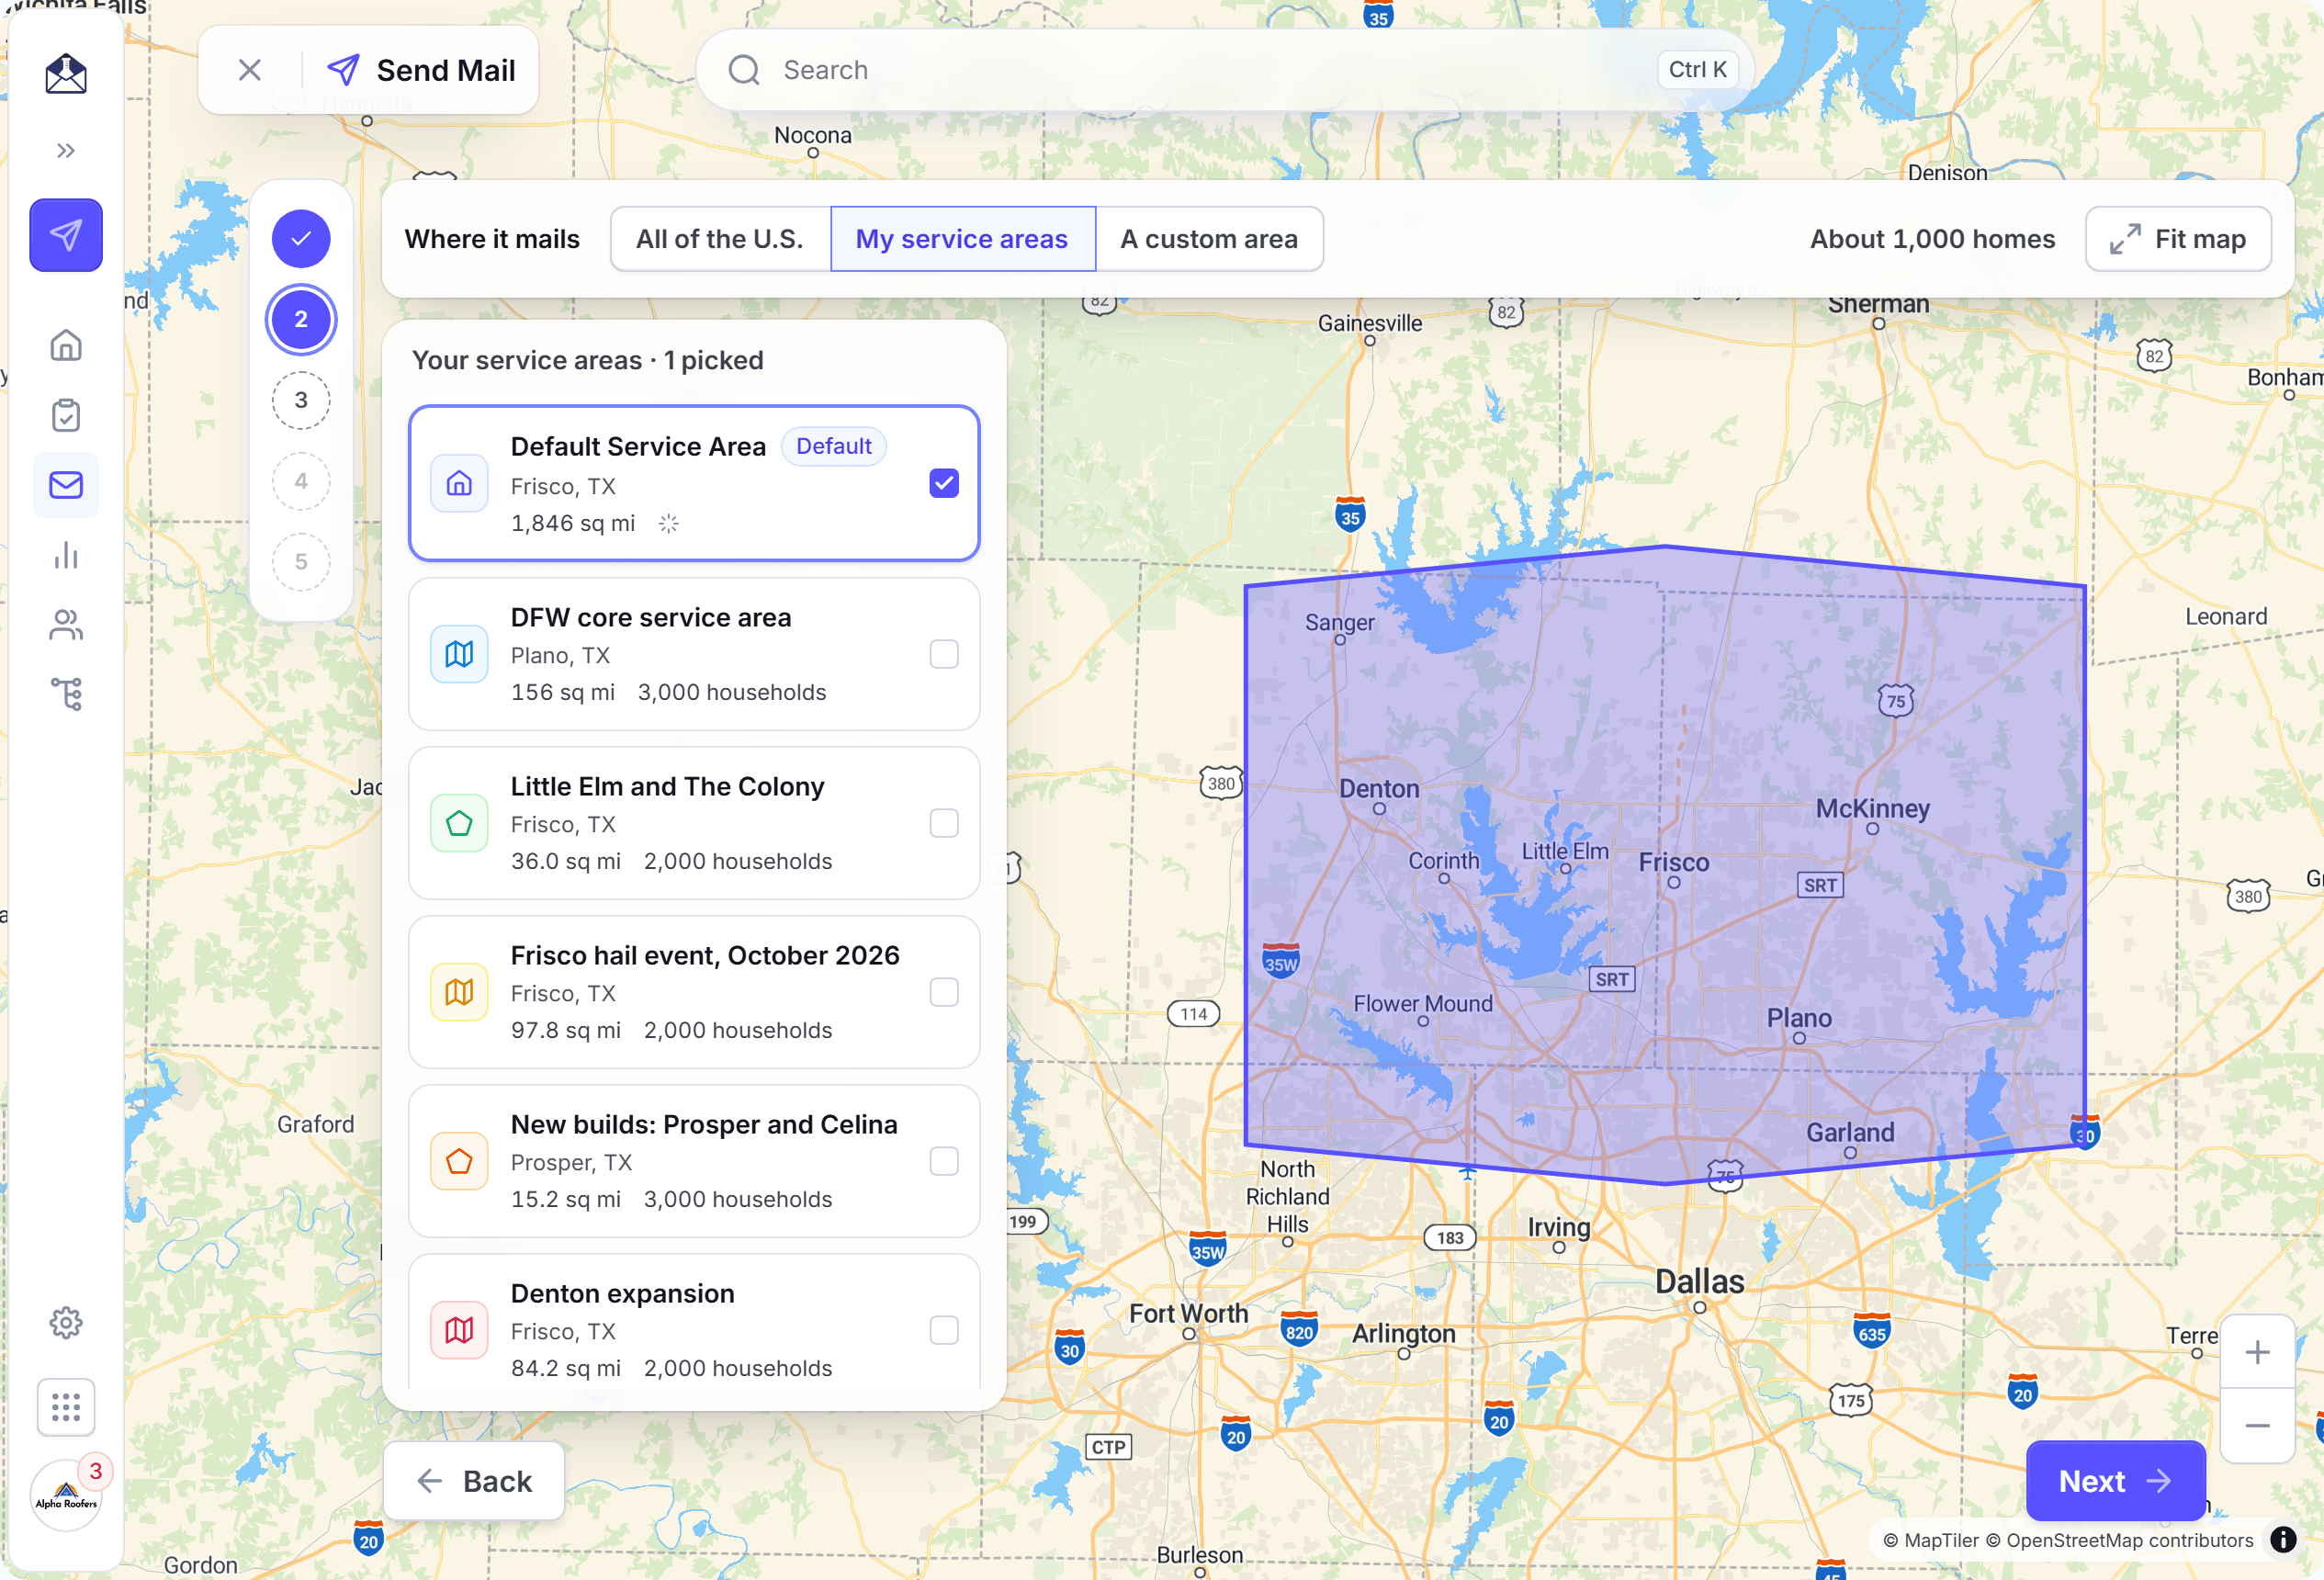
On the Location page, under Where it mails, select where to mail.
Click Next to go on to the Creative step.
Under Pick your first touch, click your template, then click Use this design.
Click Next until the Budget step opens.
Set Send date and How many. How many sets the number of homes to mail.
Read the Review, then click Go to checkout.
In the Name your campaign dialog, keep or change the Name. Then click Go to checkout.
The Filters page limits which homes in the area get mail:
| Filter | Choices |
|---|---|
| Who gets this card | Homeowners. Homeowners and renters and Renters show Coming soon, and you cannot select them yet. |
| Property type | Single family, Multi family or All property types |
| Advanced filters | Optional filters on the home and its owner. |
With Homeowners, If the owner lives somewhere else sets what LettrLabs does with a home that its owner does not live in. Leave Advanced filters empty to mail every home. Each filter makes the list shorter.
Where it mails has three choices:
| Choice | What it mails |
|---|---|
| All of the U.S. | Every home that the filters find, in the 48 contiguous states. |
| My service areas | The homes in the service areas that you pick from your list. |
| A custom area | The homes in an area that you draw on the map, for this campaign only. |
For A custom area, search for a place, drop a radius pin, or draw a shape. A custom area is not saved as a service area. The page shows the number of homes that the area and the filters find. To see the map without the preview, click Hide preview.
You're done when the message "is launched" shows with the campaign name. Checkout charges the order. The campaign mails on the send date, and it shows on the One-time tab of Campaigns.
To mail the new homes of an area each month, use Area and radius mail.
Keep people out of a campaign
Do this when some people must not get this card, such as people that you mailed last week.
In Send Mail, go to the Audience step.
Open the Exclude page. Its title is Who shouldn't get this card.
Turn on each card that you want, and set its window in days.
Optional: Click Add a suppression audience, and pick a suppression list.
Click Next.
The Exclude page offers these cards. The cards that show depend on the source.
| Card | What it keeps out |
|---|---|
| Do not mail | Everyone who asked LettrLabs to stop. It cannot be turned off. |
| Mailed recently: this campaign | Anyone this campaign mailed inside the window. |
| Mailed recently: all campaigns | Anyone any of your campaigns mailed inside the window. |
| Past customers | Anyone who bought from you inside the window. |
| A suppression list | The homes on that list. |
| A global suppression list | The homes on that list. The card shows the tag Global and the hint "Applies to every campaign of this account". It is locked, and you cannot turn it off. |
You're done when the Review reads back your exclude choices. Homes that you keep out are not mailed, and you do not pay for them.
Change or cancel an order
What you can change depends on the stage of the order.
| Stage of the order | What you can do |
|---|---|
| Draft | Edit or delete the draft. It charges nothing until you launch it. |
| Edits Needed | Edit the order, then go through checkout again. See Fix an order sent back for edits. |
| Launched, waiting for its send date, and not charged yet | Cancel it. Nothing is charged. |
| Paid | Contact support. You cannot change or cancel a paid order in the app. |
To cancel a launched one-time campaign that is not charged yet:
Open the campaign page. Click Actions, then click Cancel.
In the dialog, click Cancel the one-time campaign.
You're done when the message "One-time campaign canceled" shows. The design and the results of the campaign stay. See Save a draft, or cancel before it mails.
FAQ
Related
Send your first campaign
The full first send, from the template to checkout.
Postage and checkout
Pick the postage and the speed, and pay for the order.
Campaigns
Follow the order and read the results after delivery.
Steps checked 2026-11-16.