LeadReveal
Find the people who visit your website, and mail them while they are still interested.
Overview
LeadReveal finds the households behind the people who visit your website. A small code snippet, the pixel, runs on your site. A LeadReveal campaign then mails the visitors automatically.
You can use LeadReveal to:
- Add a pixel to each website that you own.
- See the leads that each pixel collects, and export them.
- Choose which visitors count, for example only engaged visitors in your service area.
- Mail your website visitors with an automated campaign.
Set up a pixel on your website
Set up one pixel for each website. You need access to the HTML of the site, or a person who has it.
In the left navigation, under Audiences, click LeadReveal.
Click Set up your pixel. If you already have a pixel, click New pixel.
In Website URL, enter the domain of your site, for example www.yourcompany.com. Do not enter https:// or a page path.
Click Next. The Install your pixel step opens.
Click Copy pixel.
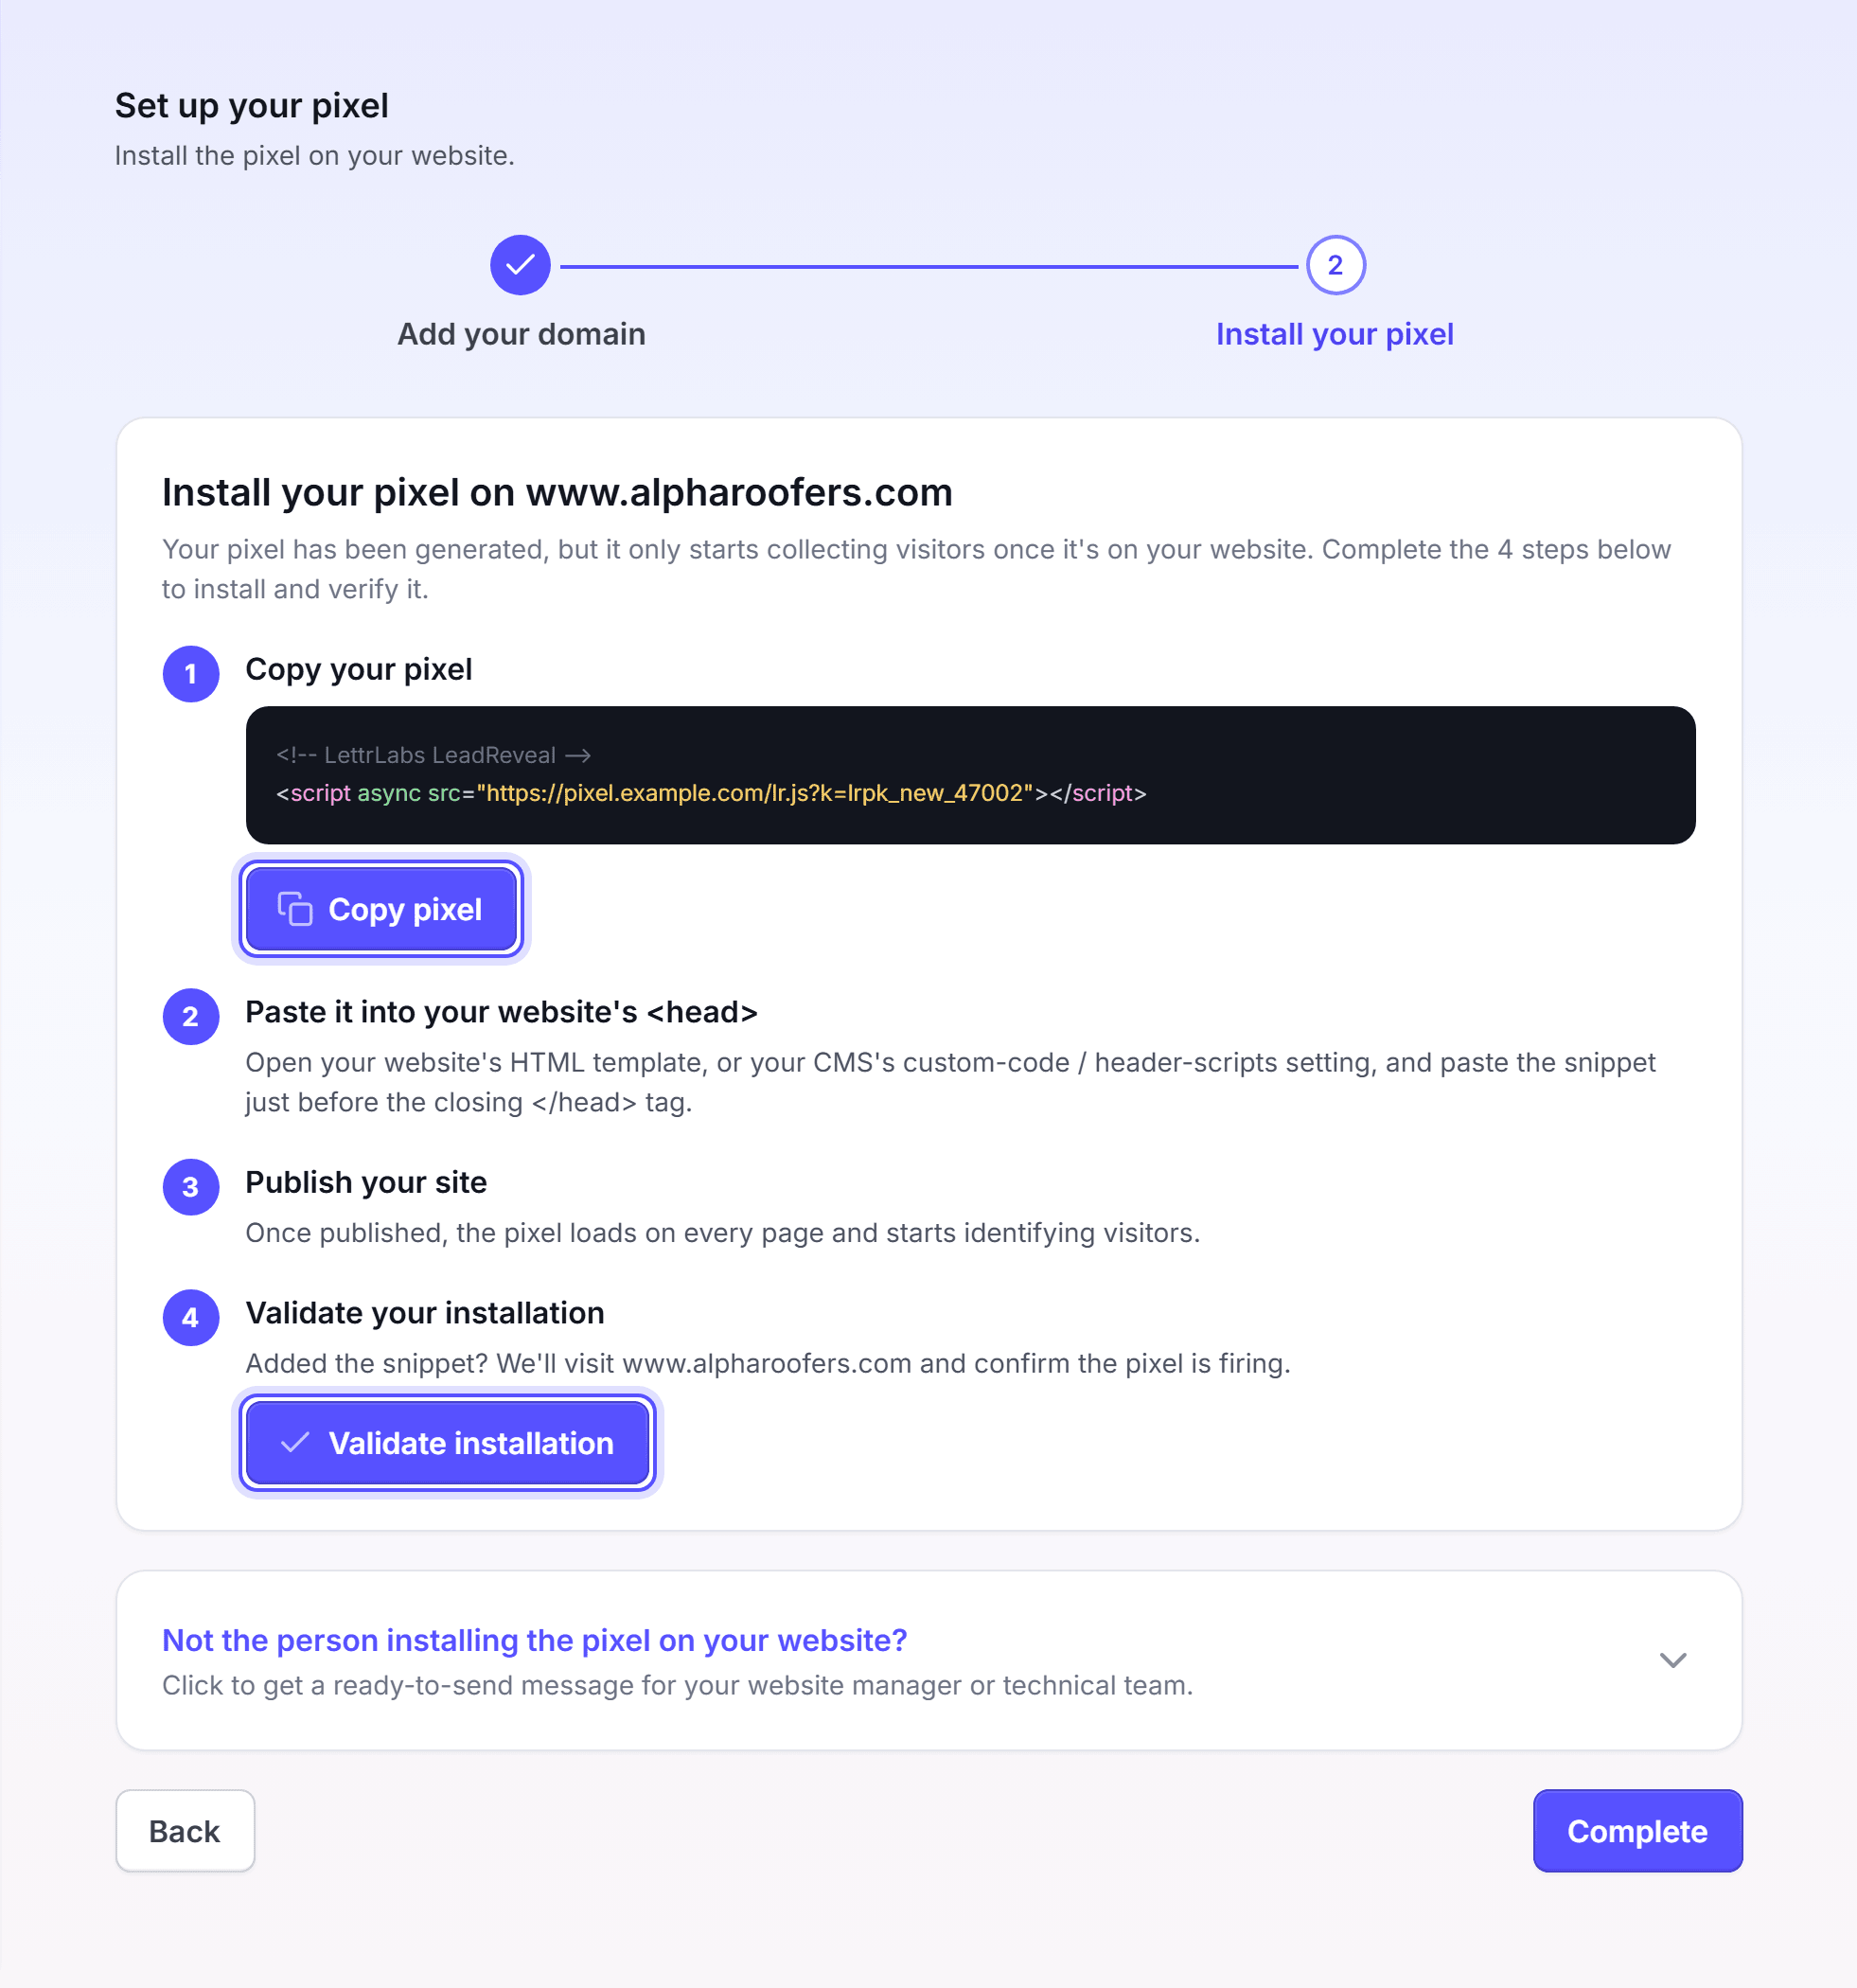
Paste the snippet into the <head> of your website, then publish the site.
Click Validate installation. LettrLabs visits your site and looks for the pixel.
Click Complete.
If another person edits your website, click Not the person installing the pixel on your website?. Then click Copy message for your team, and send the message to that person.
You're done when the message "Pixel successfully installed" shows. The LeadReveal page then lists the pixel as Validated. A pixel costs nothing. You pay only for the mail that a campaign sends.
Check that a pixel works
Validate a pixel again after you change your website.
Click LeadReveal.
Under Pixels, click the pixel card. The pixel page opens.
Click Validate installation. If the pixel was checked before, click Retry validation.
Each pixel card shows two marks. Validated or Not Validated tells you if LettrLabs found the pixel on your site. Live, Paused or Disabled gives the status of the pixel.
You're done when the message "Pixel successfully installed" shows. Validation changes nothing in your settings.
Choose which visitors count
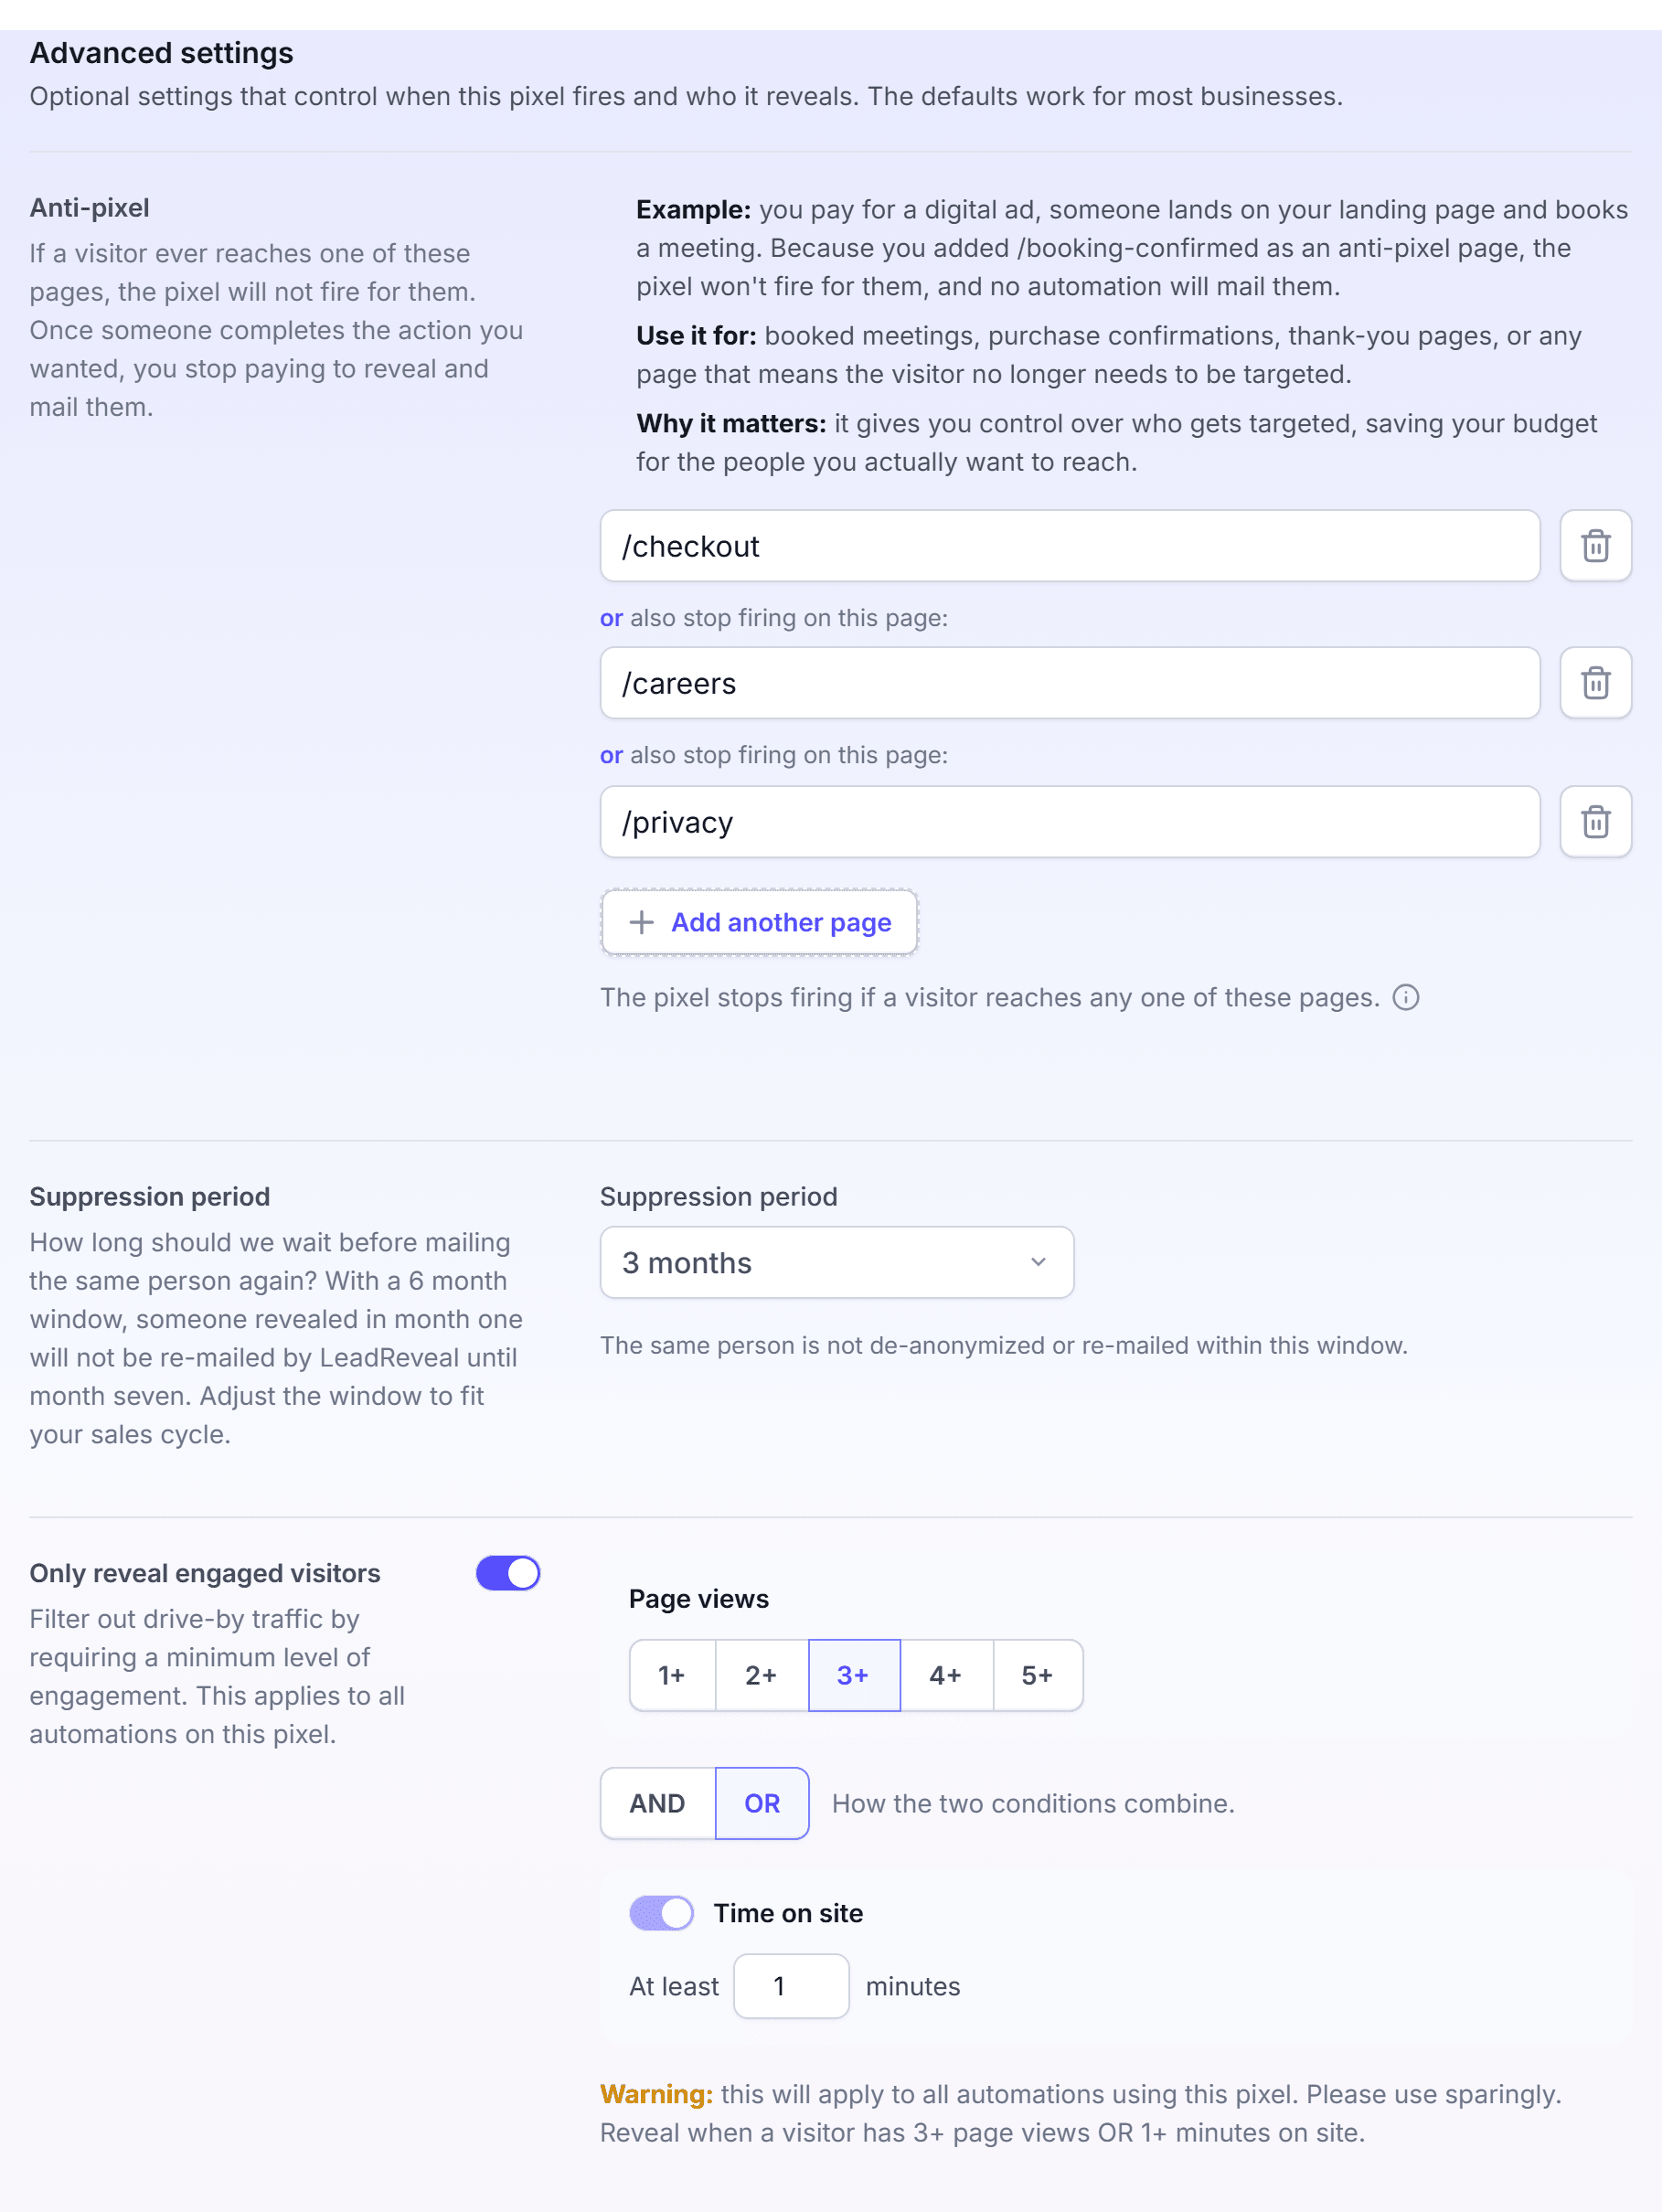
The advanced settings control when a pixel fires and which visitors it reveals. The defaults work for most businesses.
Click LeadReveal, then click the pixel card.
Under Advanced settings, change the settings that you need. The settings are in the table below.
Click Save settings.
| Setting | What it does |
|---|---|
| Anti-pixel | The pixel stops firing for a visitor who reaches one of these pages, for example a thank-you page. Click Add another page to add a page. |
| Suppression period | The time before LettrLabs reveals or mails the same person again: 3 months or 6 months. |
| Only reveal engaged visitors | Counts only the visitors with a minimum number of page views, a minimum time on site, or both. |
| Geographic suppression | Entire USA, Include zip codes or Include states. Use it to reveal only the visitors in your service area. |
You're done when the message "Your pixel has been updated." shows. The settings apply to the next visitors.
See and export your website leads
Read the leads that your pixels collect each day.
Click LeadReveal.
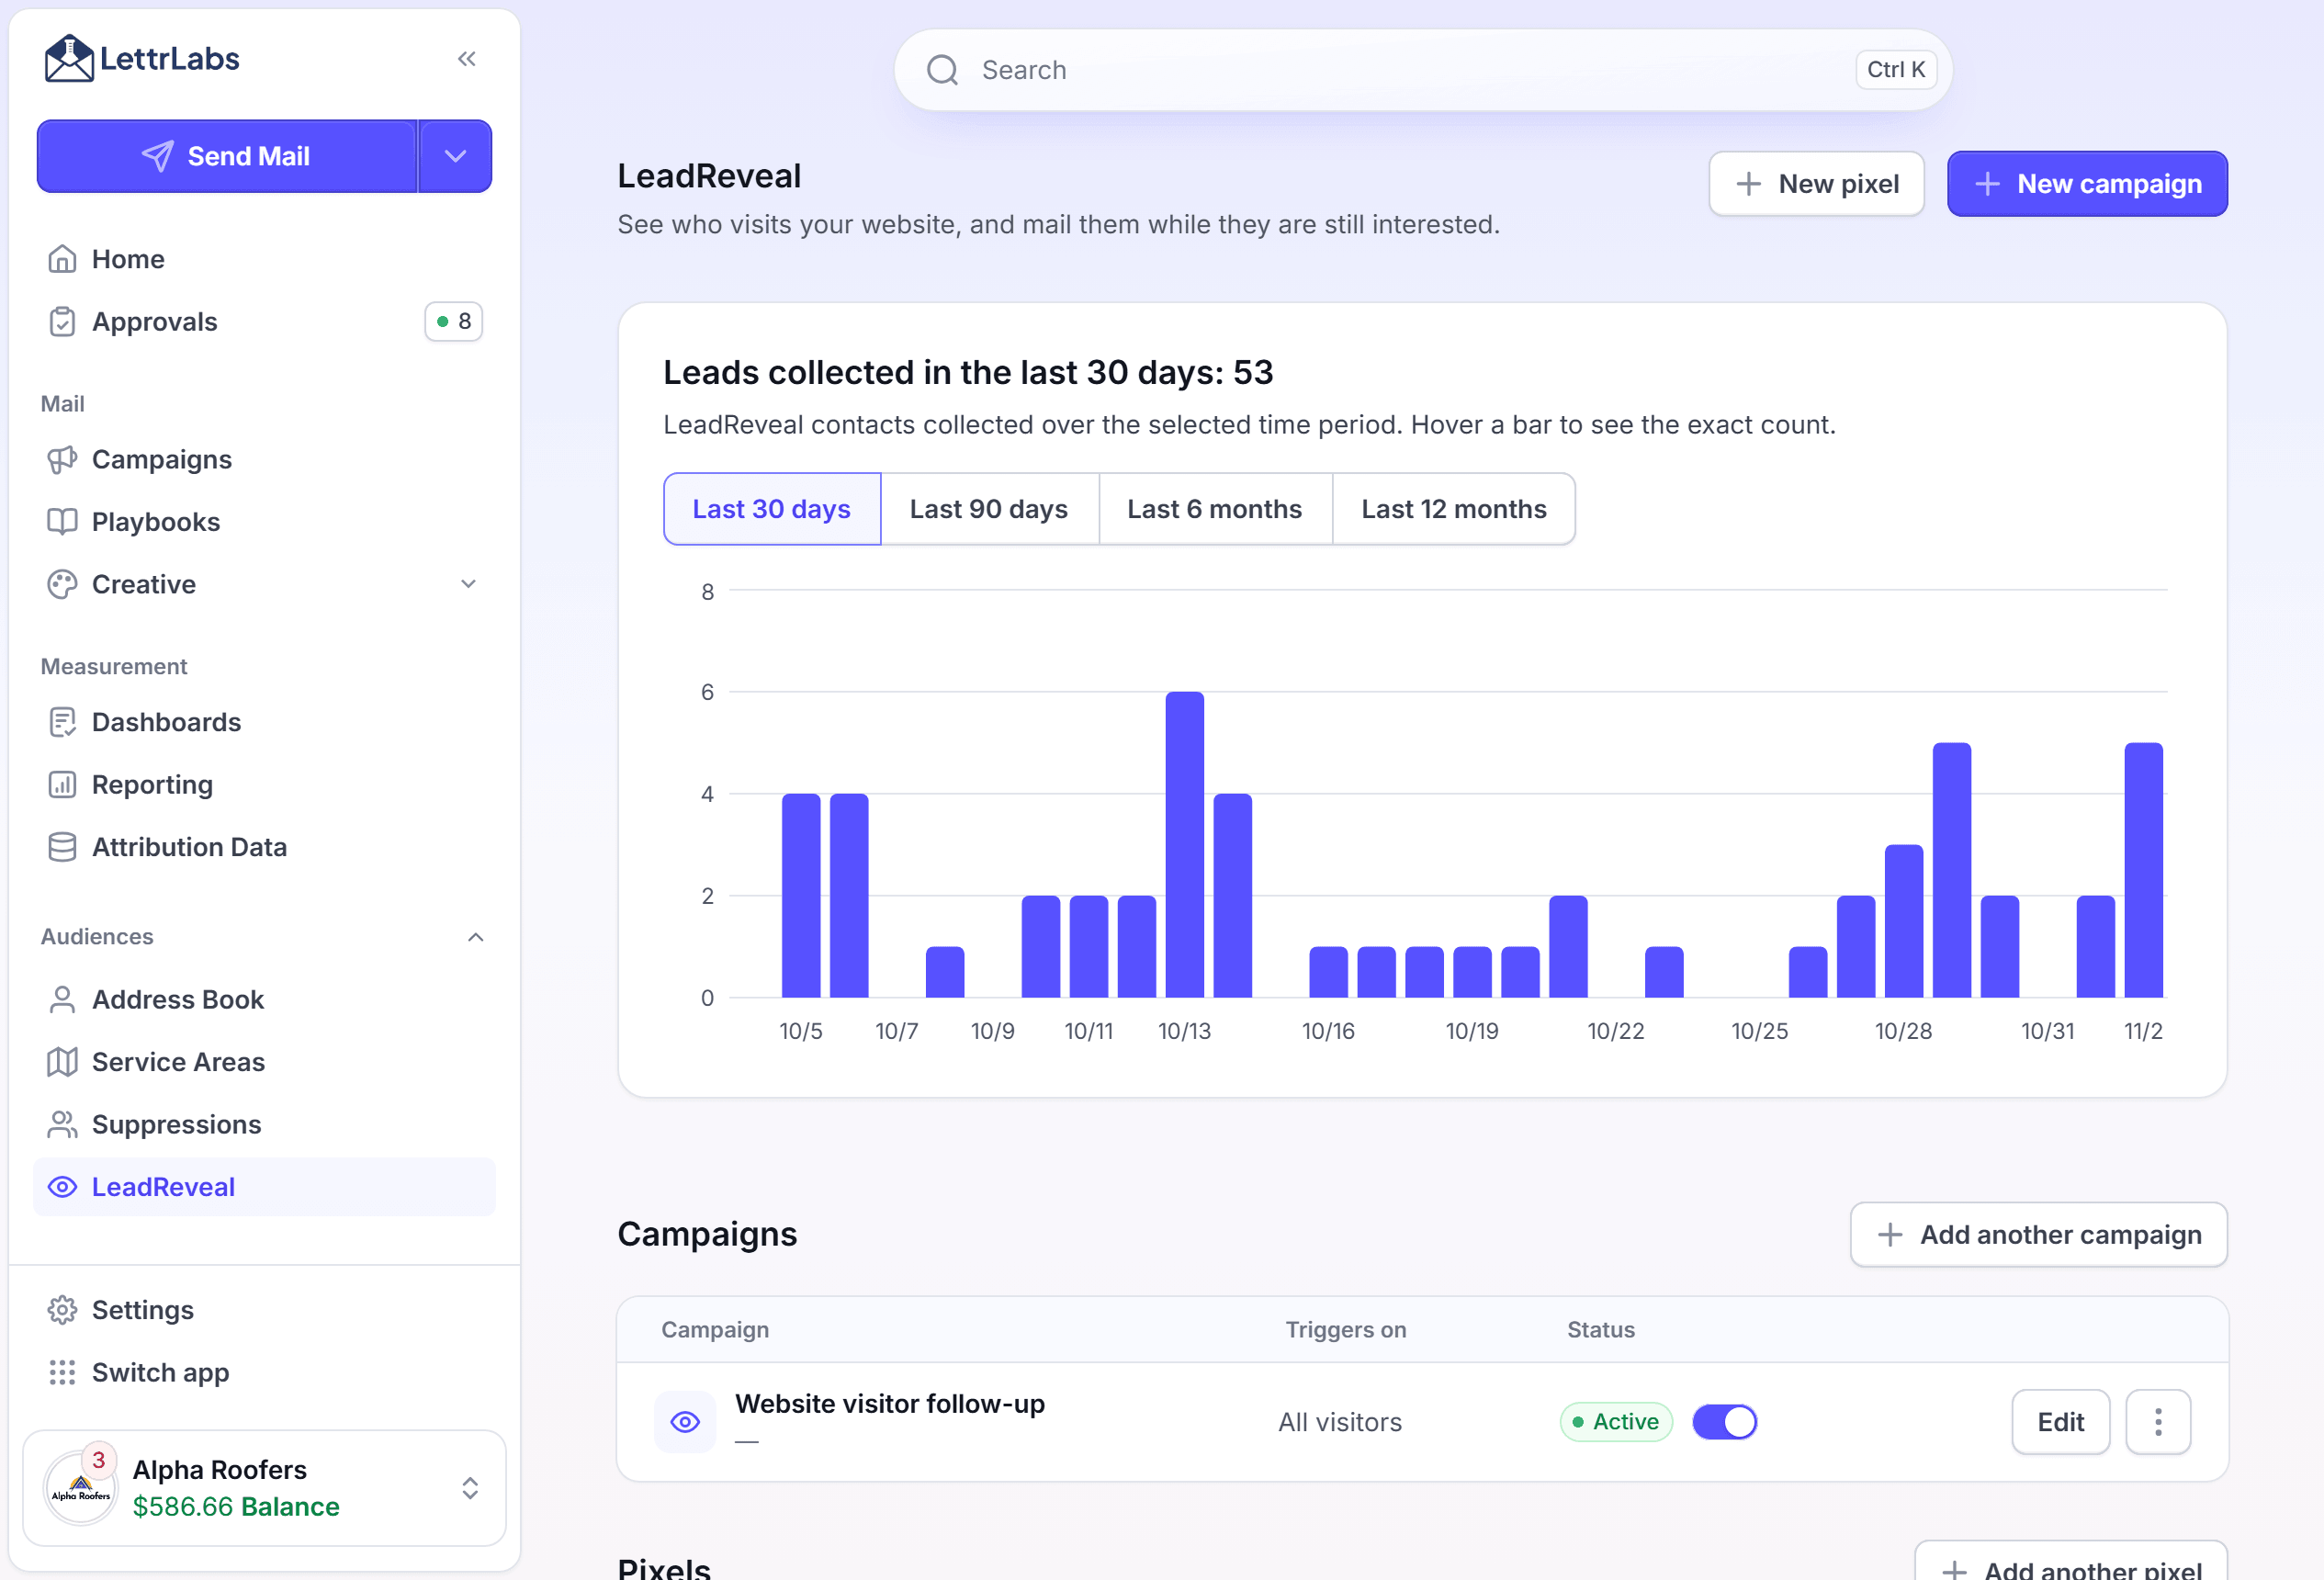
In the chart, select a period: Last 30 days, Last 90 days, Last 6 months or Last 12 months. Hover a bar to see the count for that day.
Under Leads collected, select a period, or enter a name in Search leads....
Optional: Click Export CSV to download the leads.
The table shows Visit date, Name, Address, Domain and Pages viewed. The file also holds the email address.
You're done when the table shows the leads for the period. The file downloads when you export. Reading the leads changes nothing.
Mail your website visitors
A LeadReveal campaign is an automated campaign. It mails each new visitor that your pixel reveals. Set up and validate a pixel first.
Click LeadReveal, then click New campaign. Send Mail opens with the LeadReveal source.
In LeadReveal site, select your website. If the pixel is not validated, the Validate your pixel dialog opens. Click Validate.
Optional: Under Visitor pages, click Add a page to mail only the visitors who open that page. Select contains or equals, then enter the path, for example /pricing.
Choose the design of the card, and set the Monthly limit.
Click Turn it on.
With no page in Visitor pages, every revealed visitor gets a card. In Send Mail, the LeadReveal source opens the LeadReveal page, so start each campaign there.
You're done when the campaign shows Active in the Campaigns table of the LeadReveal page. The first cards go out when the pixel reveals new visitors.
Turn a LeadReveal campaign on or off, or delete it
Turn a campaign off to stop new cards for a time. Delete a campaign that you do not need.
Click LeadReveal.
In the Campaigns table, find the campaign. The Status column reads Active or Inactive.

To turn it on or off, click the toggle, then confirm in the dialog.
To delete it, click More actions > Delete campaign. Then click Delete in the Delete dialog.
If the campaign has active follow-up cards, the dialog lists them and shows Cancel and Delete. It can also offer Pause. Pause lets the cards that are already scheduled finish.
To change a campaign, click Edit in its row.
You're done when the Status column shows the new status, or the message "Automation successfully deleted." shows.
Delete a pixel
Delete a pixel when you stop using a website.
Click LeadReveal, then click the pixel card.
Click Delete pixel.
In the Delete this pixel? dialog, click Delete pixel.
You're done when the message "Your pixel has been deleted." shows.
FAQ
Related
Automated campaigns
Learn how automated campaigns mail people as they qualify.
Suppressions
Keep some people out of your LeadReveal mail.
Templates
Design the card that your visitors get.
Steps checked 2026-11-10.