Suppressions
Keep people out of your mail with Static and Dynamic suppression audiences.
Overview
A suppression audience is a group of people that LettrLabs keeps out of your mail. A Static audience is a list of people. A Dynamic audience is a rule, and the people who match it change over time.
You can use Suppressions to:
- Keep opt-outs, current customers or partners out of each campaign.
- Stop mail to a person that your campaigns mailed or converted recently.
- Keep your ServiceTitan leads or customers with jobs out of the mail.
- Apply each audience to every campaign, or to the automations that you choose.
Each account has a default Static audience, marked Default. It applies to every campaign, and you cannot delete it.
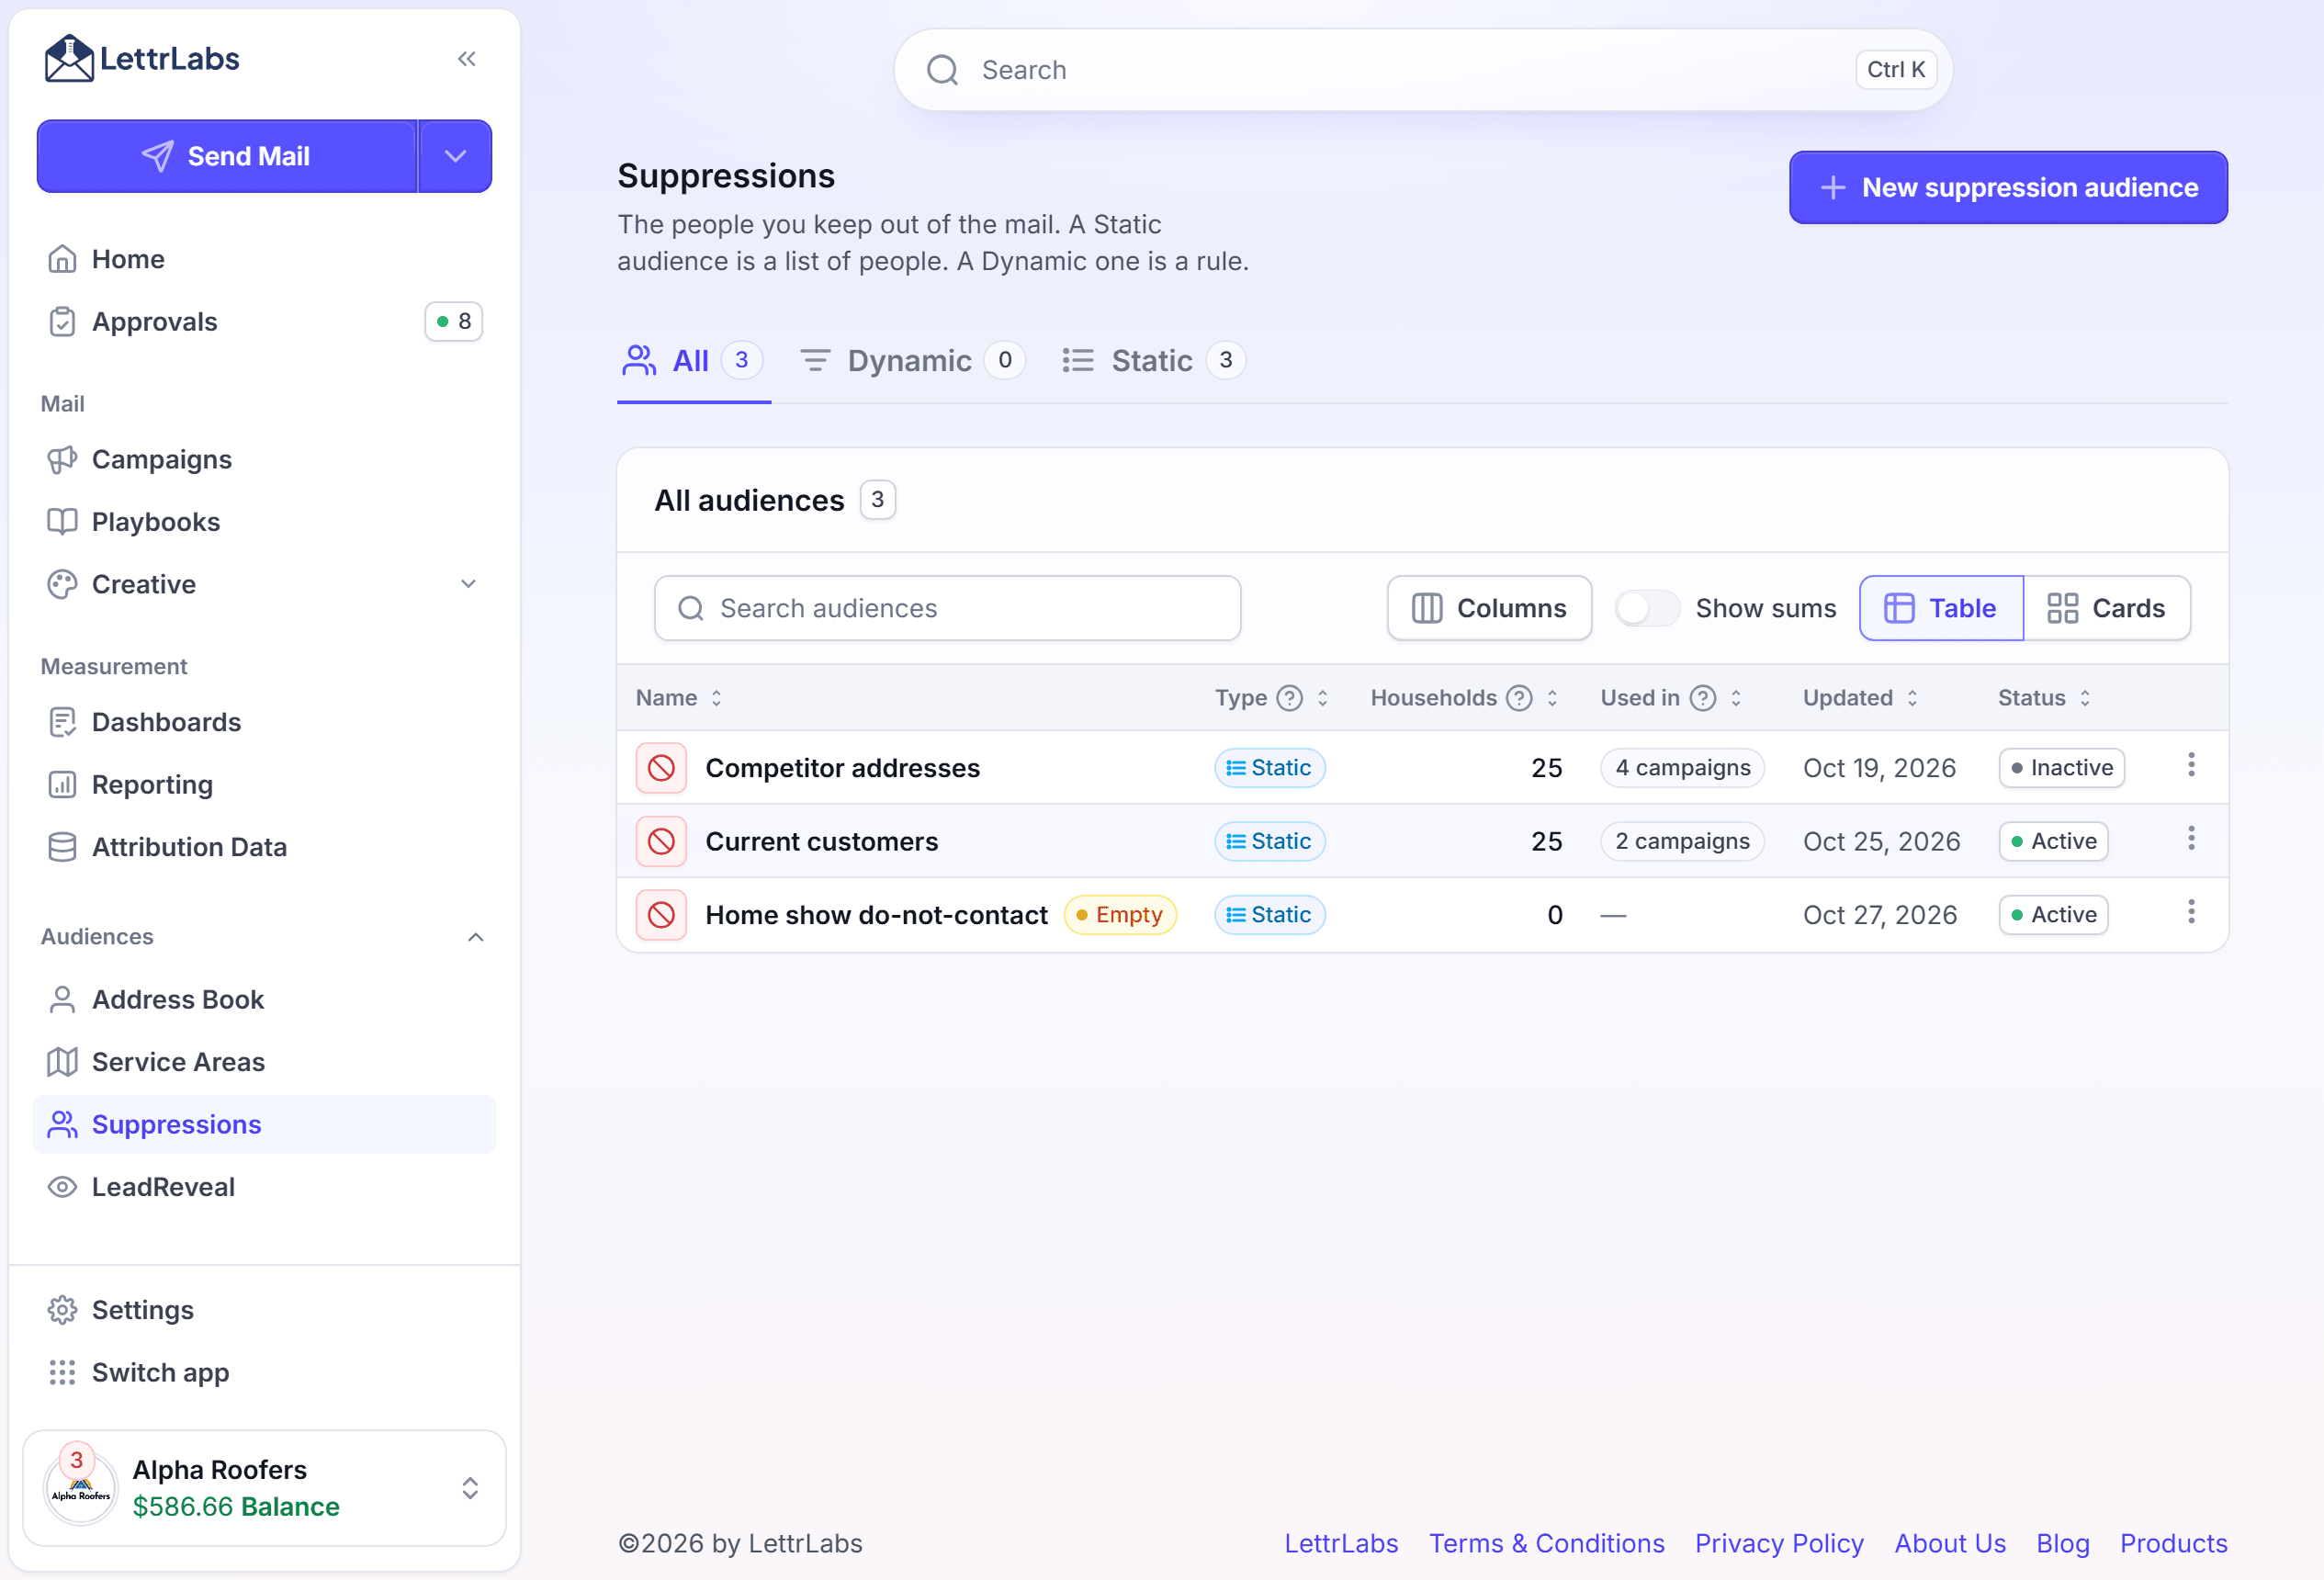
Open your suppression audiences
Open the list to see each audience, its size and where it applies.
In the left navigation, under Audiences, click Suppressions. The Suppressions page opens.
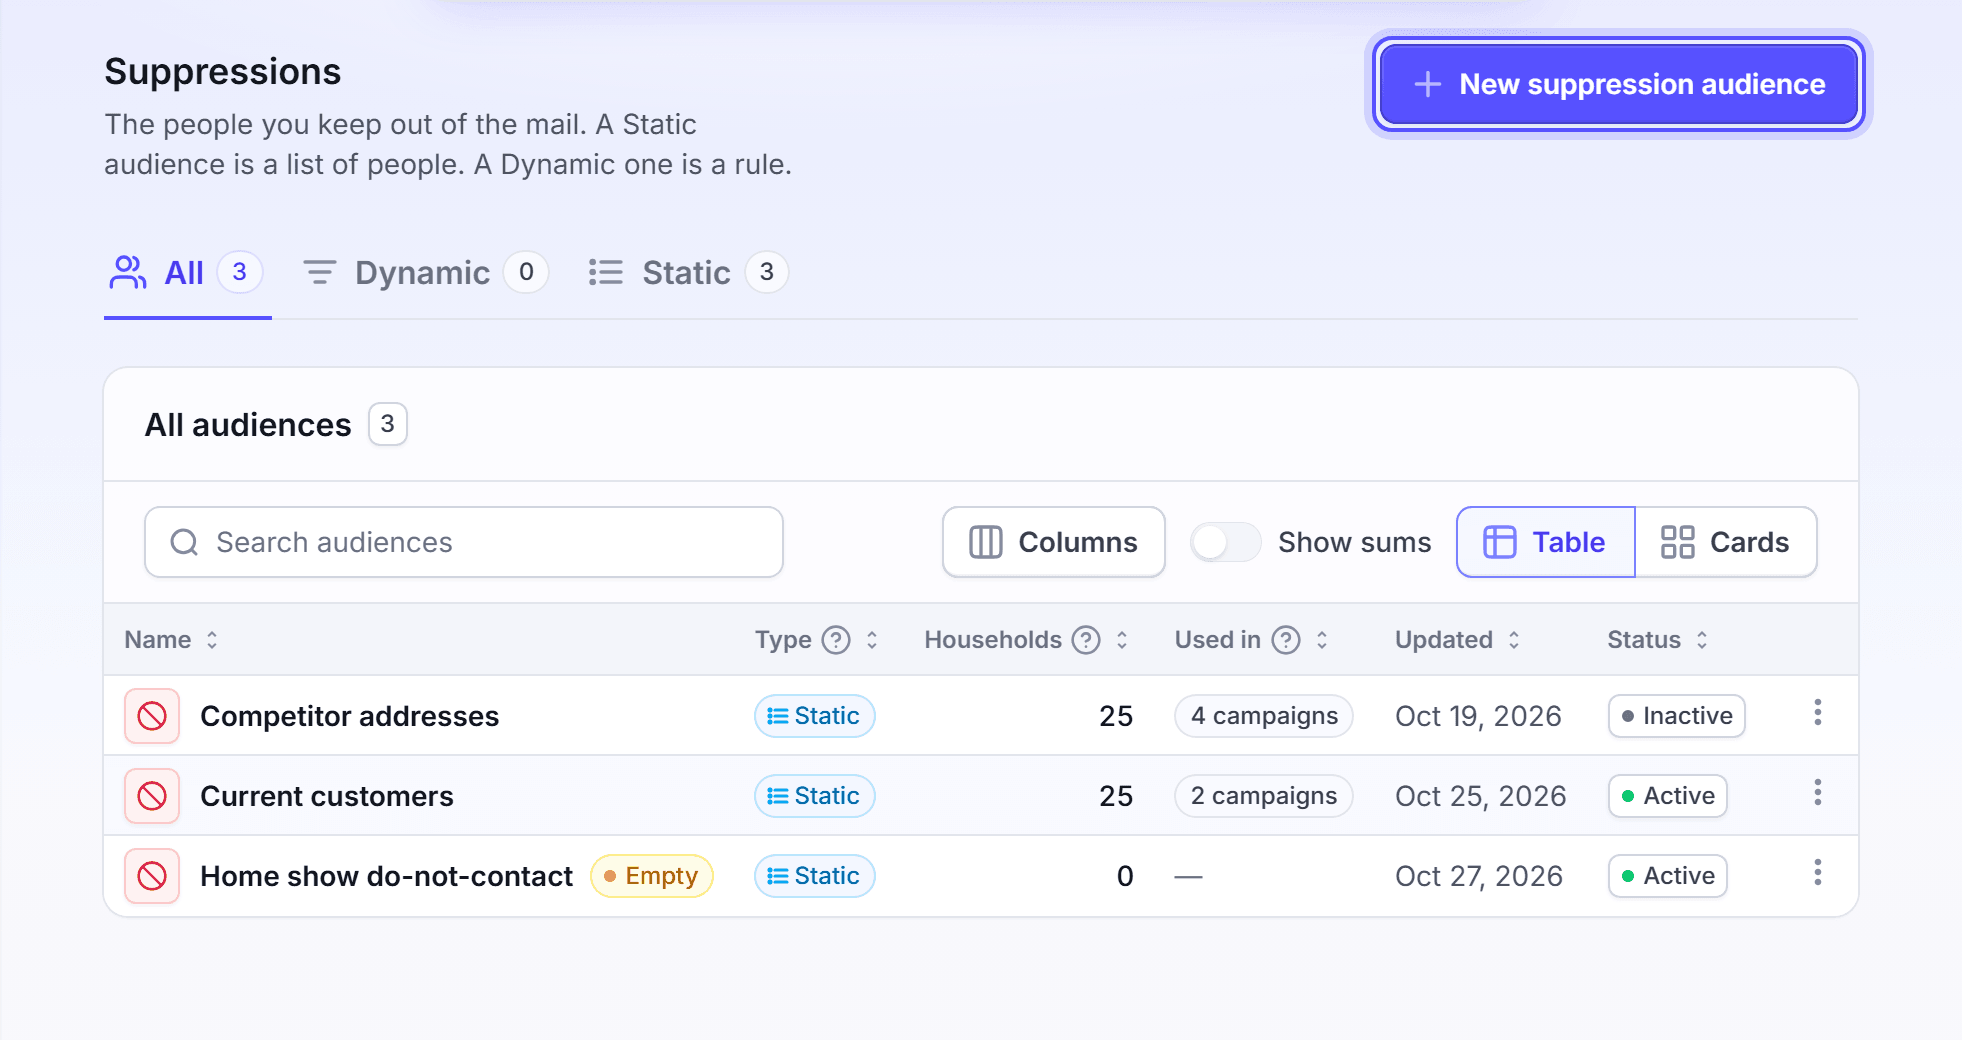
Click a tab: All, Dynamic or Static.
Optional: In Search audiences, enter a name.
Read the Households, Status and Used in columns. Used in reads "Every campaign" for the default audience. For another audience, it gives the number of campaigns that use it.
You can switch between the Table view and the Cards view. In the table, use the column picker to show or hide a column, and Show sums to add a sum row.
You're done when the table shows your audiences. Reading the list changes nothing.
Create a Static audience
Create a Static audience to keep named people out of your mail, for example the people who ask for no mail.
Click Suppressions, then click New suppression audience > Static.
In Name, enter a name, for example Opt-outs. The name can have 255 characters at most.
Optional: In Description, enter what the audience is for.
Click Next.
Select how to add the first people: Address book, Upload a CSV or Add manually.
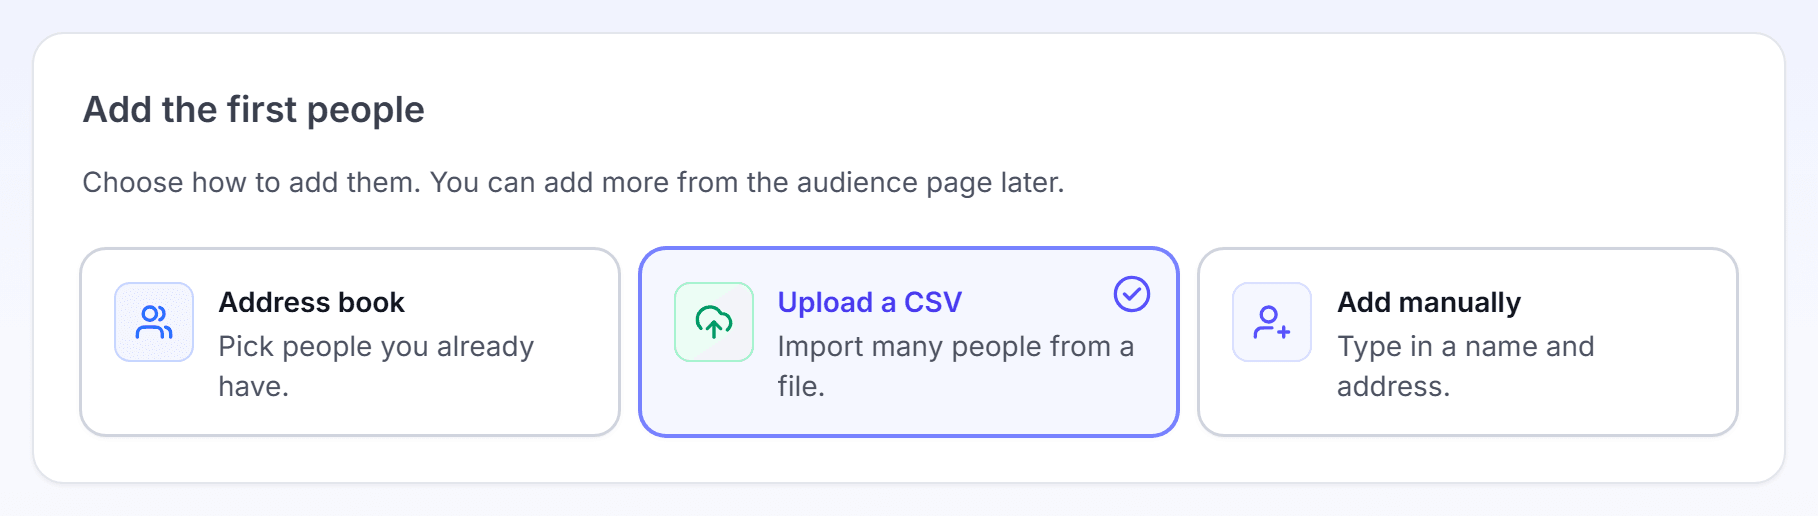
Click Create. To create the audience with no people, click Skip.
In Activate this suppression now?, click Activate now or Activate later.
The audience page opens. If you selected a method, its dialog opens so that you can add the people.
You're done when the audience page shows its name. An active audience applies to every campaign until you change its scope. Activate later creates the audience off. It keeps no one out of your mail until you click Turn on.
Add or remove people in a Static audience
Change the people in a Static audience when your list changes.
Click Suppressions, then click the audience.
Click Add Recipient, then select Add from Address Book, Add single recipient or Import from CSV.
For Add from Address Book, select the people, then click Add. For Add single recipient, complete the fields, then click Save.
To change one person, click Edit in their row. To remove one person, click Remove in their row, then confirm in the Remove from the audience dialog.
To remove many people at one time, click Bulk delete via CSV and upload a file of those people. The Remove Recipients dialog shows how many people LettrLabs removed. The removal can stop before it finishes. Then the message "The recipients were not removed" shows.
You're done when a message confirms the change, for example "Recipient added" or "Recipient removed". The change applies to the next mail that a campaign sends.
Add an address to Do Not Mail
Use the default Static audience for each person who asks for no mail from you.
Click Suppressions.
Click the audience that shows the Default badge.
Click Add Recipient, then add the person with one of the three methods.
A link to /do-not-mail also opens this audience.
You're done when the person shows in the table of the default audience. LettrLabs keeps this person out of every campaign.
Create a Dynamic audience
Create a Dynamic audience when a rule picks the people. For example, keep out each person that you mailed in the last 30 days.
Click Suppressions, then click New suppression audience > Dynamic.
In Name, enter a name. Optional: In Description, enter what the audience is for.
Under Rules, turn on each rule that you want. Each rule card has a toggle that reads On or Off.
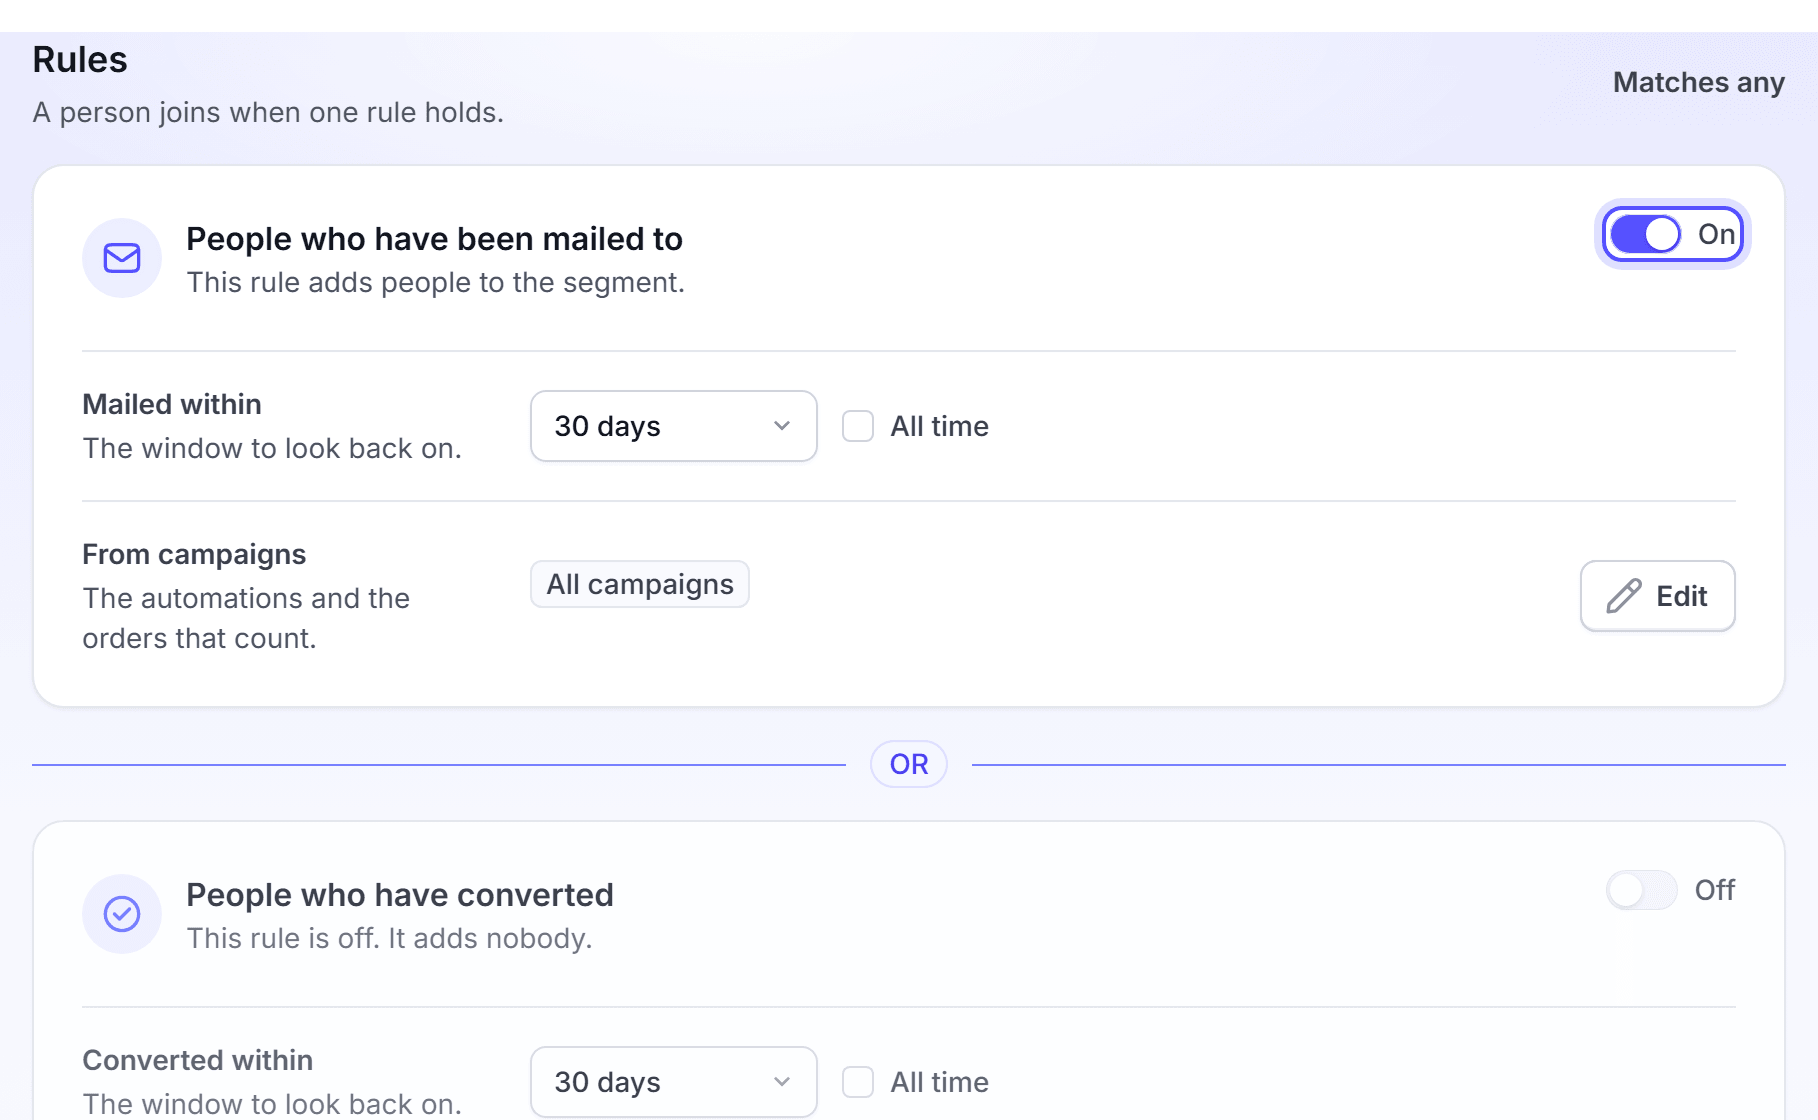
For each rule that is on, select the window: 30 days, 60 days, 90 days or 120 days. Or select All time.
Optional: For a mailed or converted rule, click Edit in From campaigns. Select the automations and orders that count, then click Save.
Click Create.
In Activate this suppression now?, click Activate now or Activate later.
The rules are in the table below. A person joins the audience when one rule that is on holds. The page shows this as Matches any.
| Rule | Who it adds |
|---|---|
| People who have been mailed to | People that your campaigns mailed in the window. |
| People who have converted | People who converted in the window. |
| ServiceTitan Leads | ServiceTitan leads created in the window. |
| ServiceTitan people with jobs | People with a ServiceTitan job created in the window. In Jobs in this status, keep All statuses, or pick Created, Completed or Canceled. |
With no campaign in From campaigns, the rule counts all campaigns.
You're done when the message "Dynamic audience created" shows. The audience page opens with its rules. Activate later creates the audience off. It keeps no one out of your mail until you click Turn on.
See who a Dynamic audience matches
Check the people that a rule picks before you rely on it.
Click Suppressions, then click the Dynamic audience.
Click See recipients. You can also click the recipients badge beside the name.
To change a rule, edit it on the audience page, then click Update.
You're done when the Recipients page lists the people. The list changes when new people match the rules.
Choose which campaigns an audience applies to
An audience applies to every campaign at the start. Limit it to some automations when it must not stop all of your mail.
Click Suppressions. In the row of the audience, open the row menu and click Choose campaigns. On the audience page, click Edit scope.
In Edit Scope, select Apply Globally or Specific Automations.
For Specific Automations, select the automations or a whole automation type.
Click Save. For specific automations, click Confirm in the Apply scopes dialog.
When you select a whole type, the audience also applies to the automations of that type that you create later.
The default audience always applies to every campaign. It has no Edit scope button.
An active audience that you apply globally shows on the Exclude step of each campaign. It is locked there, with the note "Applies to every campaign of this account". To remove it from one campaign, change the scope of the audience.
You're done when the message "Scope updated" shows. The Used in column shows the new scope.
Turn an audience on or off, or delete it
Turn an audience off to let your campaigns mail its people again for a time. Delete an audience that you do not need.
Click Suppressions.
In the row of the audience, open the row menu.
Click Turn off or Turn on, then click Turn off or Turn on in the dialog. Or click Delete, then click Delete in the dialog.
On the audience page, you can also click Delete audience, or Rename to change the name.
You're done when the message "Suppression turned on", "Suppression turned off", "Static audience deleted" or "Dynamic audience deleted" shows.
FAQ
Related
Address Book
Add the people that you keep or mail.
Campaigns
See the campaigns that a suppression audience applies to.
ServiceTitan
Connect ServiceTitan to use its rules.
Steps checked 2026-11-16.