Team members
Invite your team, and set what each person can do.
Overview
The users of an account work in the same campaigns, templates and billing. Each user has one of two roles: Admin or User. An admin invites the team, sets each role and removes a user who leaves.
You can use the Users page to:
- Invite one or more people to your account.
- Resend, change or delete an invite that is not accepted yet.
- Change the role of a user.
- Remove a user from the account.
To open the page, click Settings, then click Users. The page shows Manage Users at the top, then Pending Invites and Active Users.
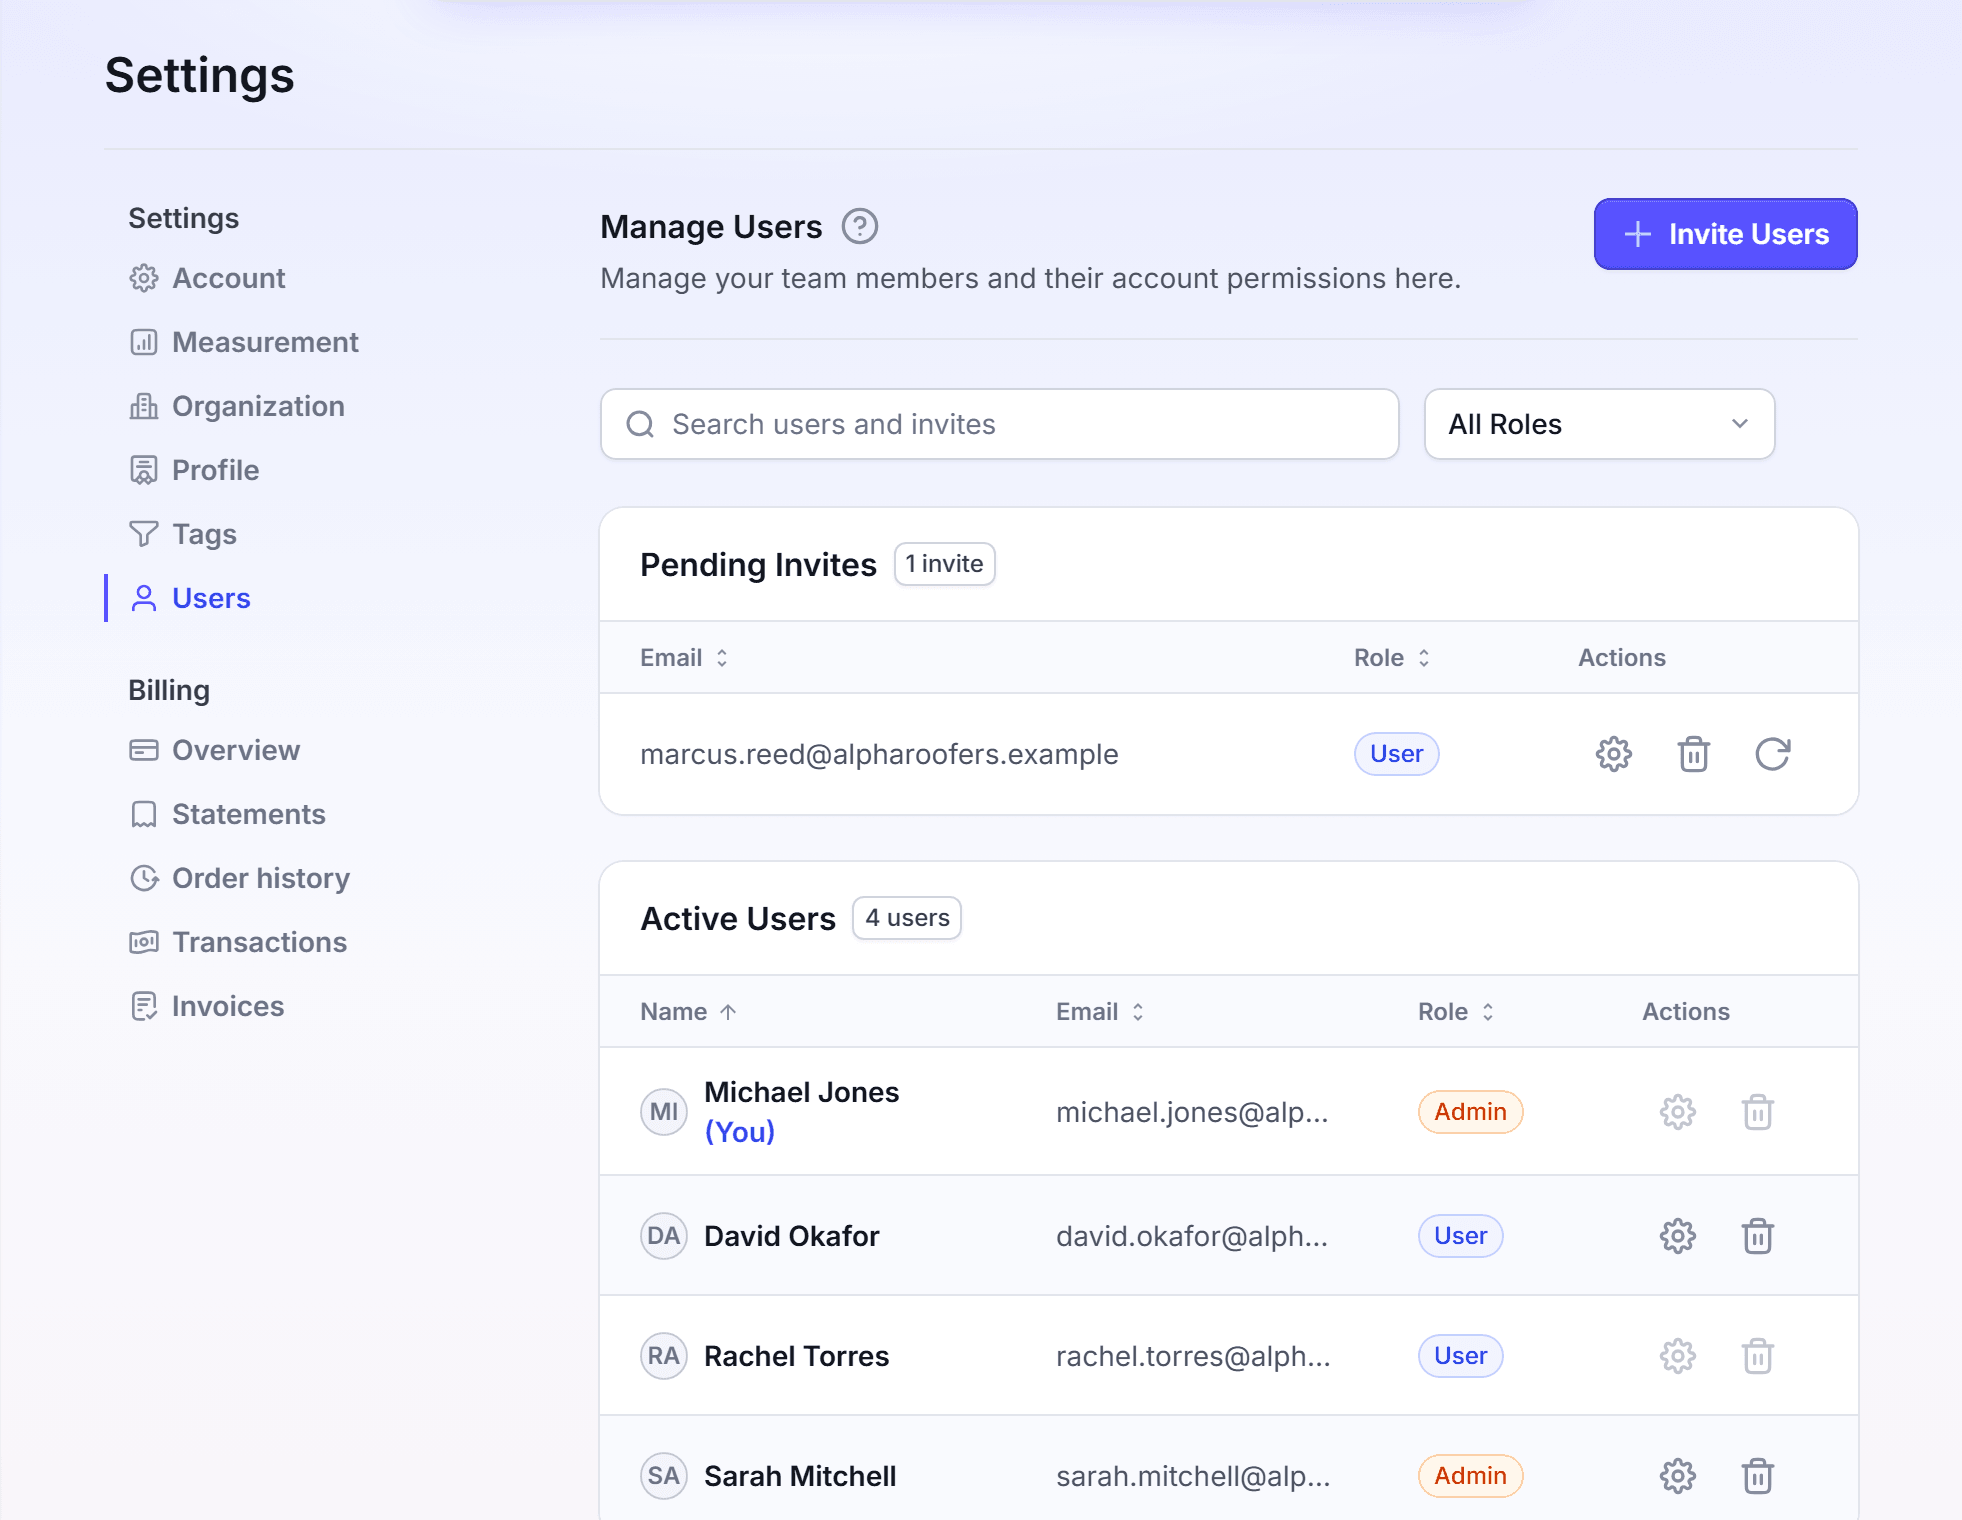
Invite your team
Invite each person who works on your mail. Invite people in your first week, and when a person joins your team.
You must be an account admin to do this. Without the permission, Invite Users does not show.
Click Settings, then click Users.
Click Invite Users. The dialog Invite users to your team opens.
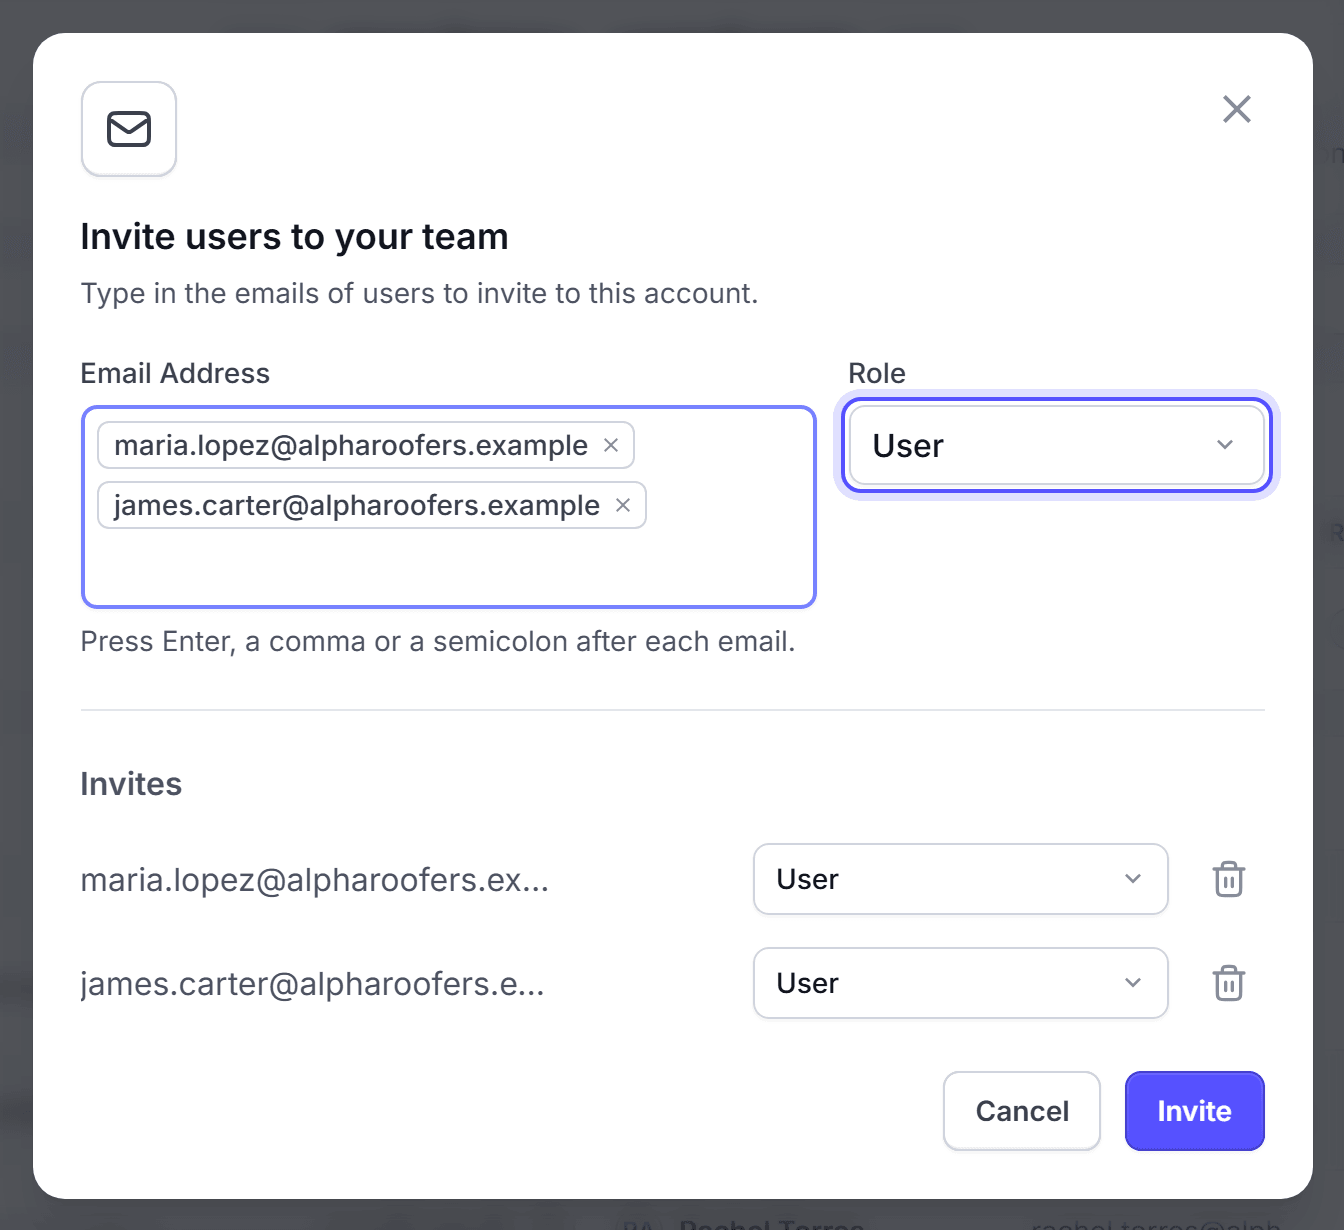
In Role, select Admin or User. Each new email takes this role. The default is User.
In Email Address, type an email. Press Enter, a comma or a semicolon after each email.
Optional: In the Invites list, change the role of one email. To remove an email, click its delete icon.
Click Invite.
An email can have up to 49 characters. You can paste a list of emails, and LettrLabs splits it.
You're done when the message "Invite sent." shows, or for example "3 invites sent." Each invite shows in Pending Invites. LettrLabs emails each person a link to join. Inviting a user costs nothing.
Resend, change or delete an invite
Manage an invite that a person did not accept yet. Resend it when the person cannot find the email. Delete it when you sent it by mistake.
Click Settings, then click Users.
In Pending Invites, find the email.

In Actions, click the icon for the task. The icons are in the table below.
In the dialog, click Update, Re-send or Delete invitation.
The actions are in the table below.
| Icon | Dialog | What it does |
|---|---|---|
| Edit | Edit Invite | Sets the Role that the person gets when they join. |
| Delete | Delete invitation | Cancels the invite. The invite leaves Pending Invites. |
| Resend | Re-send invitation | Sends the invite email again. |
You're done when a message names the email, for example "Invite resent successfully to: ana@example.com".
Change a user's role
Change a role when a person needs more access, or less. You must be an account admin to do this.
Click Settings, then click Users.
In Active Users, find the user. To find a user, use the search field or the Role filter.
Click the Edit icon on the row. The dialog Edit User opens.
In Role, select Admin or User.
Click Update.
You cannot change your own role. You cannot change the role of a user who has not signed in yet.
You're done when the message "Role updated to Admin for:" or "Role updated to User for:" shows, with the email. You can change the role again at any time.
Remove a user
Remove a user who leaves your team. The person loses access to the account.
Click Settings, then click Users.
In Active Users, find the user.
Click the Delete icon on the row.
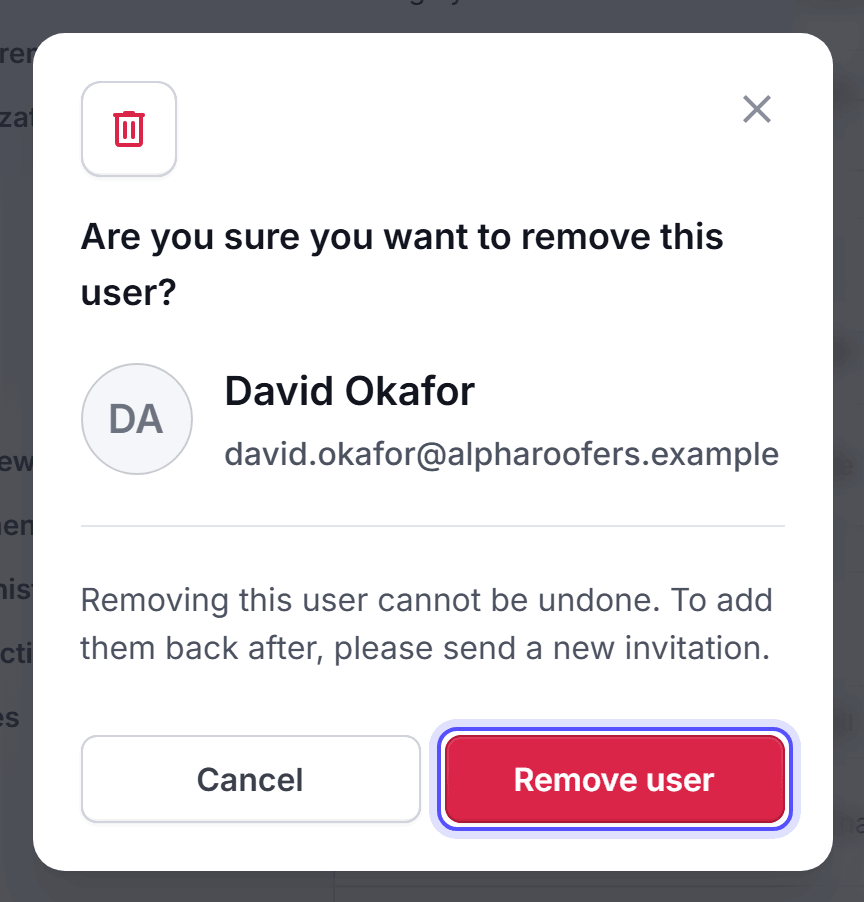
In the dialog Are you sure you want to remove this user?, click Remove user.
You cannot remove yourself. You cannot remove a user who has not signed in yet.
You're done when the message "User removed:" shows, with the email. The user leaves Active Users.
Roles and permissions
An account user has one of two roles. Some pages show a message when a user with the User role opens them.
The table lists the actions that need the Admin role.
| Action | Where | What a User sees |
|---|---|---|
| Invite and manage users | Settings > Users | The list is hidden. The page reads "Only an account Admin can see the users of this account." |
| Change the payment methods | Settings > Overview under Billing | The Payment methods card reads "Only an account Admin can change the payment methods". |
| Change automation auto-billing | Settings > Overview under Billing | The options are not available. |
| Save the account and company details | Settings > Account | The message "Admin permissions are required for this action." |
Each user, with either role, can edit their own profile and choose their own order emails.
A person can be a user of more than one account, with a different role in each. See Work across accounts.
FAQ
Related
Your profile
Change your name and the emails you get.
Payment methods
Add the card that pays for your mail.
Work across accounts
Switch between the accounts you belong to.
Steps checked 2026-11-16.