Send your first campaign
Upload a list of addresses, pick a design, choose postage and pay, to mail your first campaign in about 15 minutes.
Overview
A one-time campaign mails one template to a list of people one time. In this tutorial, you upload a small list, pick your template, choose the postage and pay at checkout.
You can use this tutorial to:
- Learn the five steps of Send Mail: Objective, Audience, Creative, Measurement and Budget.
- Upload a list of addresses and fix bad rows.
- Choose the postage, the production speed and the send date.
- Pay at checkout and see the new campaign.
The tutorial takes about 15 minutes. Do Templates and Payment methods first.
Make the sample list
Use this task before you start Send Mail. LettrLabs reads a CSV or Excel file (.csv, .xlsx or .xls) with one home on each row.
Put a header row at the top that names each column. LettrLabs reads these seven columns:
First Name,Last Name,Address 1,Address 2,City,State,ZIPOpen a spreadsheet program, such as Excel or Google Sheets.
Enter the seven column names in the first row.
Enter three to five real people and their addresses, one person on each row.
Leave Address 2 empty when the home has no apartment or unit.
Save the file as first-campaign.csv.
Use real addresses only. A made-up address fails the address checks at checkout. Use addresses that you are happy to mail, such as your office and your team.
Send Mail also offers Download the sample file. The sample has the same seven columns and five made-up homes. Use it to see the format, not to mail.
You're done when first-campaign.csv holds three to five rows under the header row. Nothing is sent yet.
Send the campaign
Use this task to mail your sample list. The send has six stages. Do them in order.
Step 1: Start the campaign
Send Mail is the LettrLabs campaign builder. It opens at the Objective step.
In the left nav, click Send Mail.
Under Campaign Type, click One-Time Campaign.
Under How Do You Want to Build This?, click Build a Custom Campaign.
Under What Builds the Audience?, click My Data and Integrations.
Under Which Data Source?, click My List or Address Book.
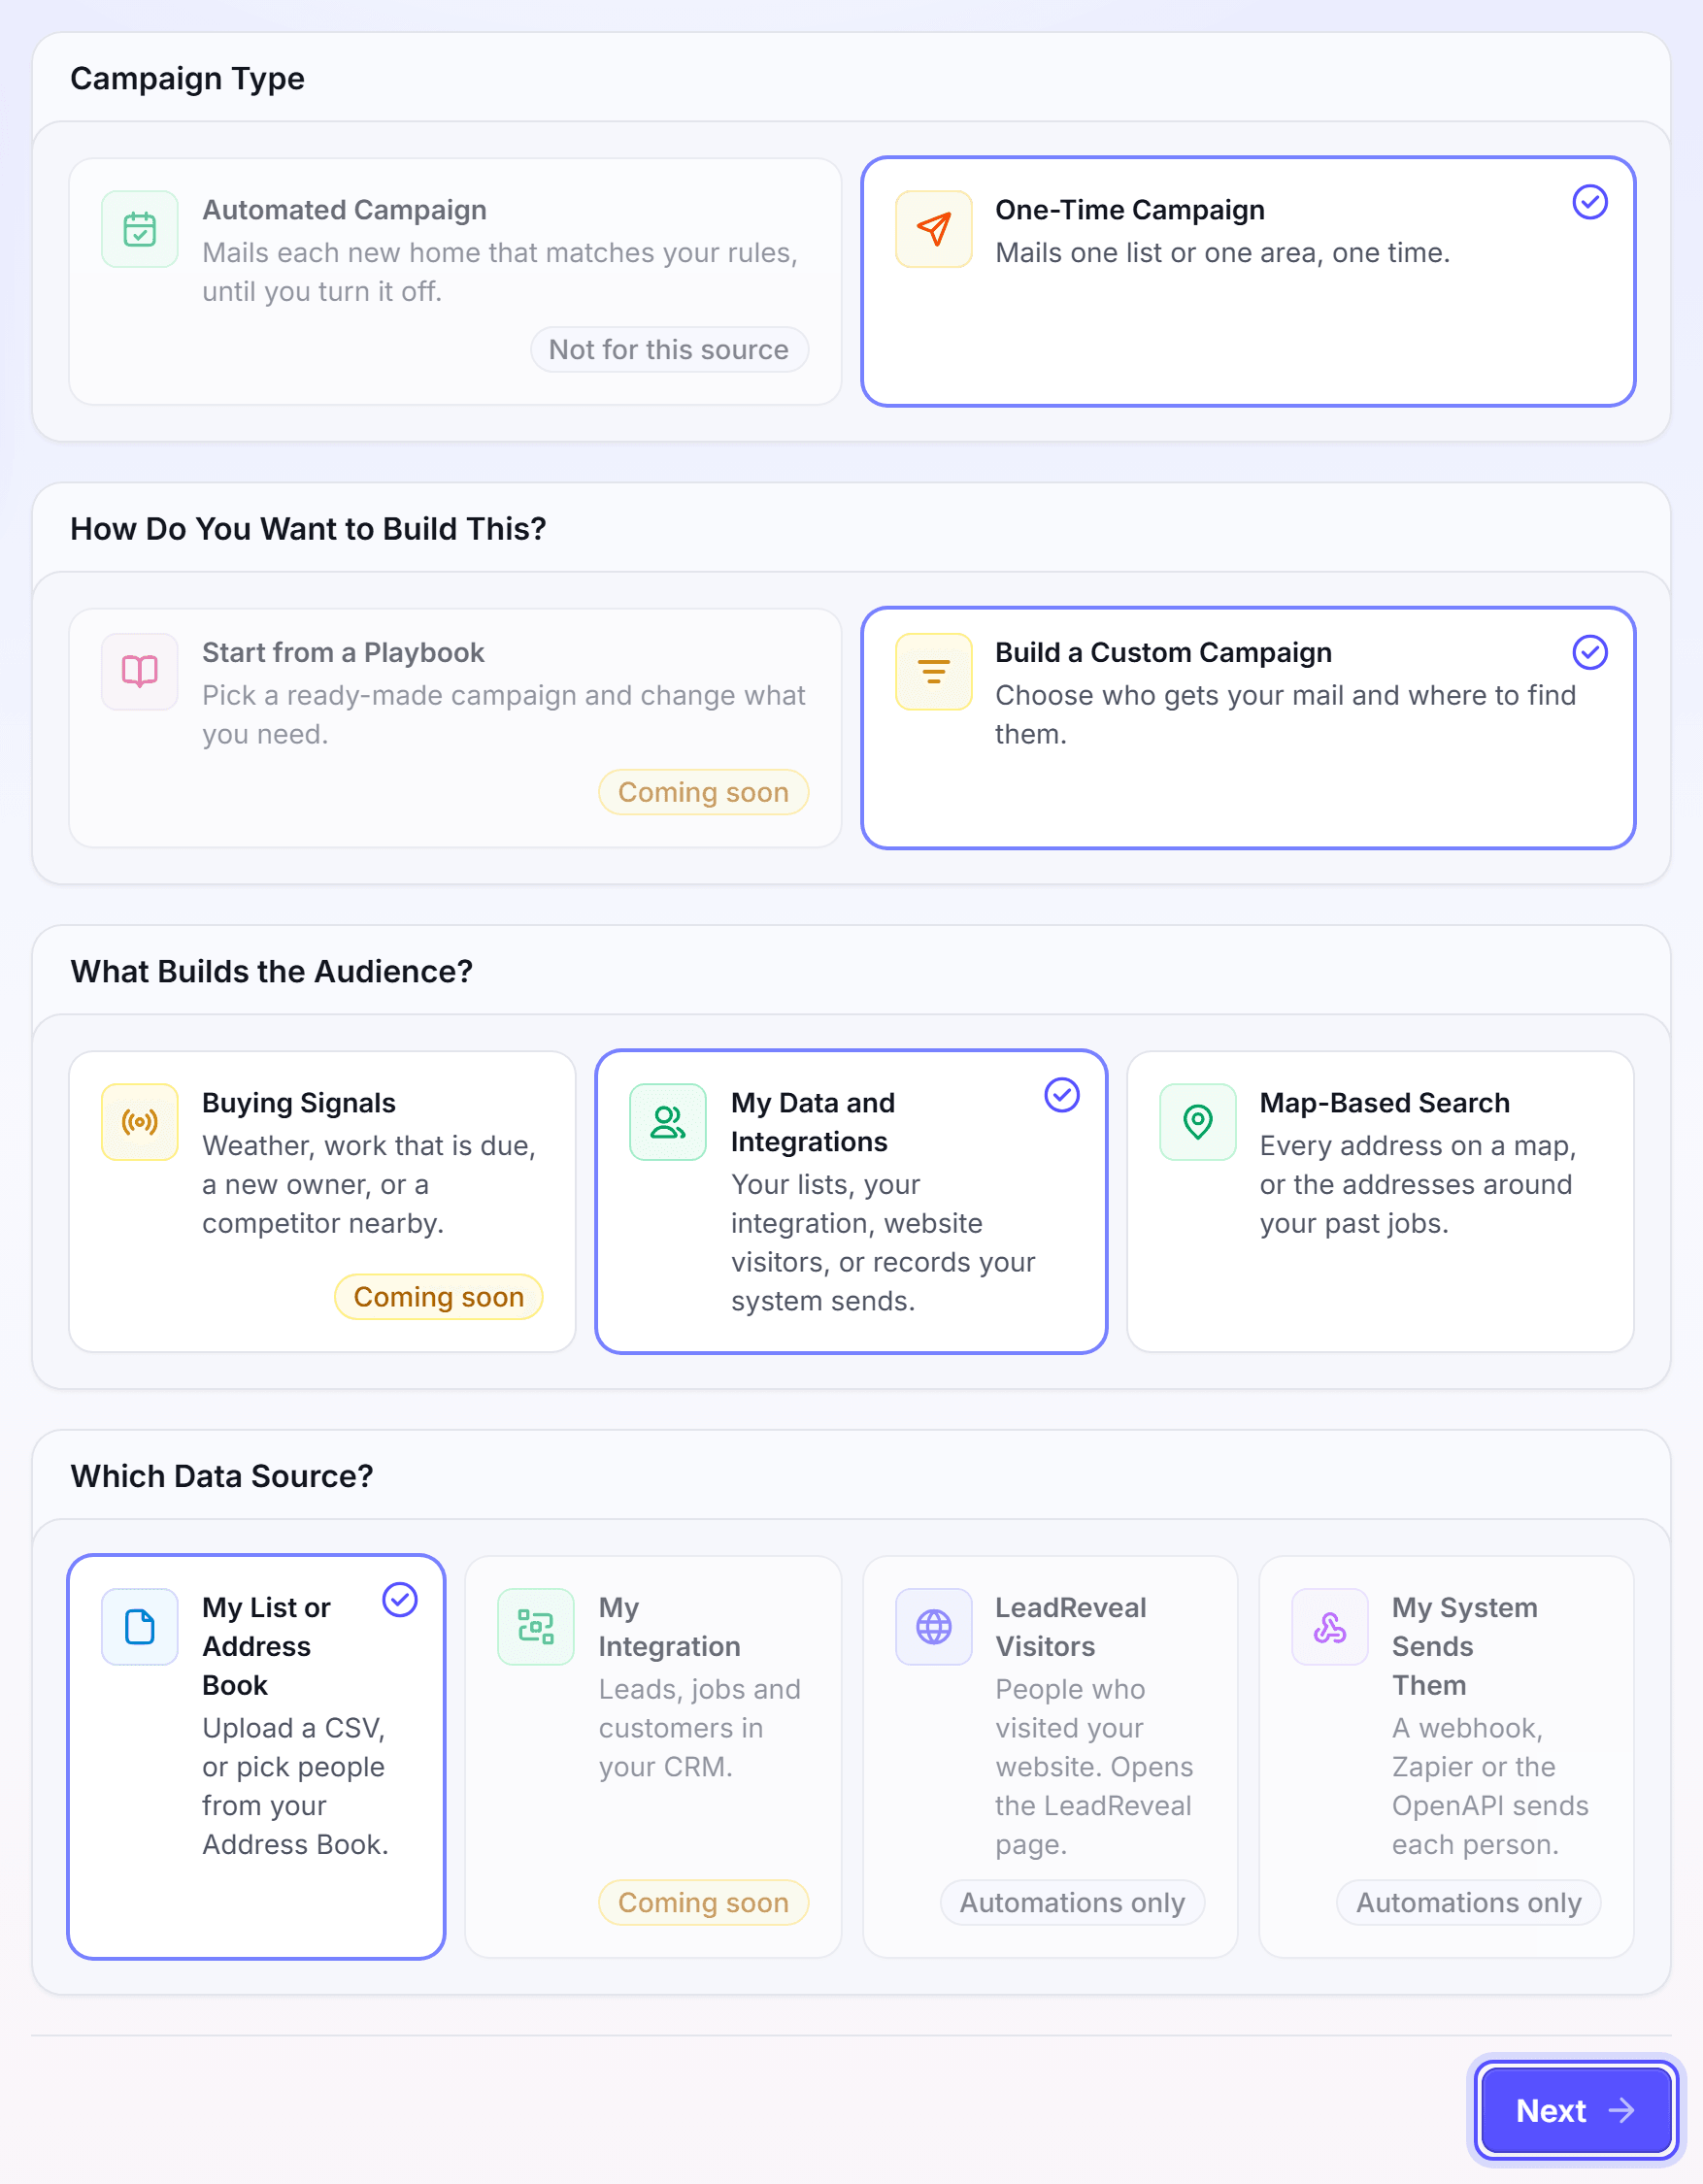
Click Next. The Audience step opens.
Send Mail saves the campaign as a draft each time that you change it. You can leave and continue later from the Drafts tab of Campaigns.
Step 2: Upload your list
The Audience step reads your list and checks each row.
Under Upload a file, drop first-campaign.csv into the drop zone. Or click the drop zone and select the file.
The Map your columns dialog opens. Check the field that each column fills, then click Use this mapping.
Wait while LettrLabs checks the addresses. The rows show in a table.
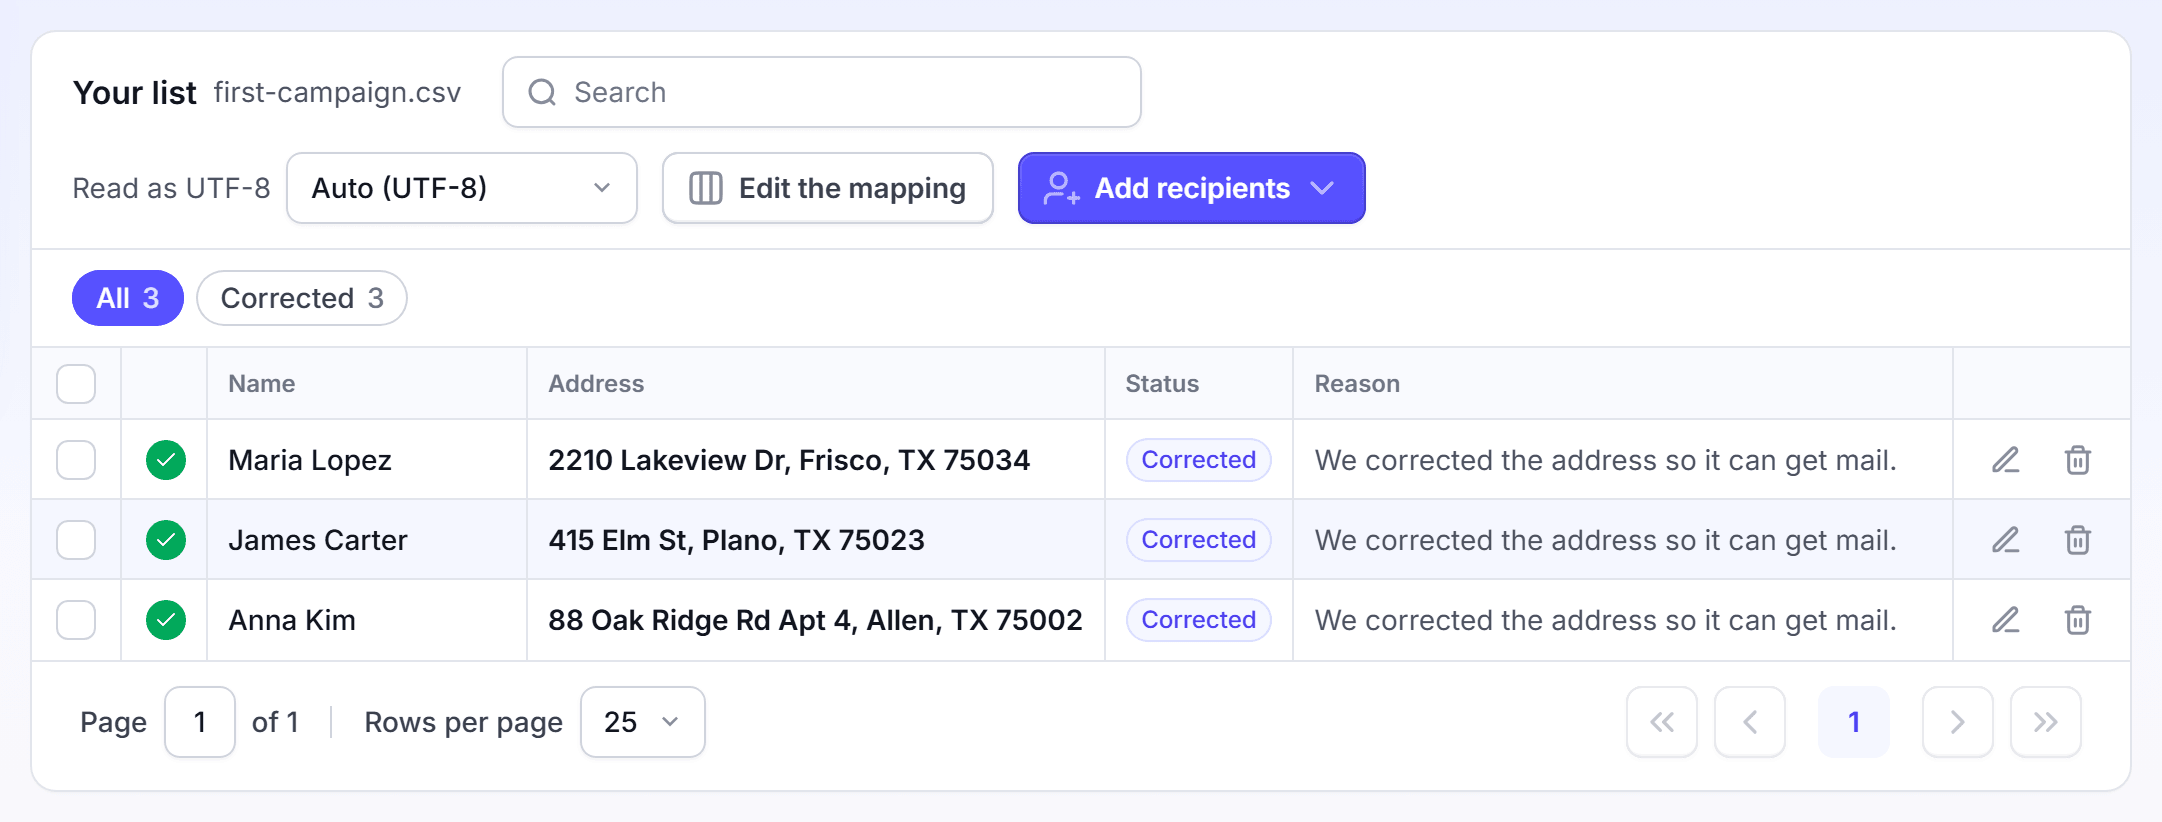
Check the row groups: Ready to mail, Duplicates and the addresses that cannot get mail. LettrLabs takes each duplicate out of the list.
For a group of bad addresses, click Fix. Correct each address, and save it. Or remove the row.
Optional: To add one more person by hand, click Add one. Then enter the name and the address.
Click Next. The Who shouldn't get this card panel opens. For a first campaign, keep its settings.
Click Next. The Creative step opens.
A CSV file can have 1,000,000 rows at most. An Excel file can have 250,000 rows at most. Next stays blocked while a row has a bad address.
Step 3: Pick the design
The Creative step picks the template that each home gets.
Under Pick your first touch, find the template that you made.
Click the template. It opens large, with the front and the back.
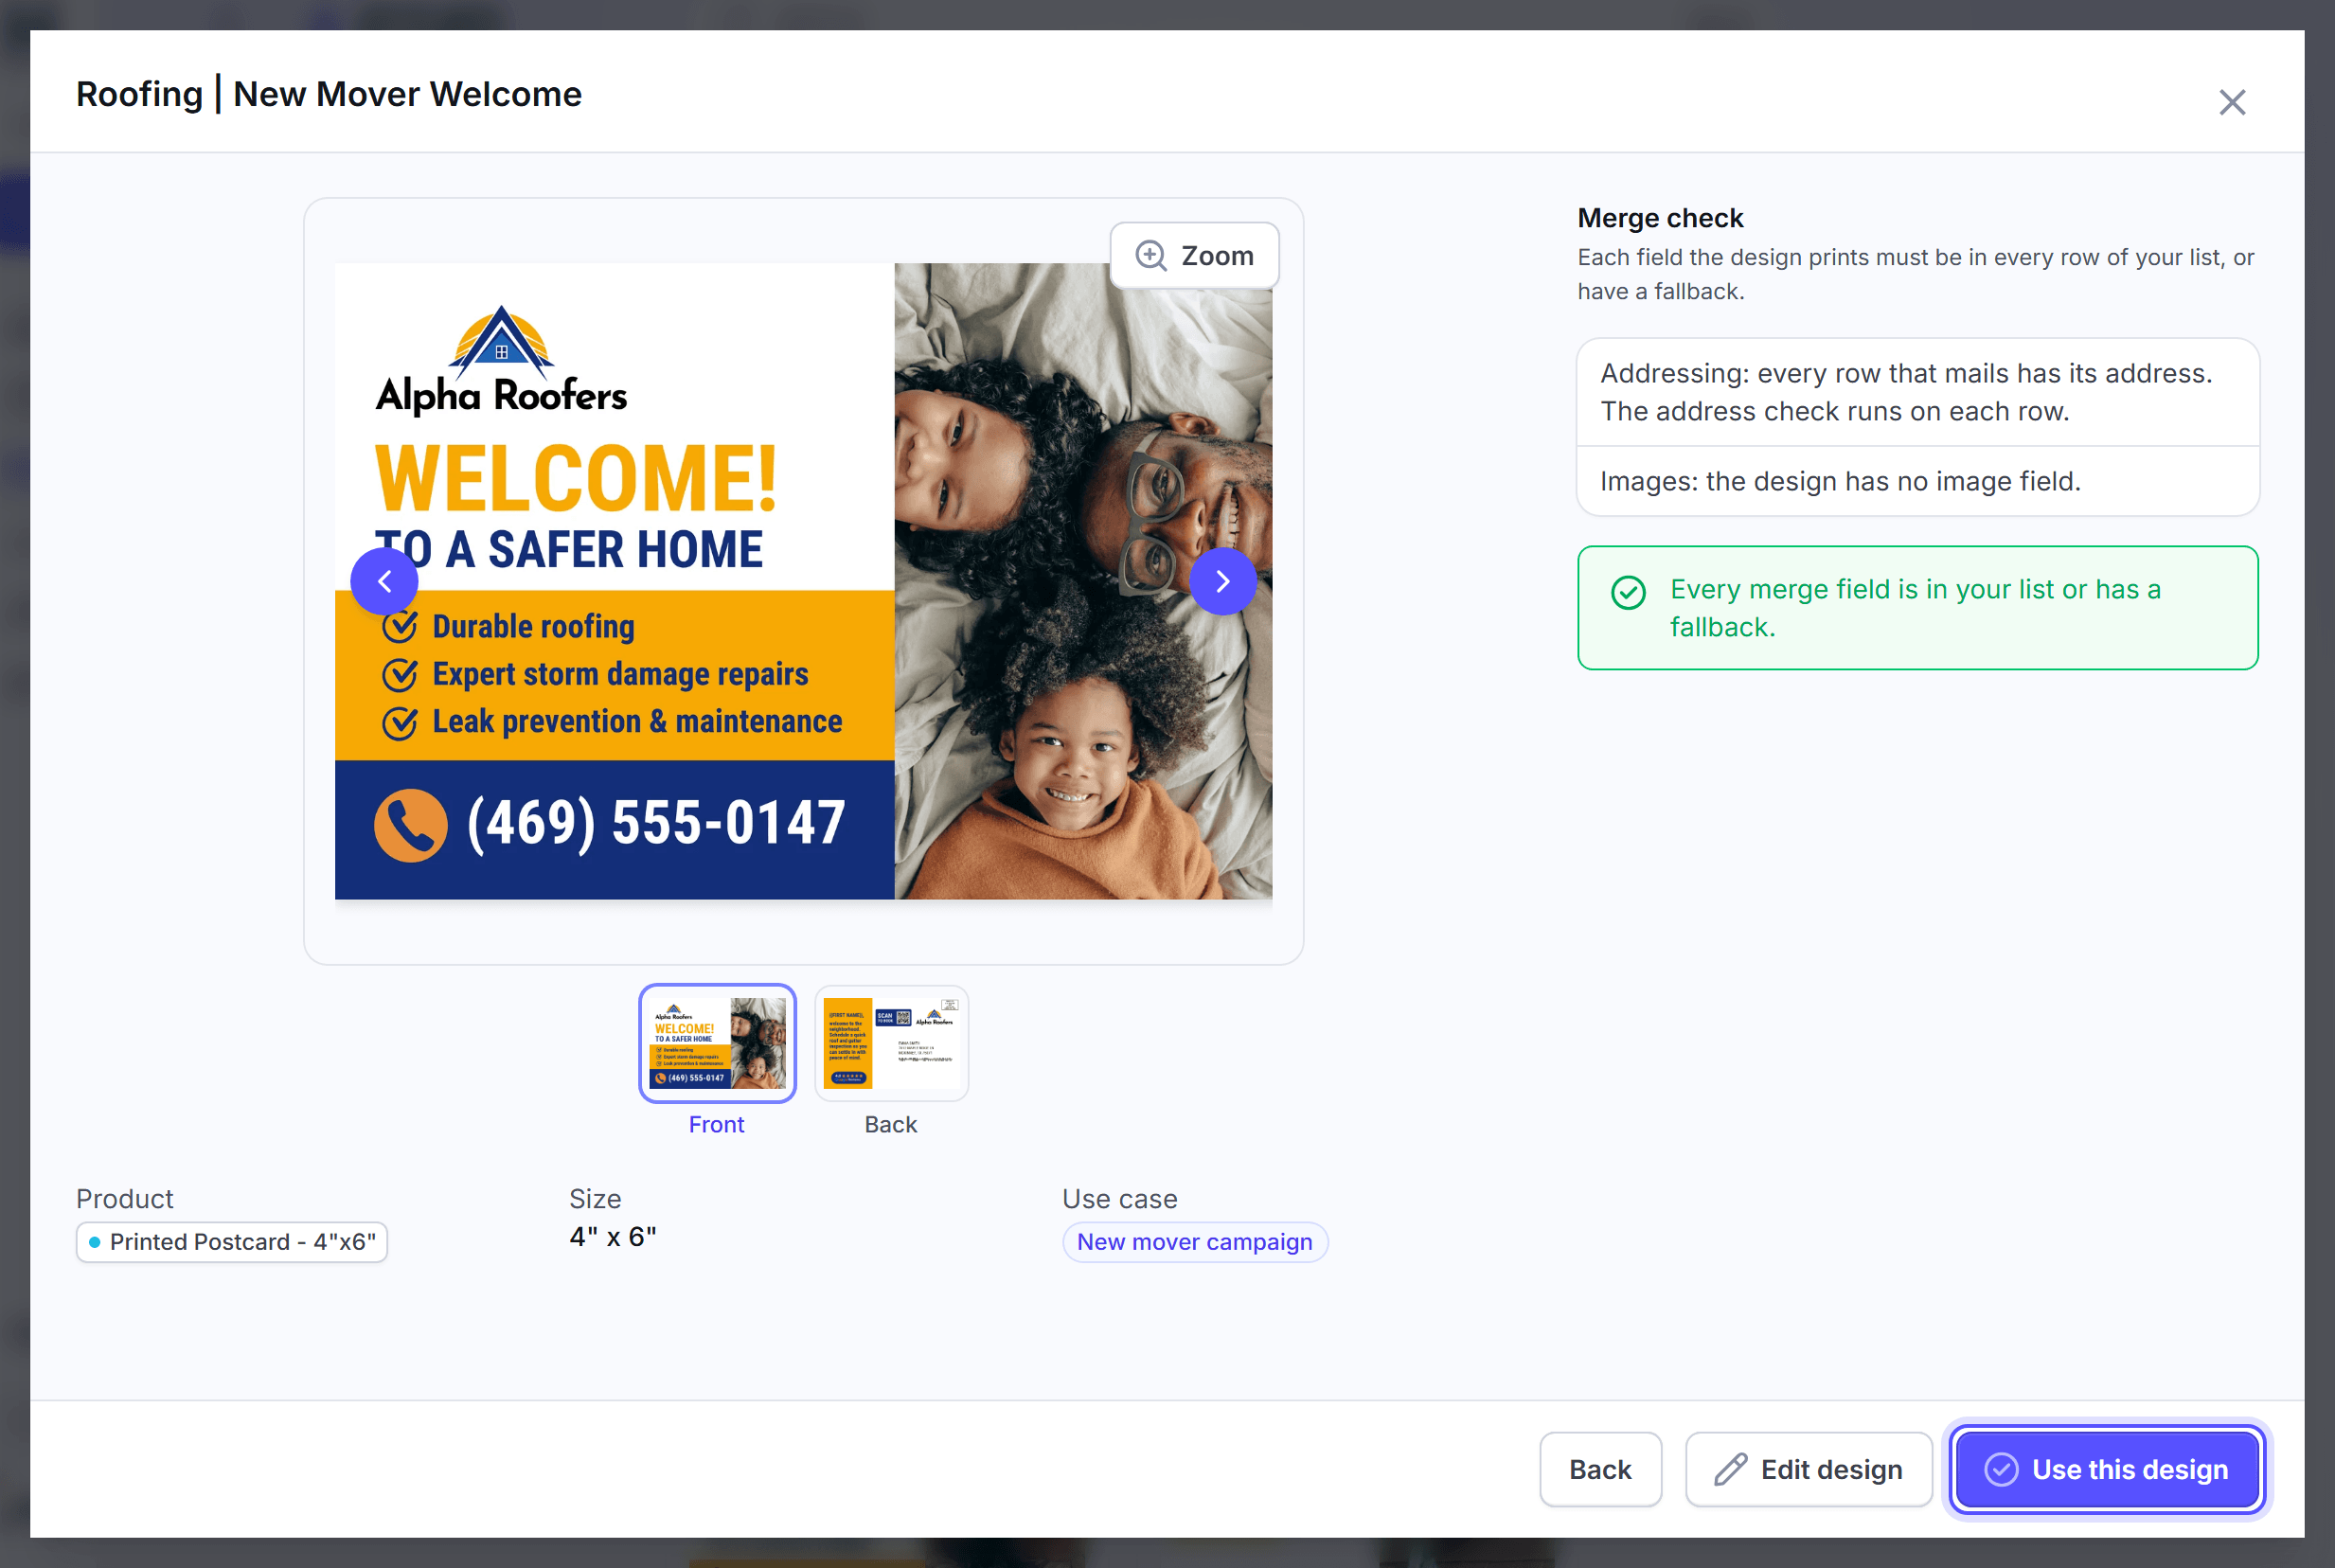
Click Use this design. The card of the touch shows the design and its postage.
On the card of the touch, click the postage. Then select Standard or First Class.
Click Next. The Measurement step opens.
To make a template here, click New template in the template picker. A template with no saved design shows "Your design is incomplete", and you cannot pick it. Click Edit Design, finish and save the design, then pick the template again.
The table lists the two postage choices.
| Postage | Delivery time | Price |
|---|---|---|
| Standard | 10 to 14 business days | Included |
| First Class | 3 to 5 business days | Costs more per card |
Step 4: Keep the measurement defaults
The Measurement step sets how LettrLabs counts the results of the mail. For a first campaign, keep the defaults.
Read the default settings.
Click Next. The Budget step opens.
Step 5: Choose the speed, the date and the name
The Budget step of a one-time campaign has three panels: Mailing and timing, Schedule and budget and Review. LettrLabs asks for the name after you click Go to checkout.
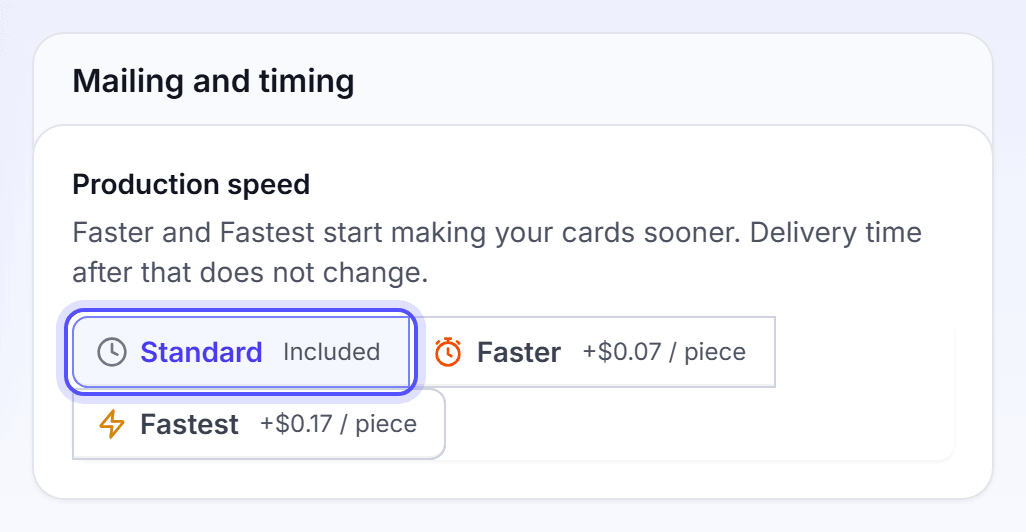
In Mailing and timing, under Production speed, select Standard.
Click Next. The Schedule and budget panel opens.
Under Send date, select the day that the mail goes to print. Or click Pick a date.
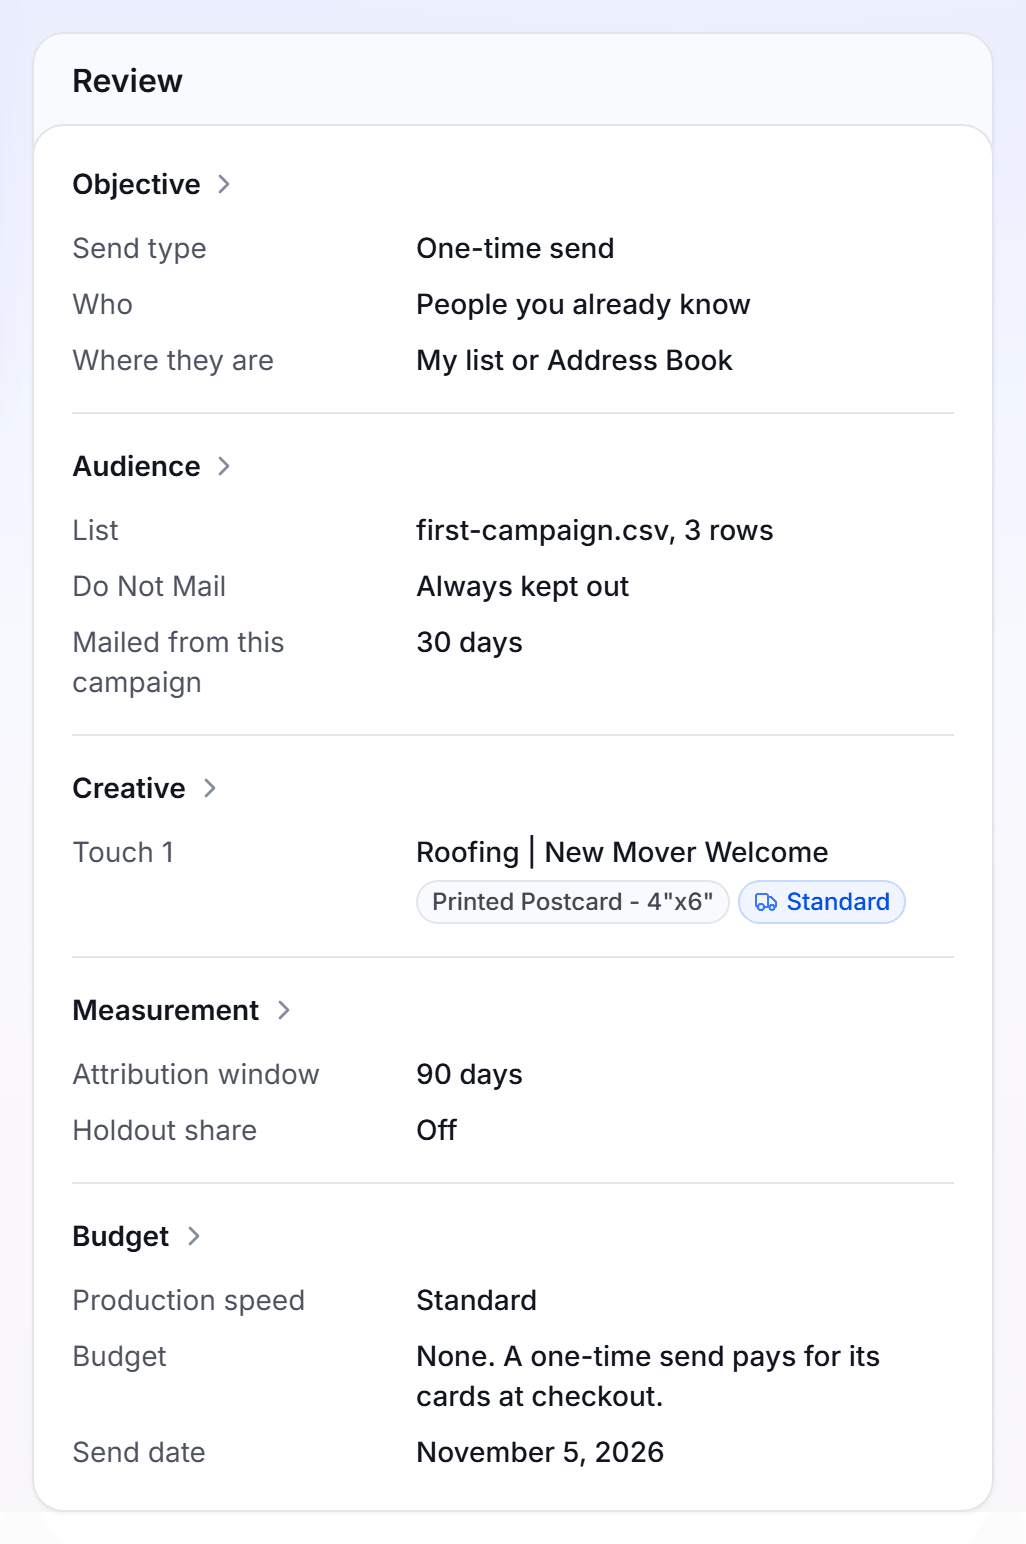
Click Next. The Review panel opens. It reads back each setting of the campaign.
Click Go to checkout. The Name your campaign dialog opens.
In Name, enter My first campaign. Then click Go to checkout. The checkout opens.
Faster and Fastest production speeds cost more. They start to make your cards sooner. The delivery time after that does not change.
Step 6: Pay and place the order
The checkout shows the order at the left and the payment at the right.
Read the order summary and Total due.
Under Address checks, read each warning. Remove the address, or select I approve to send to unverified addresses.
Under Payment, select a payment method. To add one, click Add a payment method.
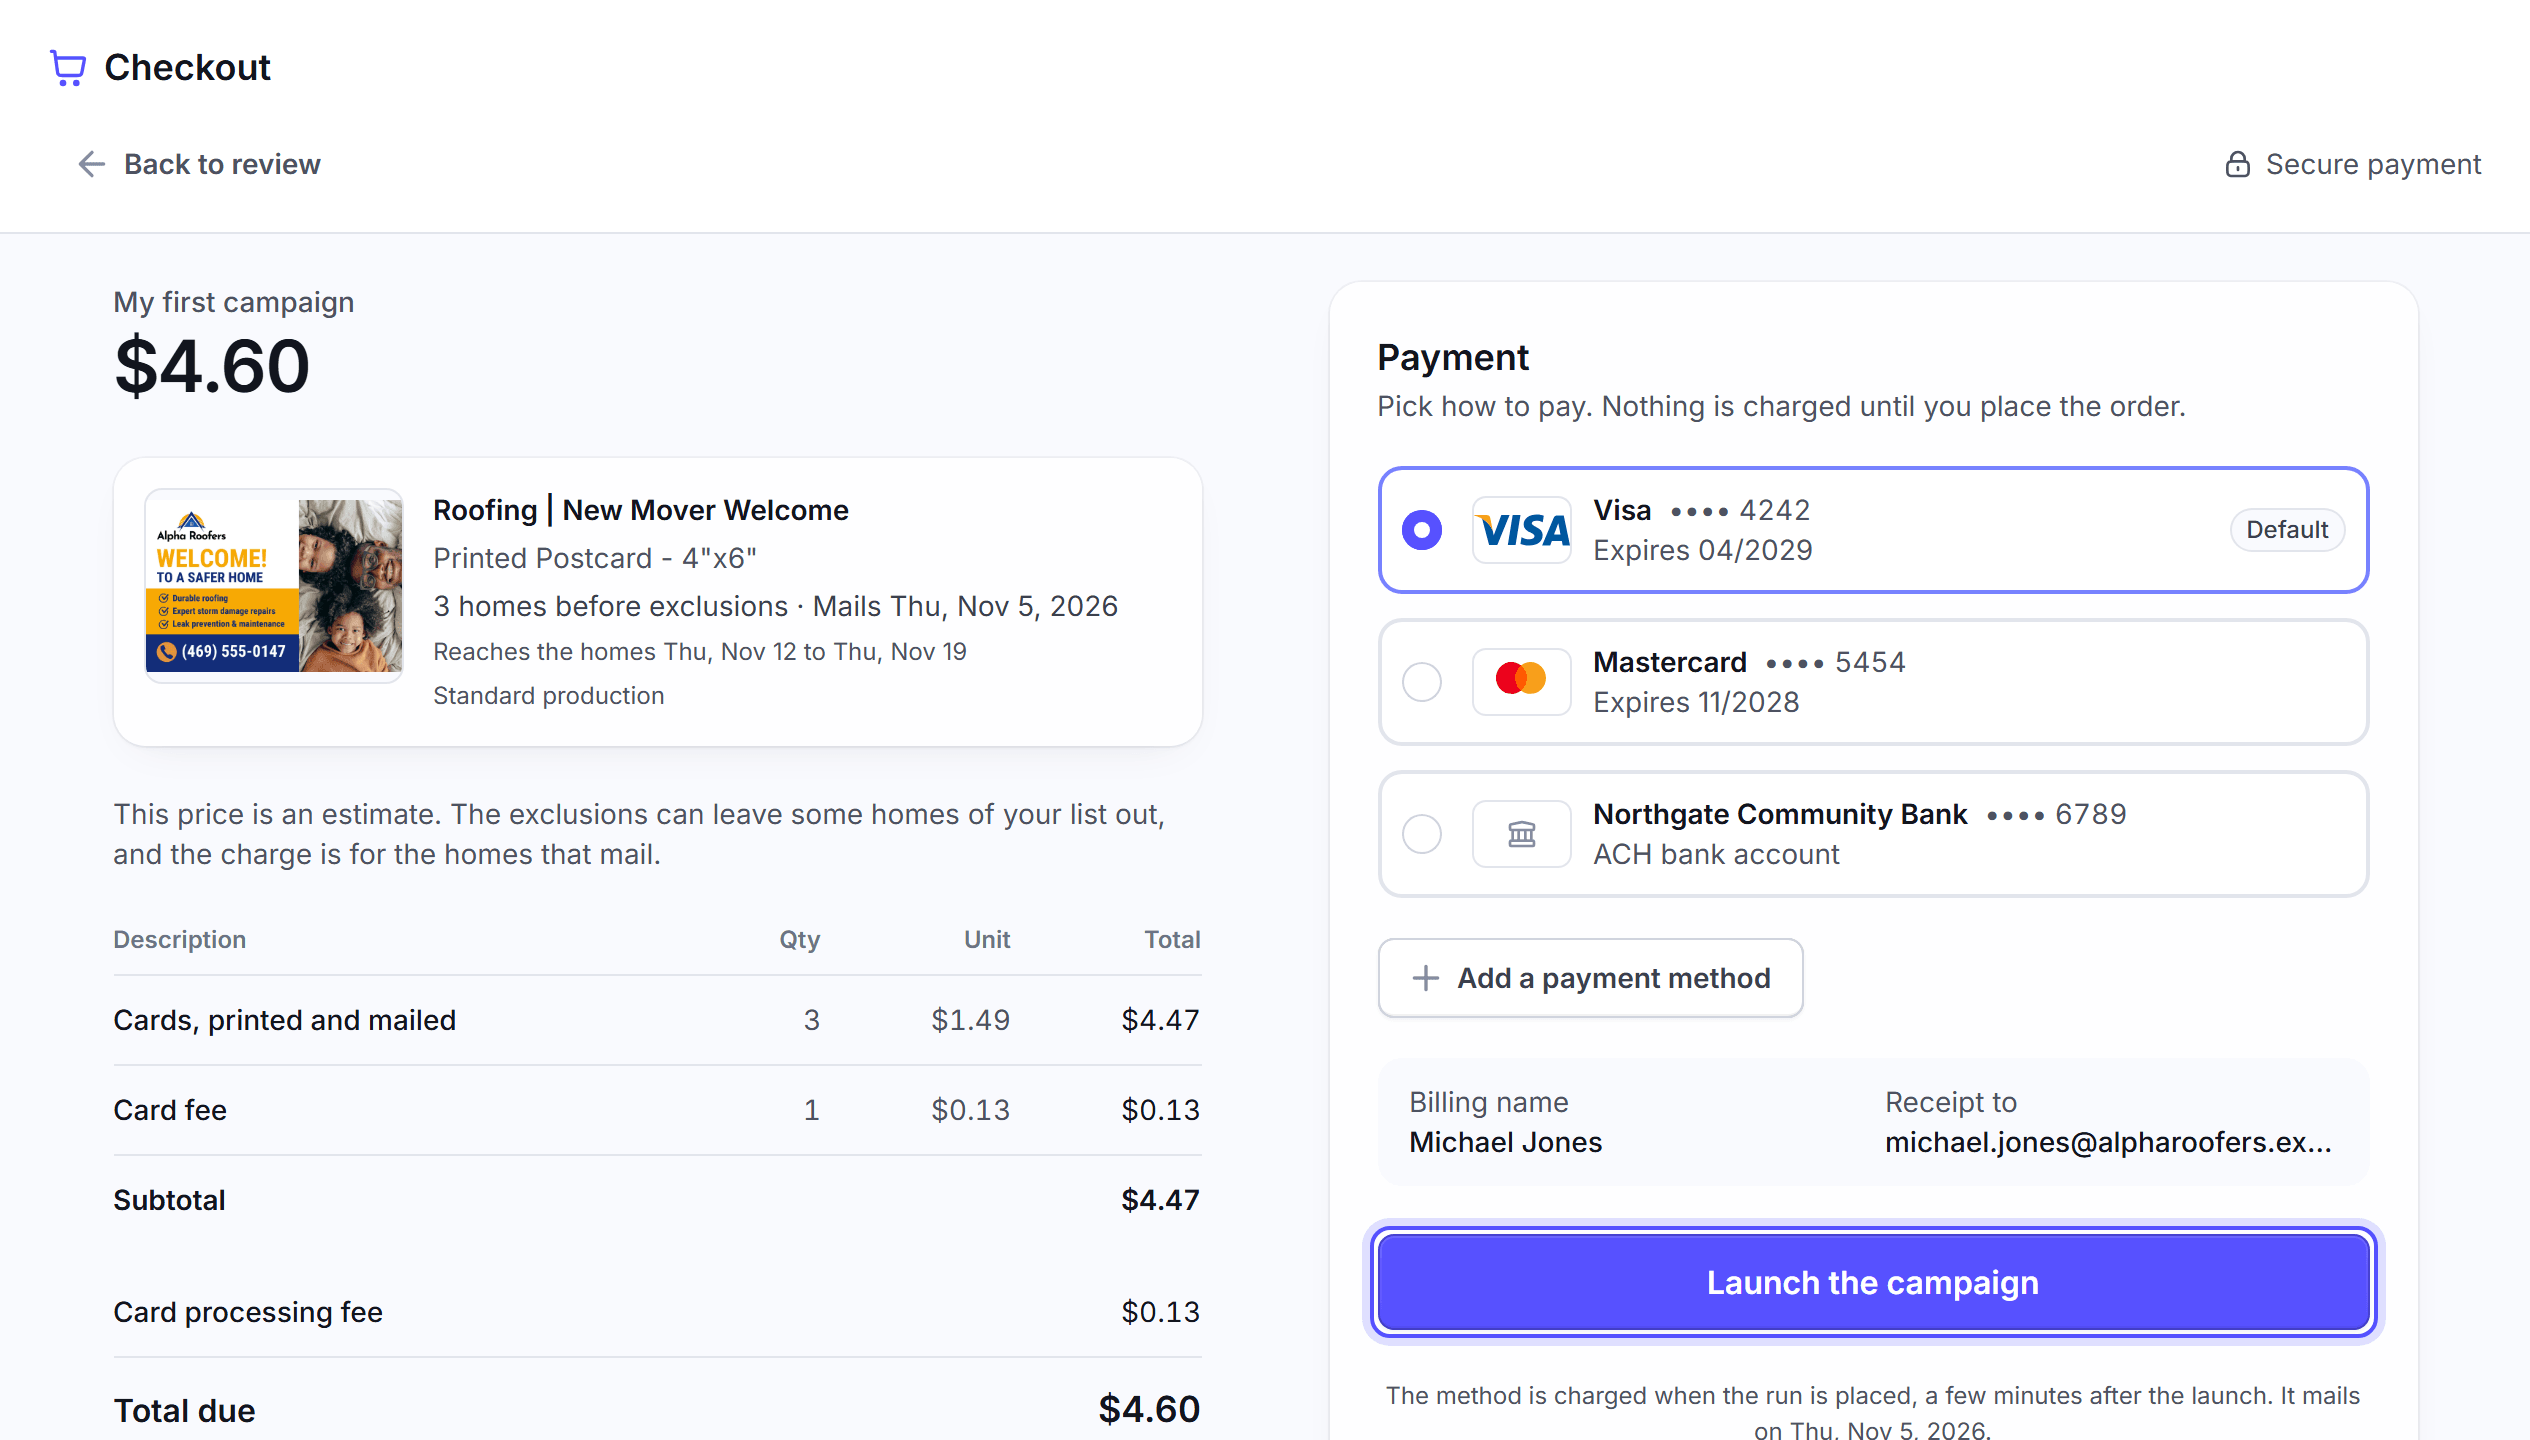
Click Launch the campaign. The message reads "My first campaign is launched".
Click View the campaign. The campaign page opens.
Nothing is charged until you click Launch the campaign. To change a setting first, click Back to review.
You're done when My first campaign shows on the One-time tab of Campaigns. LettrLabs charges the order at launch. Production starts on the send date. Standard postage arrives in 10 to 14 business days, and First Class in 3 to 5.
To check the order, open these places:
- The Recipients tab of the campaign page shows the number of recipients.
- Settings > Transactions, in the Billing group, shows the charge for the order.
FAQ
Related
Campaigns
Read the results of your campaign and manage it.
Templates
Make the card design that your campaign mails.
Postage and checkout
Choose postage and production speed, and pay.
Steps checked 2026-11-16.