Attribution Data
See each sale that counts for your mail, and add your own sales.
Overview
Attribution Data lists the records that each source sends to LettrLabs, such as jobs, estimates, invoices and orders. Each record shows whether it counts for your mail, and for which campaign. Use it to check a number on a dashboard against the records under it.
You can use Attribution Data to:
- See the records of each source, with their attribution.
- See why a record counts for your mail, or why it does not.
- Add your sales or leads from a CSV file, the API, Zapier or an integration.
- Export the records to a CSV file.
The CSV Upload, Webhooks and API / Zapier tabs always show. A tab for ServiceTitan, AccuLynx or Shopify shows after you connect that source.
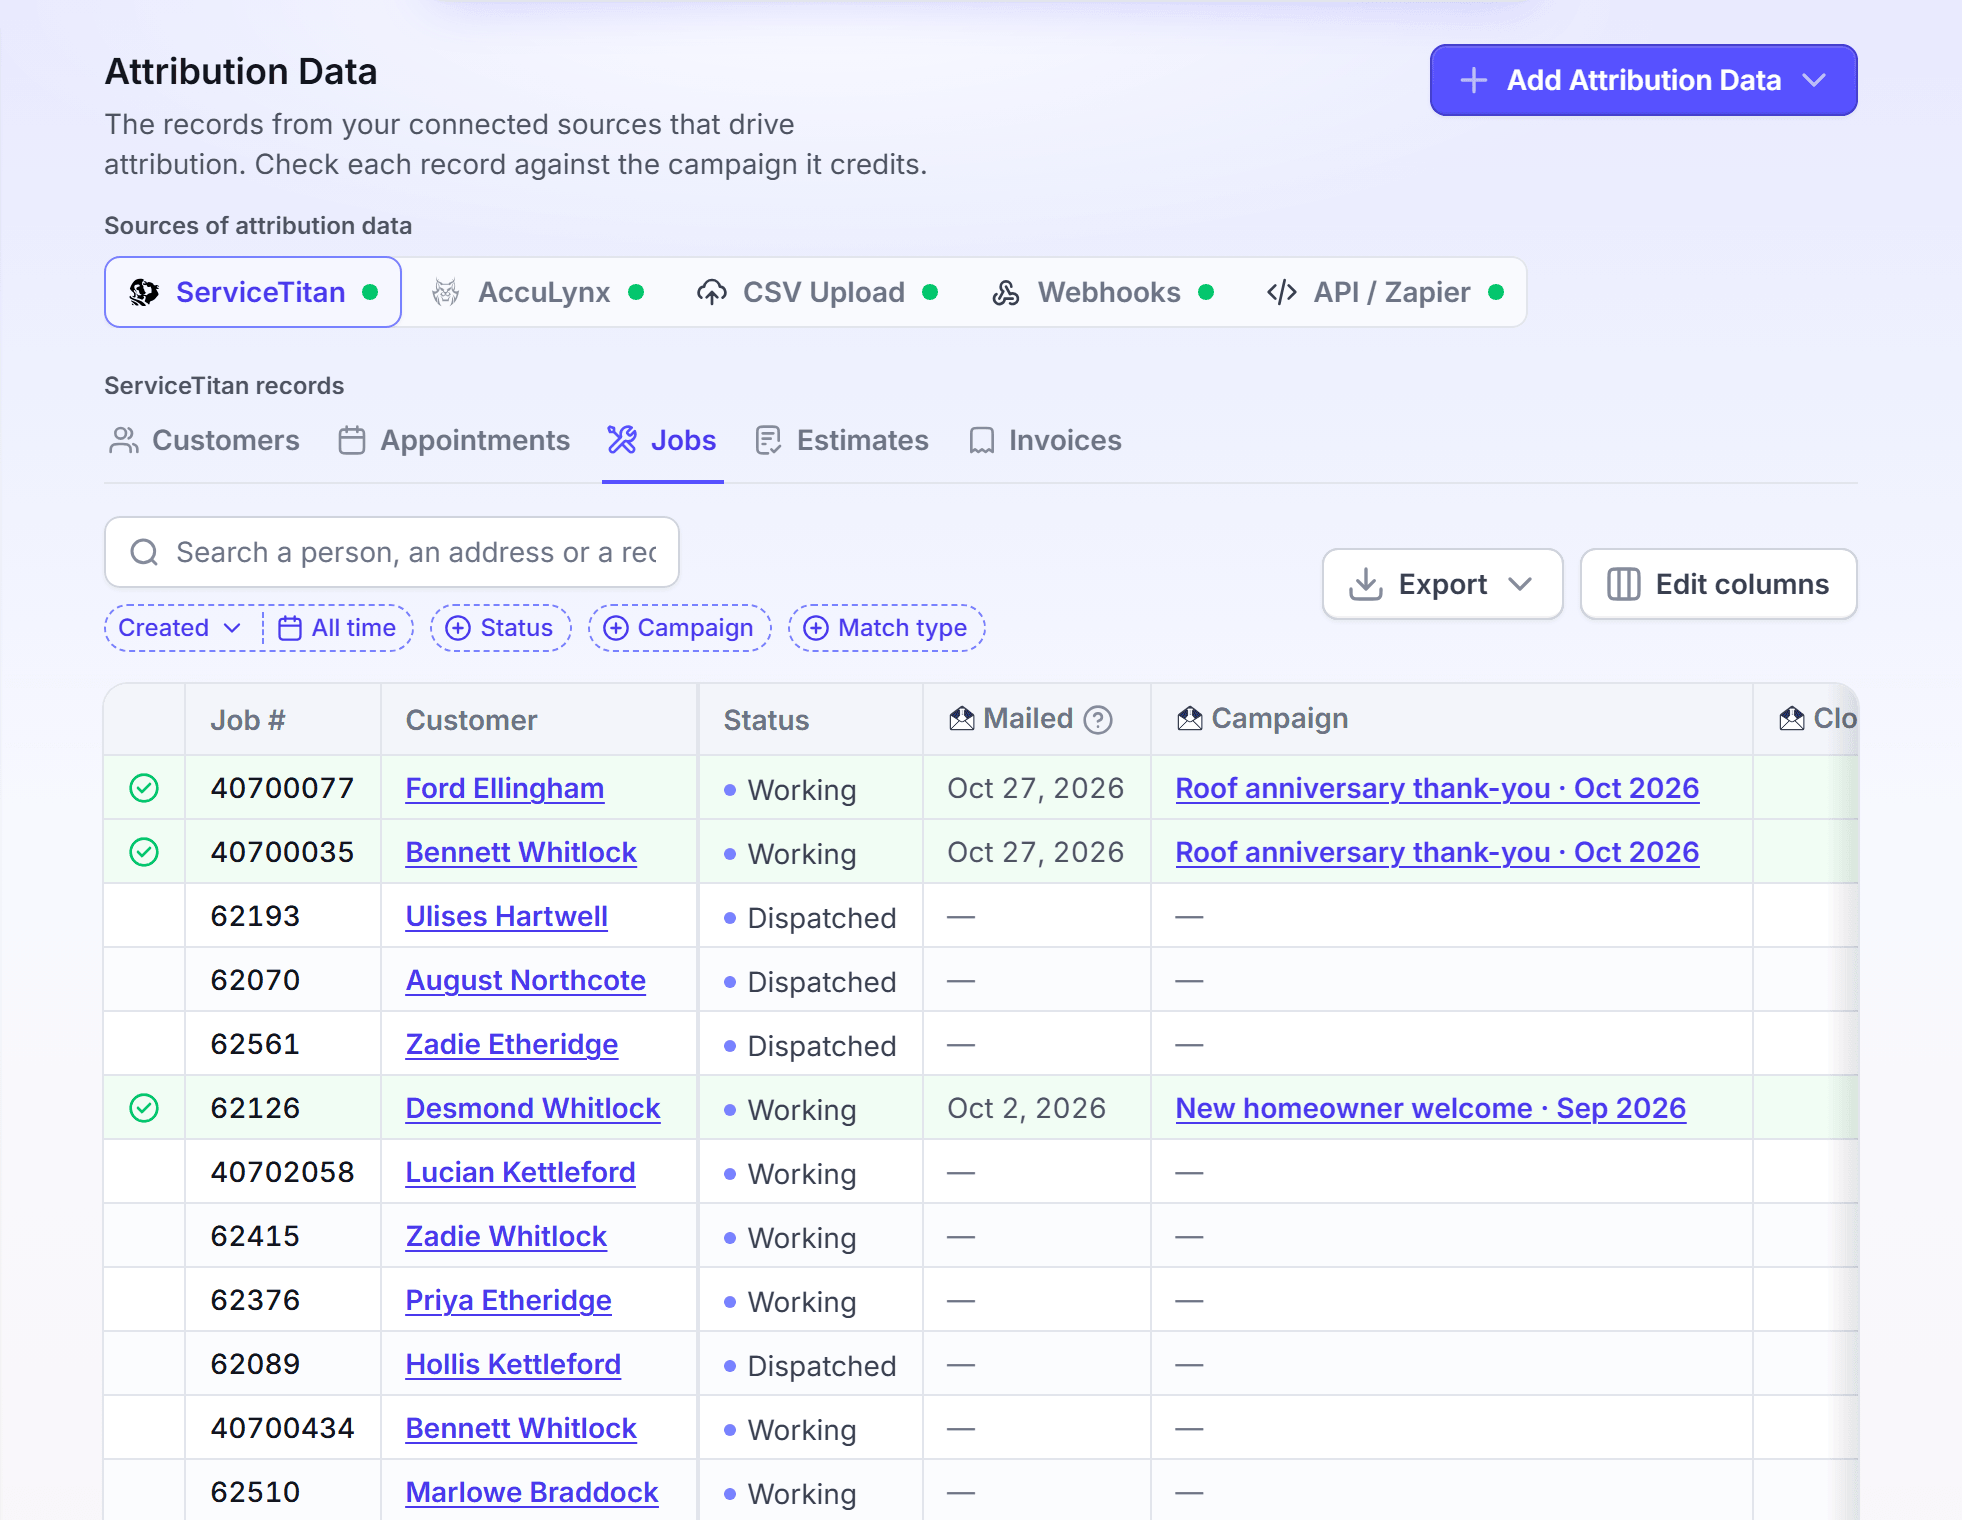
Where the records come from
Each source gives LettrLabs its records in its own way. Click Add Attribution Data to start with a source.
| Source | How it sends records | Item of Add Attribution Data |
|---|---|---|
| Upload a CSV | You upload a file of your sales or leads. | Upload CSV Attributions |
| Send by the API | Your own system sends each sale or lead with an API key. | Configure API |
| Integrations | LettrLabs reads a connected integration each day. | Connect Integration |
| Webhooks | Not available yet. | None |
| Zapier | A Zap sends each sale with the Send Purchase Event action. | None. Set it up in Zapier. |
Upload CSV Attributions opens the CSV Uploads tab of CSV Upload. Configure API opens the Send by the API drawer. Connect Integration opens the Integrations page. Create New Webhook opens the Inbound webhooks page, where a webhook can mail people but cannot count sales.
Browse the records of a source
Browse the records when you want to see what a source sent, and which records count for your mail.
In the left navigation, under Measurement, click Attribution Data.
Under Sources of attribution data, click the tab of a source, for example ServiceTitan.
Click a record type, for example Jobs, Estimates, Invoices or Customers. The CSV Upload, Webhooks and API / Zapier tabs show Attribution Records. CSV Upload also shows CSV Uploads, and Webhooks also shows Webhook Events.
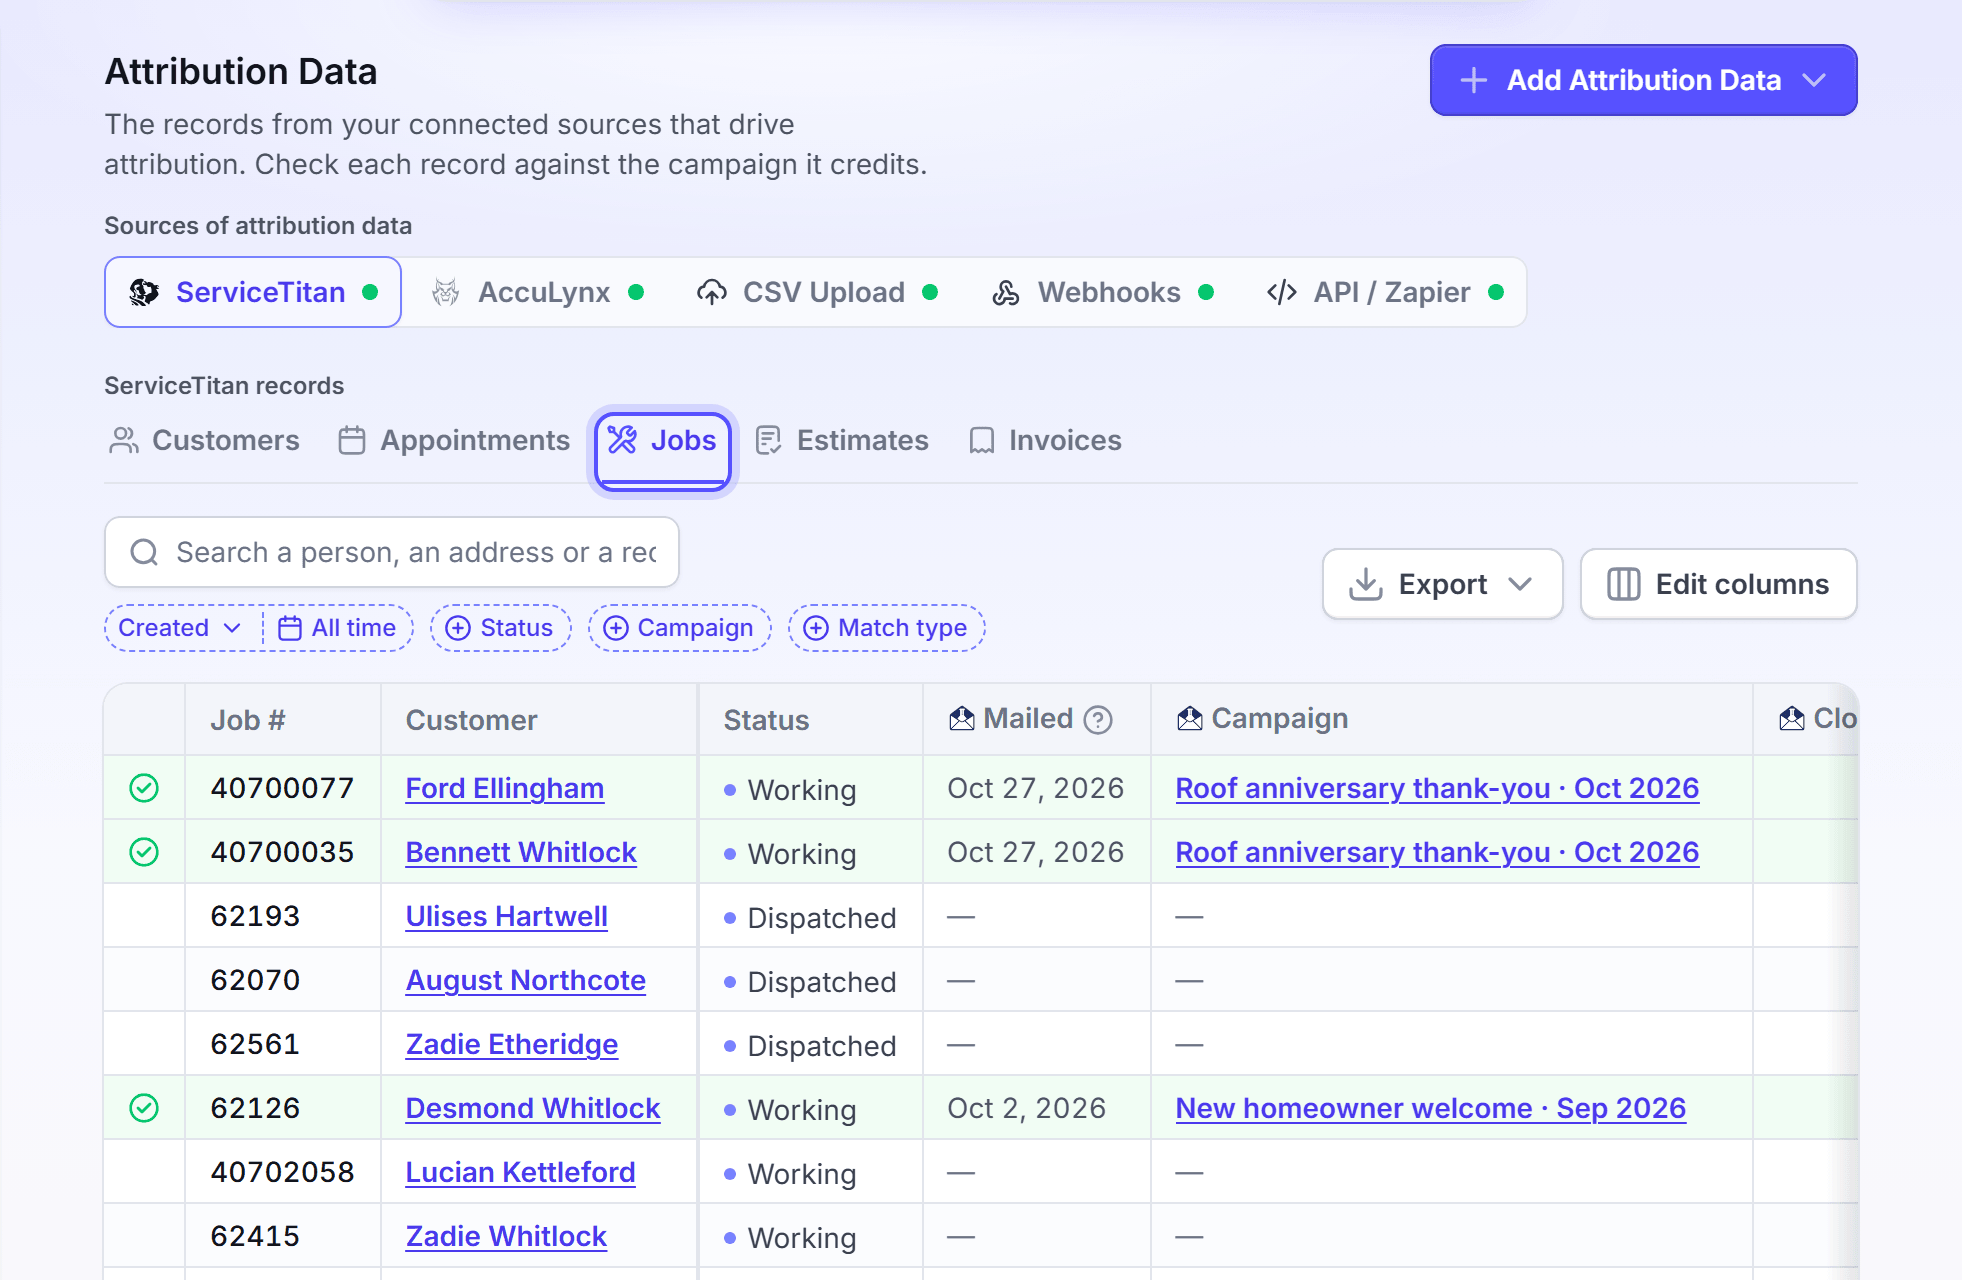
Read the mark in the first column. A solid green check is Generated. A green outline check is Influenced. A row with no mark is Not attributed. Hold the pointer on a mark to read the state.
The dot beside a source name shows the health of that source. A source that lost its connection shows Disconnected.
You're done when the table shows the records of the source. Reading the records changes nothing.
See why a record counts for your mail
Open a record to see its attribution. What the drawer shows depends on the source of the record.
In the table, click a row. The record drawer opens.
Read the Record section. It shows the fields of the record.
The table lists what the drawer shows for each kind of record.
| Record | What the drawer shows |
|---|---|
| A ServiceTitan job, estimate, invoice or appointment, or an AccuLynx job | The Record section only. Its Attribution, Campaign and Mail delivered fields give the result. |
| A customer, on the Customers record type of a source | The Record section only. |
| A webhook event or a call to LettrLabs | The Payload or the Request body, and Rows it created. |
| A record of another source, such as a Shopify order or a CSV upload row | The Record section and the Attribution trail. |
The Attribution trail lists each mail piece sent to the address, with its campaign and its dates. Each piece shows In the window or Outside the window. A piece with no USPS tracking counts its window from the order date. Its line reads "Counted from", then the order date, then "(order date, no USPS tracking)". Under the list, Attribution window and Decision show. The decision shows the attribution state with the campaign, or the reason that the record is not attributed.
The window in the trail is the account window from Settings > Measurement. To change it, see How attribution works.
Filter the records
Filter the records to find one group, for example the jobs that one campaign generated.
Click the date chip. Select the date that the range reads, such as Created or Completed. Then pick the start and end dates.
To filter by the status in your source, click Status and select the values.
To see one campaign, click Campaign and select the campaign.
To see attributed records only, click Match type. Select Generated, Influenced or both.
To find one record, type a person, an address or a record number in the search box.
You're done when the table shows only the records that match. If no record matches, the table reads "No records match".
Choose columns and export
Change the columns to see the fields you need. Export the records to work with them in a spreadsheet.
Click Edit columns.
Select or clear the columns under LettrLabs fields and the fields of the source.
To export, click Export.
Click Export this page to get the rows that show. Or click the item for all rows of the record type, for example Export all jobs.
For all rows, the export dialog opens. Under Date range, select Today, Last 7 days, Last 4 weeks, Last 90 days, Current month, Last month, All or Custom. Then click Export.
The CSV file holds the columns that show. The export of all rows keeps your filters and your search. One export holds 100,000 rows at most. If the range holds more rows, select a shorter range.
On the CSV Upload, Webhooks and API / Zapier tabs, the first item reads Export the current view. The item for all rows downloads the file at once, with no dialog.
LettrLabs keeps your columns for each source and record type, in this browser only.
FAQ
Related
Upload a CSV
Upload a file of your sales or leads.
Send by the API
Send your sales from your own system.
How attribution works
Learn how LettrLabs matches a sale to your mail.
Steps checked 2026-11-16.