Upload a CSV
Upload a CSV file of your sales or leads, so attribution can count them.
Overview
Upload a CSV file when your sales or leads are not in a connected source. An example is an export from your CRM. LettrLabs matches each row to the mail you sent, and the rows then count in attribution.
You can use a CSV upload to:
- Give LettrLabs the sales or leads of a system with no integration.
- See how many rows were valid, and how many matched your mail.
- See why LettrLabs refused a row.
- Delete an upload that holds the wrong file.
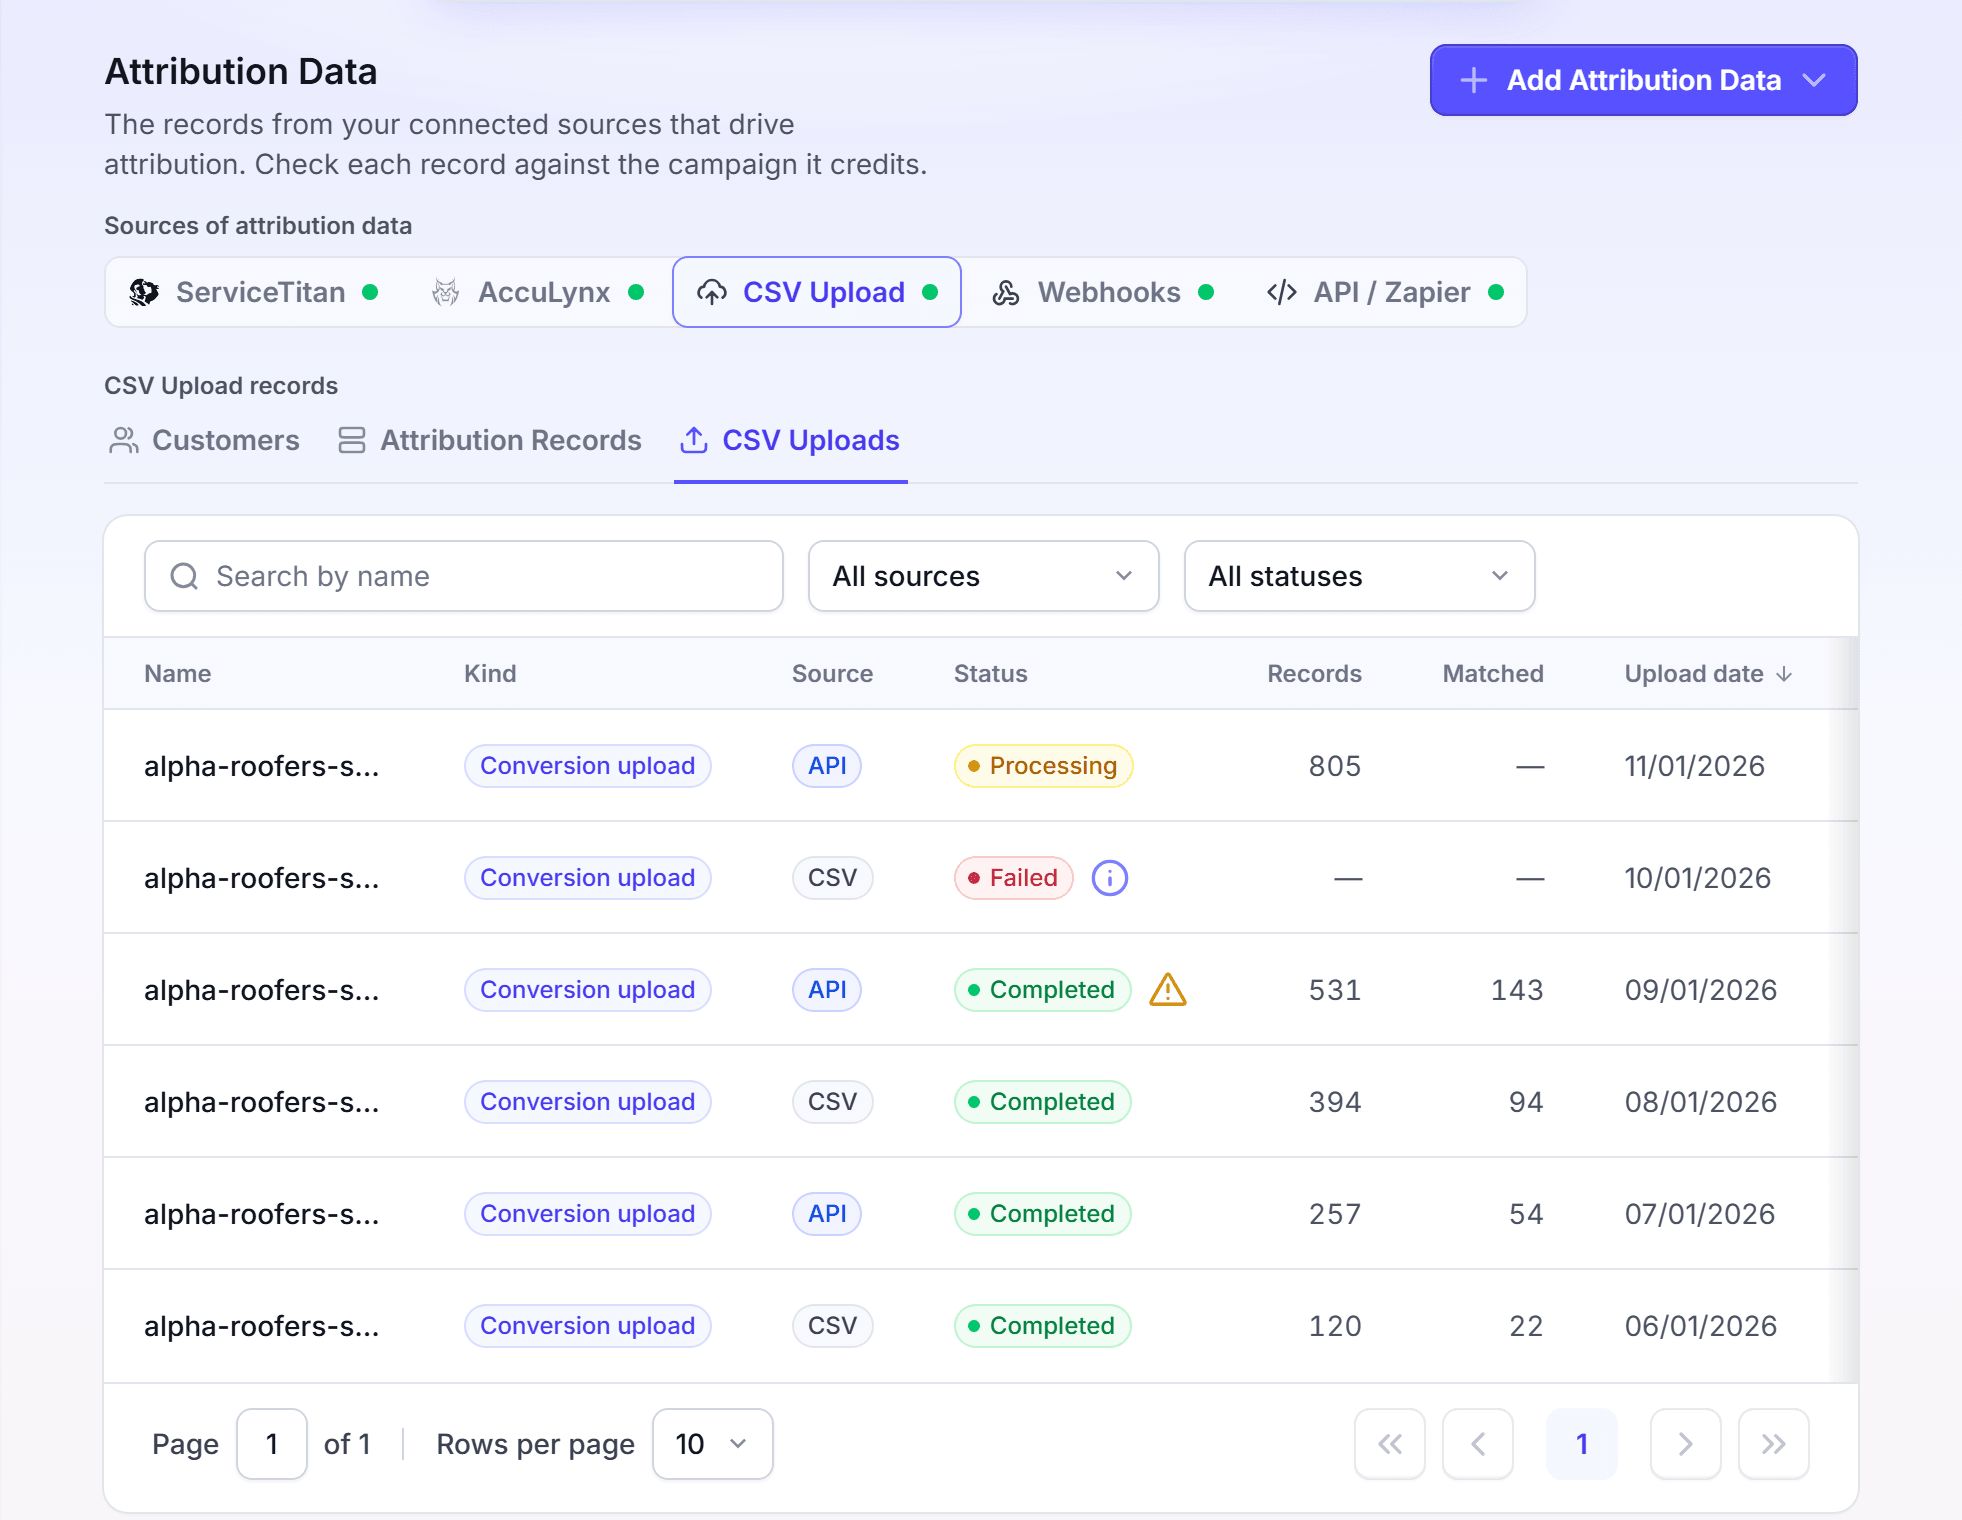
The uploads are on the CSV Uploads tab of the CSV Upload source in Attribution Data. The same table lists the batches that your system sends by the API.
What a row must hold
Each row is one sale or one lead. A row must hold one identifier, so that LettrLabs can find the household that got your mail.
| Identifier | The columns to fill |
|---|---|
| A full address | FullAddress |
| An address in parts | Address1 and ZipCode, or Address1, City and State |
| An email | PrimaryEmail or SecondaryEmail |
| A phone number | PrimaryPhoneNumber or SecondaryPhoneNumber |
| A discount code | CouponCode |
A secondary address (SecondaryAddress1 and the other secondary columns) also counts as an identifier. A row with no identifier is refused.
The file can also hold these columns:
- The name: FirstName, LastName, FullName or BusinessName.
- Revenue: the value of the sale. Leave it empty for a lead.
- Type: Conversion for a sale, or Lead.
- EventDate: the date of the sale or the lead. An empty date reads as the day of the upload.
- Your own ids: OrderId, StoreId, UniqueId, CrmId and CustomerId.
A conversion with no revenue is stored as a lead. A revenue over $100,000,000 is refused, because it is almost always an id in the wrong column.
The importer shows its own names for these columns. Match each column of your file to the field that the importer asks for.
Upload your sales or leads
Upload one file of sales or leads at a time. You can upload a new file each time your CRM has new sales.
In the left navigation, under Measurement, click Attribution Data.
Click Add Attribution Data, then click Upload CSV Attributions. The CSV Uploads tab of CSV Upload opens.
In the empty table, click Upload a CSV. The importer opens.
Select your file. Match the columns of your file to the fields that the importer asks for.
Complete the import.
You're done when the message "Upload received — processing your conversions." shows, or the same message with the number of rows. The upload shows on the CSV Uploads tab with the status Processing. The status changes to Completed when LettrLabs has matched the rows to your mail.
Review an upload
Review an upload to see how many rows it held, and why a row was refused.
On the CSV Uploads tab, find the upload. Use Search by name, All sources or All statuses to find it.
Click the row. The upload drawer opens.
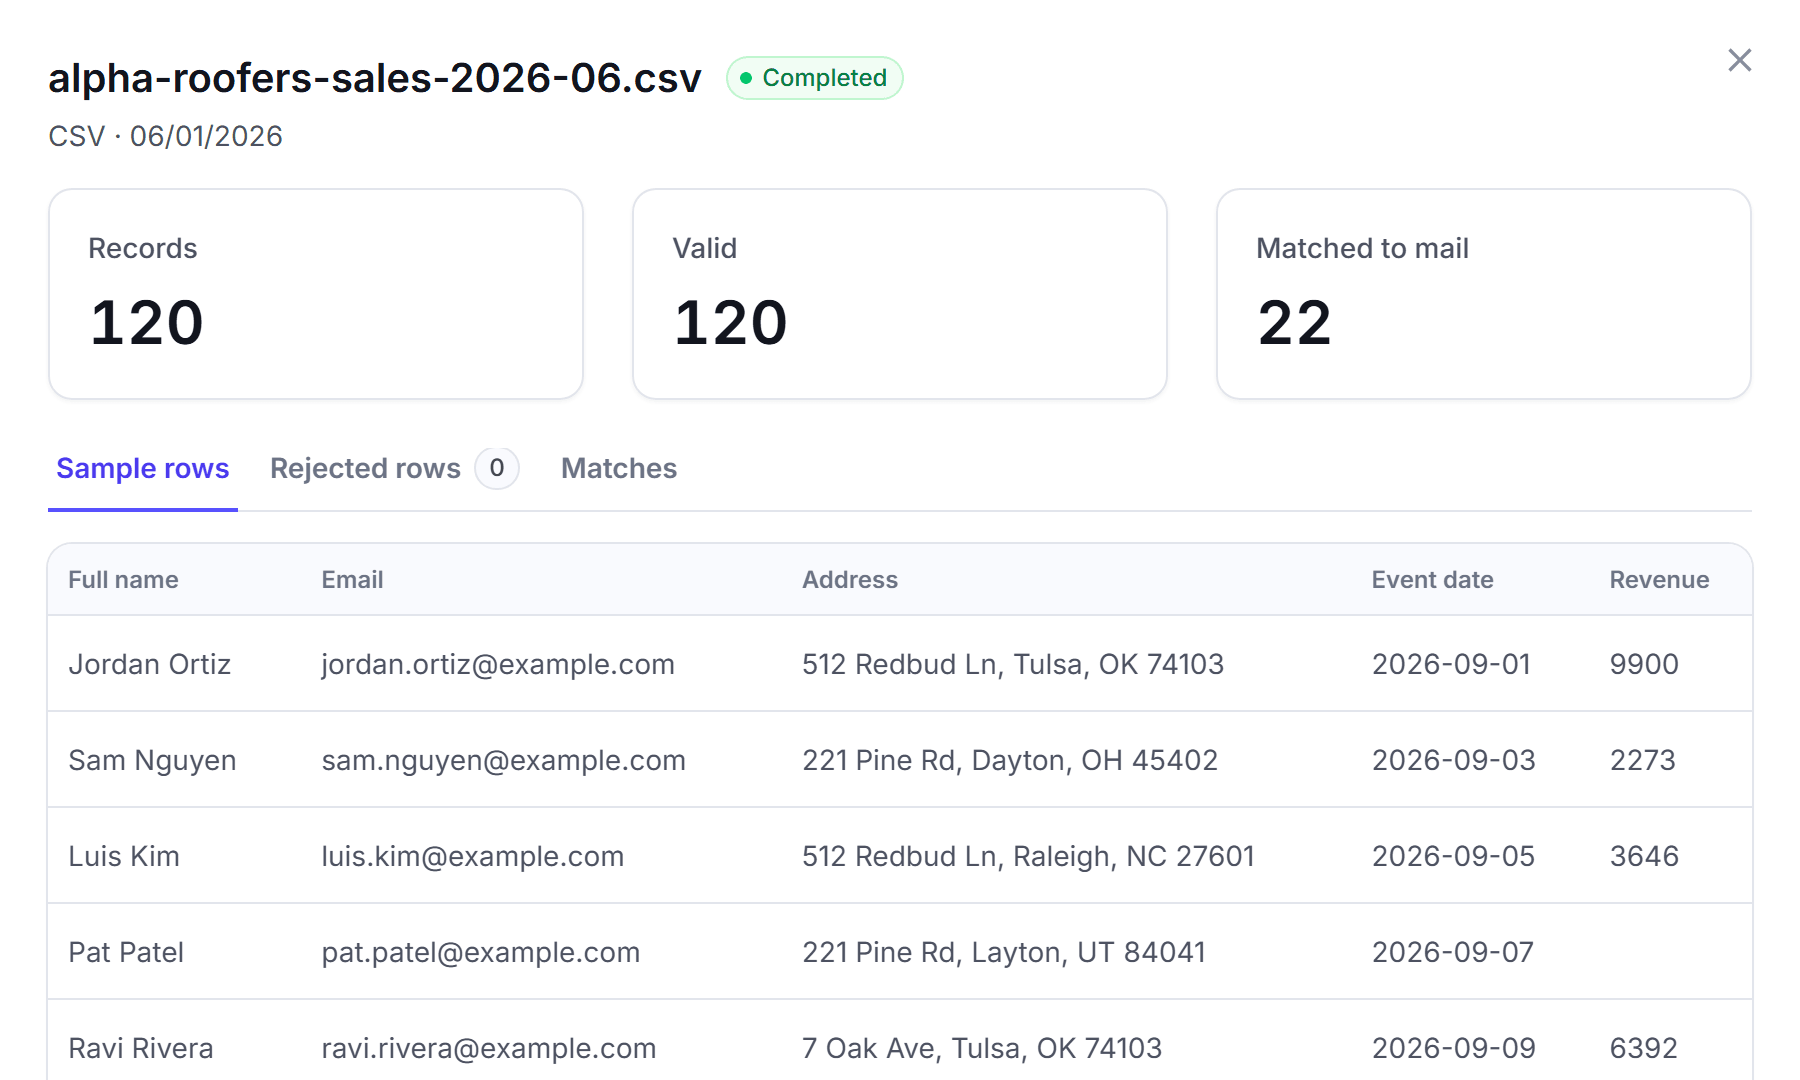
Read Records, Valid and Matched to mail.
Click Sample rows, Rejected rows or Matches to see the rows.
The upload statuses are Processing, Completed, Failed, Deleting and Deleted. A warning icon on a row tells you that LettrLabs refused some rows. A failed upload shows "Why the upload failed" with the reason. To get the file back, click the download icon on the row.
Delete an upload
Delete an upload when you uploaded the wrong file.
On the row of the upload, click the delete icon.
In the dialog, click Yes, I'm sure.
You cannot delete an upload while it processes.
FAQ
Related
Attribution Data
See each record and the campaign it credits.
Send by the API
Send your sales from your own system.
How attribution works
Learn how LettrLabs matches a sale to your mail.
Steps checked 2026-11-16.