Address Book
Keep the people you know in one place, and see what your mail did for each person.
Overview
The Address Book holds the people you know: your customers, your leads and your contacts. You can mail them from Send Mail without a file. LettrLabs also shows what your mail did for each person.
You can use the Address Book to:
- Add people one at a time, and edit or delete them.
- Find people by name, address, source or mail history.
- Tag people, and export them to a CSV file.
- Enrich people with a missing address or birthday.
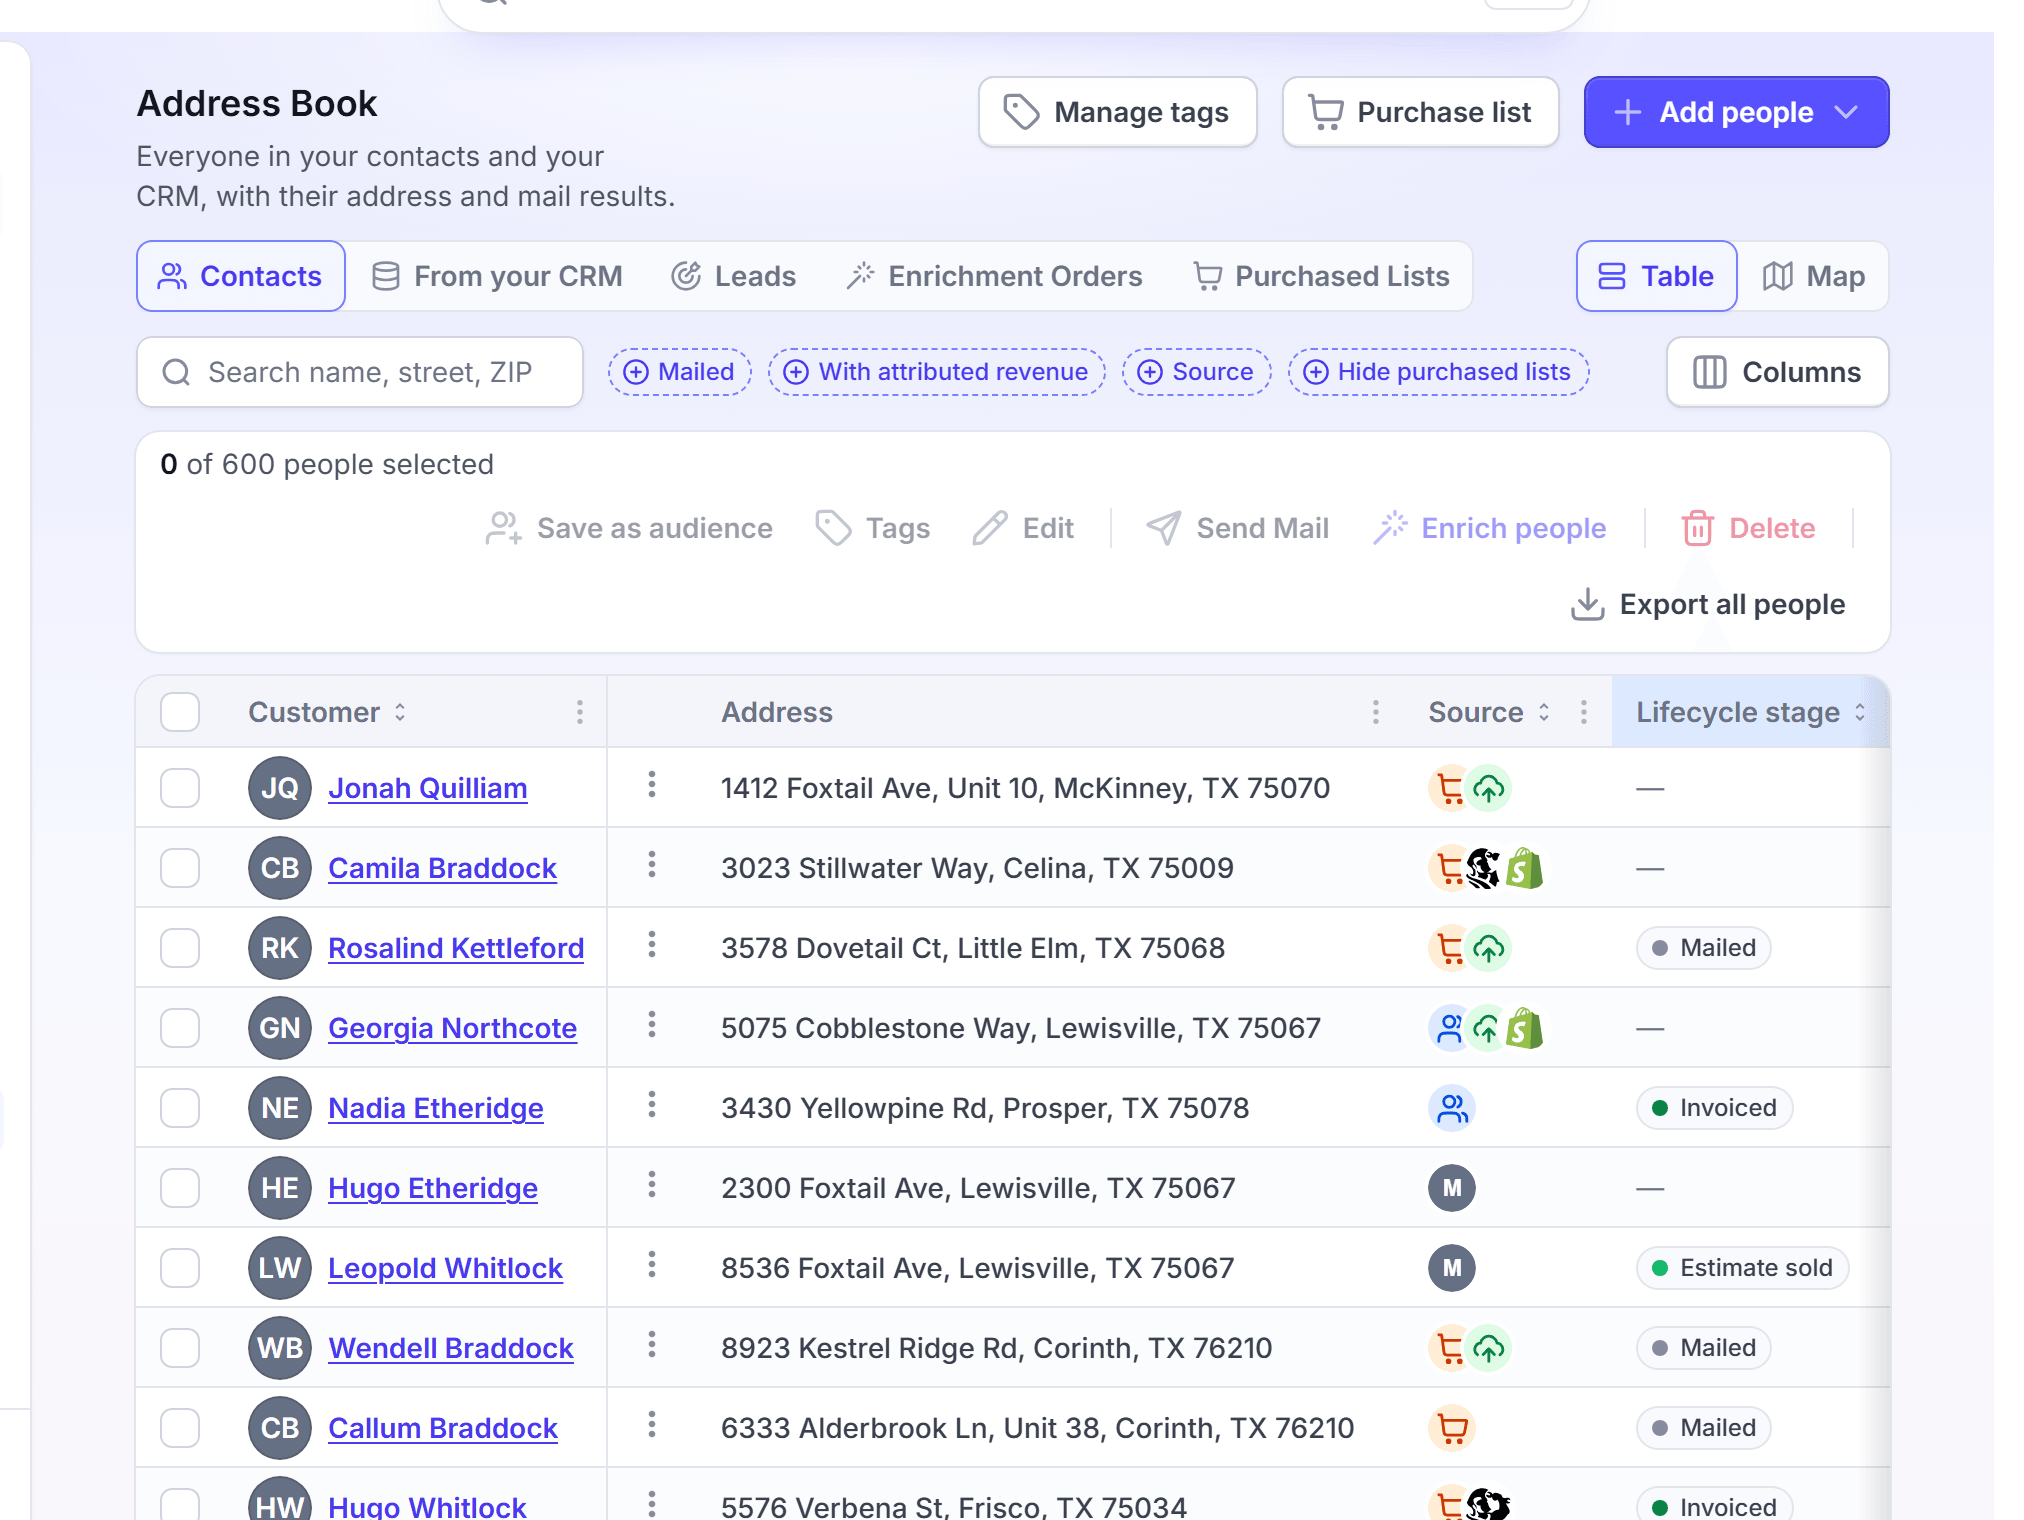
Add a person
Add a person by hand when you have one new customer or lead to mail.
In the left navigation, under Audiences, click Address Book.
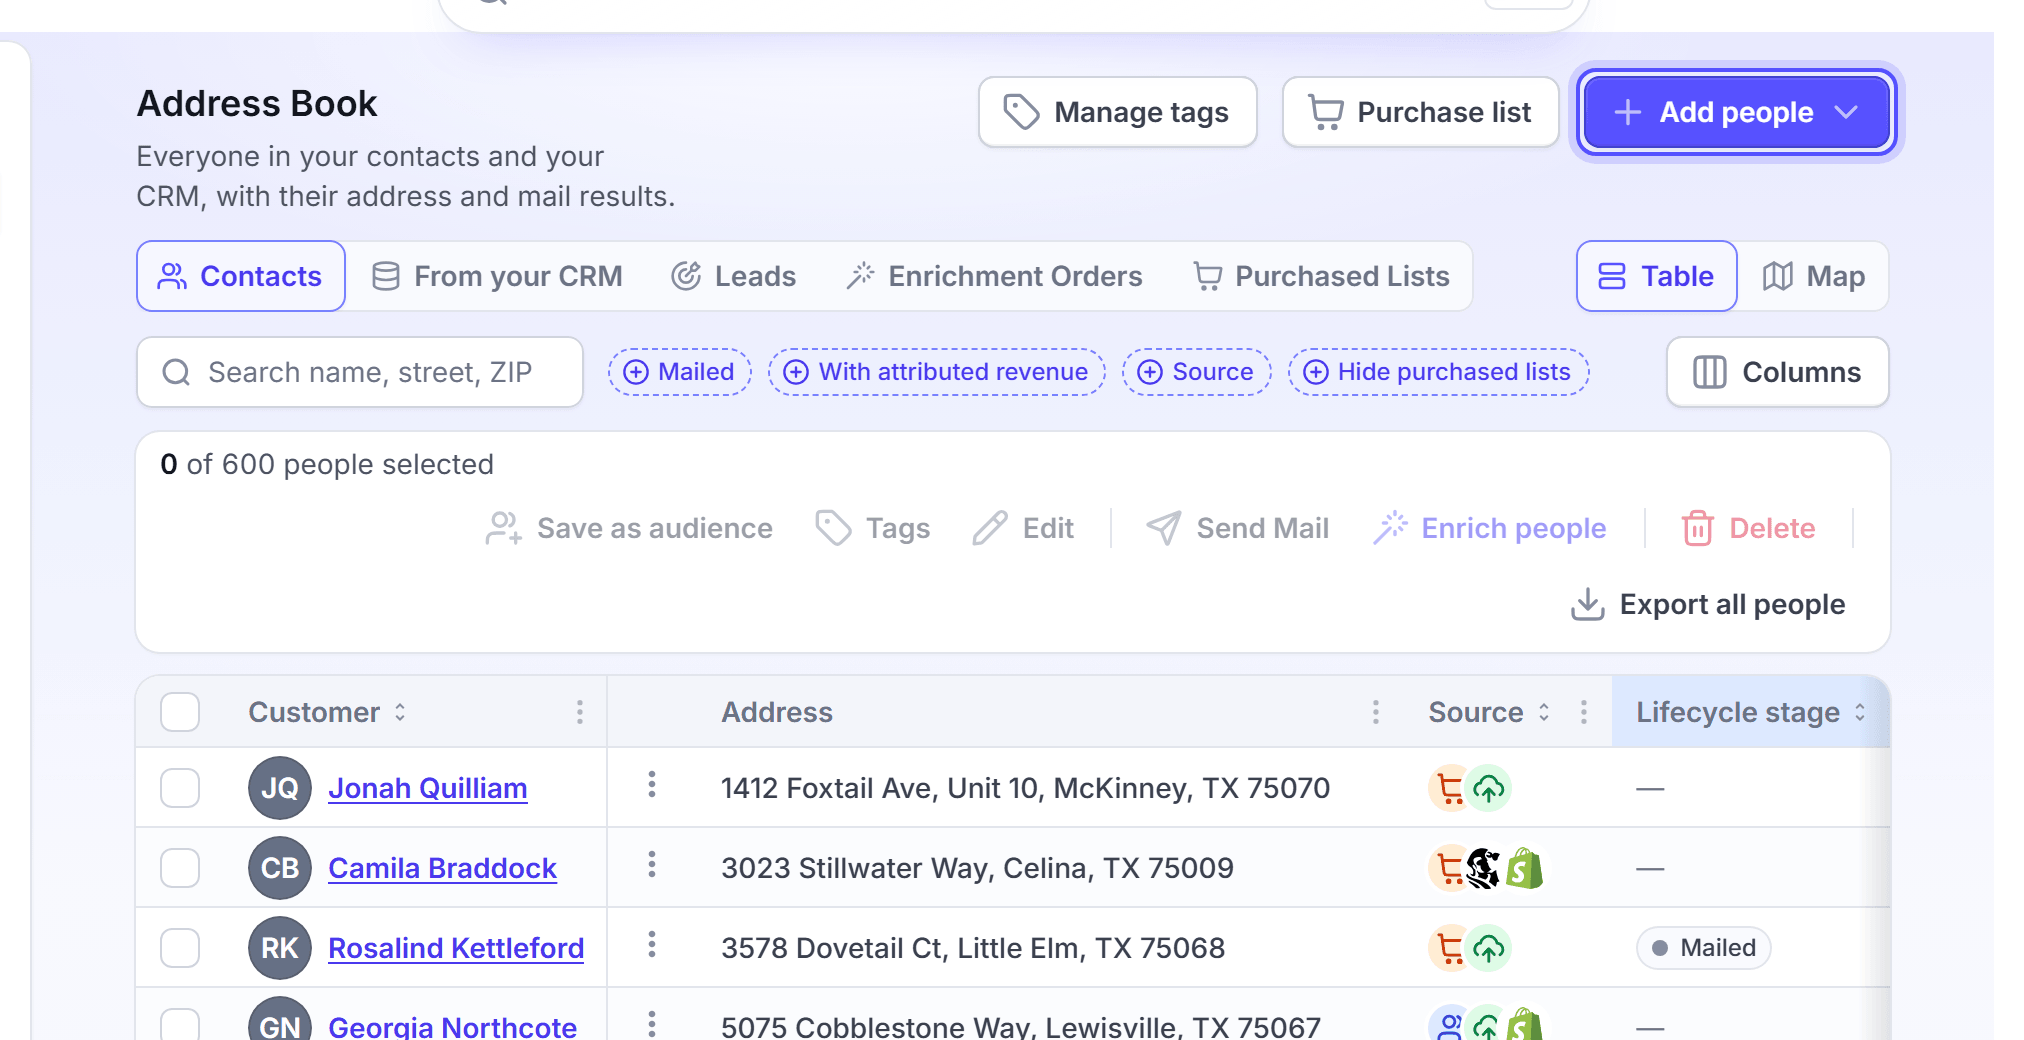
Click Add people, then click Add person. The Add person dialog opens.
In First Name and Last Name, enter the name.
In Address 1, enter the street address.
In City, State and Zip, complete the address. Pick State from the list.
Optional: Fill in Email, Phone Number, Organization Name, Address 2, Birthday and Anniversary.
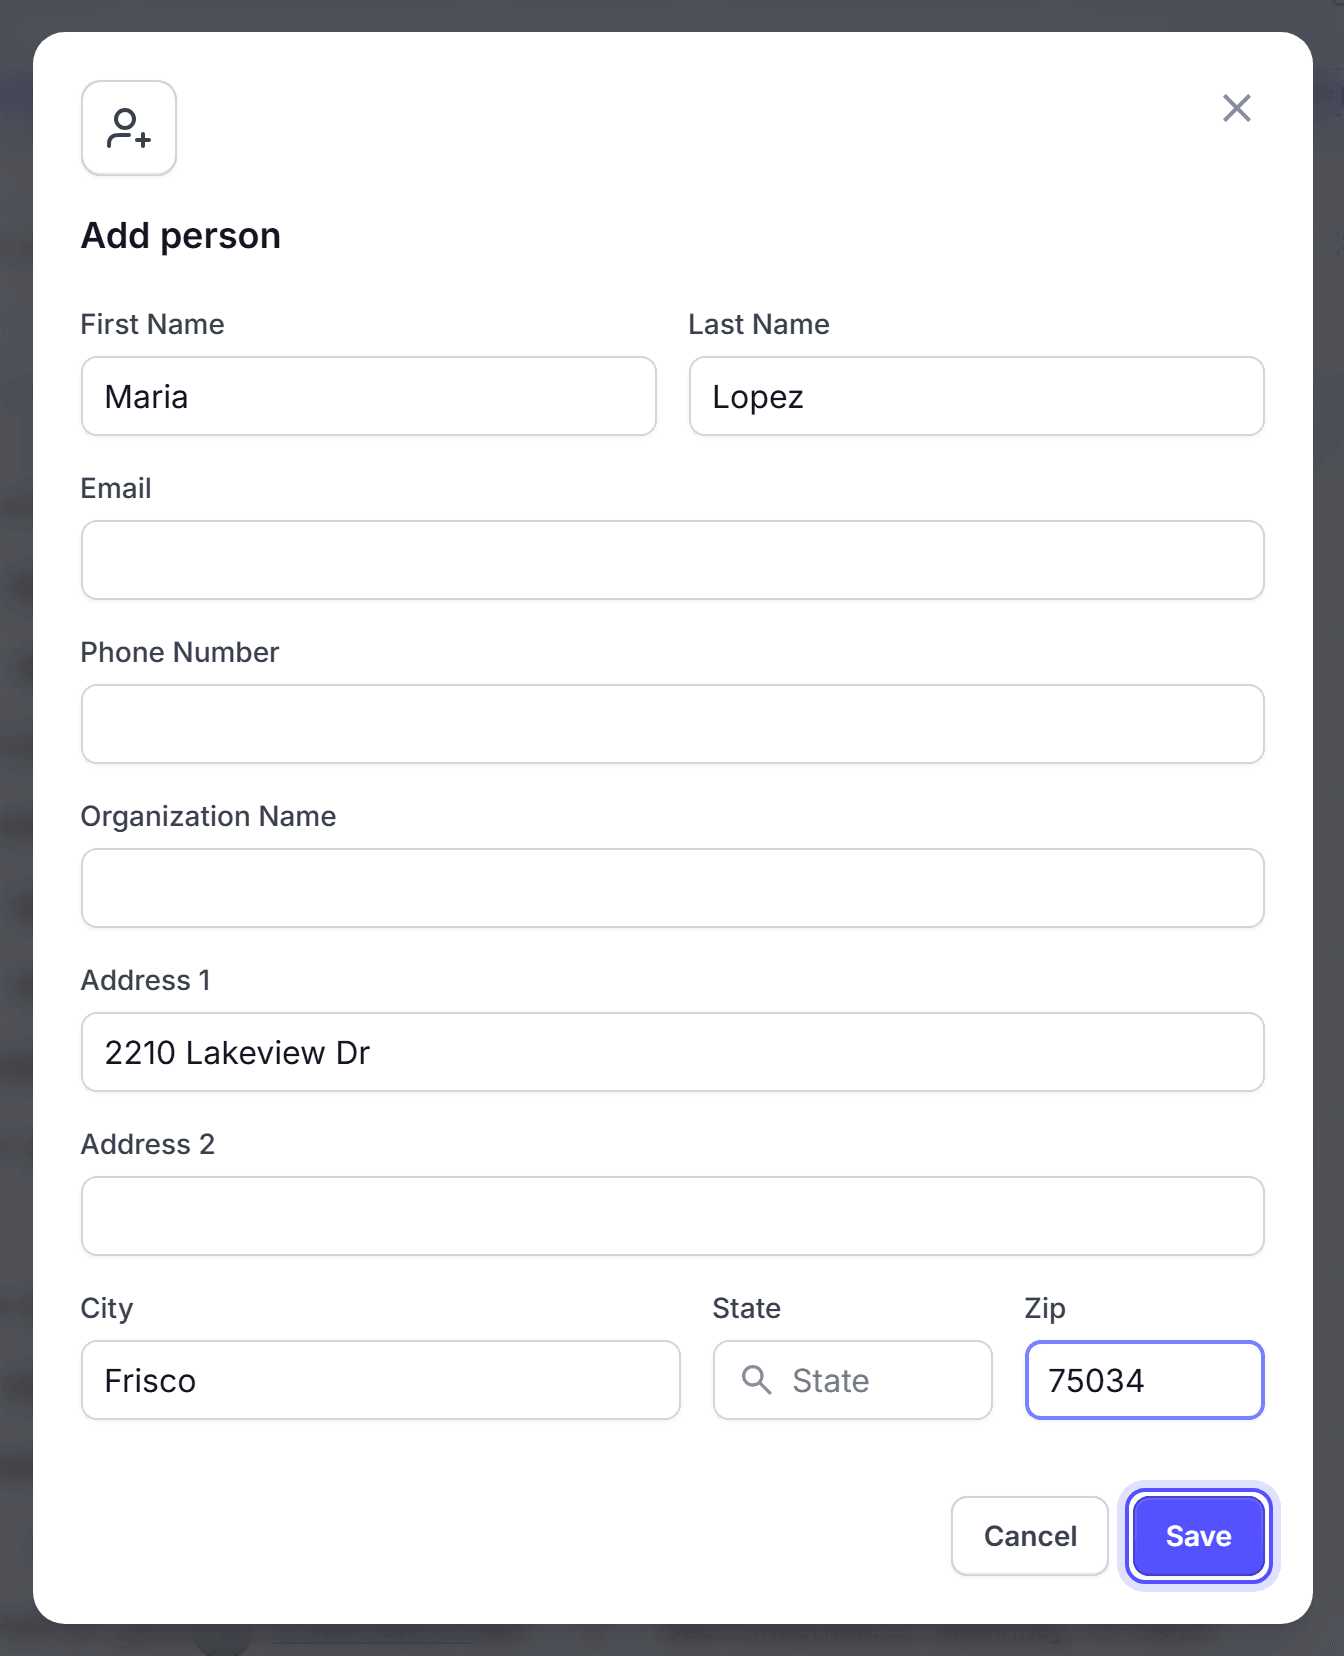
Click Save.
A person needs a name, an address or an email at the least. To mail the person, give the full address. Zip takes 5 digits. Phone Number takes 10 to 15 digits.
You're done when the message "The contact was added" shows. The person shows in the table on the Contacts tab. Adding a person costs nothing. You can edit or delete the person at any time.
Find people
Use the tools over the table when you look for one person or a group of people.
In Search name, street, ZIP, enter a name, a street or a ZIP code.
Optional: Open the Mailed chip, and select Mailed or Not mailed.
Optional: Turn on With attributed revenue to show only the people whose address has revenue from your mail.
Optional: Open the Source chip, and pick where the people came from.
Optional: Turn on Hide purchased lists to hide the people from lists you bought.
To change the order, click the sort button. It reads Most revenue until you add a sort.
The table has two views, Table and Map. Select a view over the table. The Contacts and From your CRM tabs split your own contacts from the people that only your CRM sends. Leads is a tab of its own.
You're done when the table shows the people you look for. The filters change only what you see. They do not change your data.
Edit a person
Edit a person when a name, an address or a contact detail changes.
On the Contacts tab, find the person.
Open the row menu, and click Edit contact details. The Edit person dialog opens.
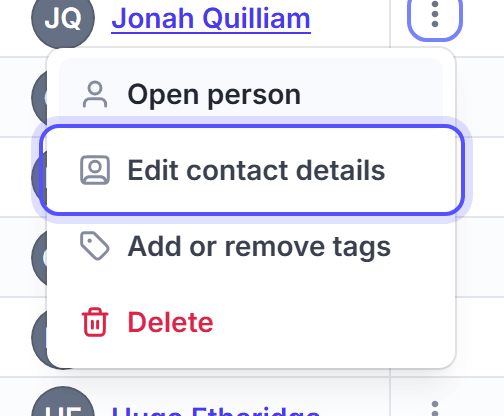
Change the fields.
Click Save.
You're done when the message "The contact was saved" shows. The next mail to the person uses the new values. You can edit the person again at any time.
Delete people
Delete a person who must not stay in your Address Book.
On the Contacts tab, find the person.
Open the row menu, and click Delete. The dialog asks "Delete this person?".
Click Delete.
To delete several people, select their rows. Then click Delete in the bar that shows for the selected rows.
You're done when the message "The person was deleted" shows. For several people, the message gives the number of people. To stop mail to a person and keep the record, use Suppressions.
Open a person's page
Open a person's page to see the full story of one customer.
On the Contacts tab, find the person.
Open the row menu, and click Open person.
The page starts with a profile card, with a Street View photo of the home. Under it are the Pipeline card, The home card, the activity, the Records card and the Audiences card. A link from a campaign can also open a home by its address. That page shows the mail that reached the home, also when the home is not in your sources yet. To add that home as a person, click Add to Address Book.
You're done when the person's page opens. Reading the page changes nothing.
Import people from a CSV
Import a CSV file when you have many people to add at once.
Tag people
Tags group people, so you can find them and mail them together.
On the Contacts tab, select the rows of the people to tag.
In the bar for the selected rows, click Tags. A dialog opens. Its title gives the number of people to tag.
In Add Tags, select the tags to add.
Click Bulk Add.
To remove tags, select them in Remove Tags, then click Bulk Remove. For one person, open the row menu and click Add or remove tags.
You're done when the Tags column of each person shows the new tags. You can remove a tag again at any time.
Manage your tags
Create, rename or delete the tags of your account.
At the top of the Address Book, click Manage tags. The Manage Tags dialog opens.
Click Add New Tags. The Add Tag dialog opens.
In Tag Name, enter the name. Optional: Pick a Colour.
Click Add.
To rename a tag, click its Edit Tag icon. To delete a tag, click its Delete Tag icon, then click Delete.
You're done when the tag shows in the list. You can rename or delete the tag later.
Edit the organization and radius pin of many people
Change the organization or the radius pin of several people in one step.
On the Contacts tab, select the rows of the people.
In the bar, click Edit. A dialog opens. Its title reads Update and the number of people.
Fill in Organization Name, Radius Pin Address or Radius Pin Street.
Click Update.
A field you leave empty keeps its current value.
You're done when the message "The update is on its way. It can take a minute to show." shows. Each selected person then gets the new values.
Export the Address Book
Export the people in the table to a CSV file, for example to share them or to use them in another tool.
Set the search and the filters to show the people to export.
Clear the selection of rows. Then click Export all people.
The export holds every row of the filtered table, up to 100,000 people. It does not work with the Mailed filter, the With attributed revenue filter or a sort on a figure.
You're done when the CSV file downloads to your computer. An export changes nothing in LettrLabs.
Download the selected people
Download a CSV file of only the people you pick.
On the Contacts tab, select the rows of the people.
In the bar, click Export selected.
You're done when the CSV file downloads to your computer.
Enrich people
Enrich people when their address or birthday is missing or old. LettrLabs looks up the data and adds it.
On the Contacts tab, select the rows of the people to enrich.
Click Enrich people. The Enrich people dialog opens on Select Type.
Select Enrich Contact or Birthday, then click Next.
In Update Settings, set Skip if Last Update and the number of days. Click Next.
In Overwrite Settings, select Always Keep Mine, Auto Merge or Always Override. Click Next.
In Review, read the Enrichment Order Summary, and select a payment method.
Click Checkout.
Enrich people works only on the people you select in the Table view. The summary shows the Maximum Amount. You pay only for the people that LettrLabs enriches.
You're done when the dialog shows "All Set! We're Improving Your Data Now." Click Go to Enrichment Orders to follow the order. The Enrichment Orders tab shows its status.
Review an enrichment order
Review an order to see what changed, and to settle the conflicts.
On the Address Book page, click the Enrichment Orders tab.
Click the ID of the order. The Enrichment Report opens.
Under Conflict Resolution, check the current or the enriched value of each conflict.
Click Save Changes.
The report shows Requested, Processed, Charged and Conflicts. Results lists each person with the values before and after.
You're done when the report shows "No open conflicts." The charge does not change when you settle the conflicts.
How the options work
The enrichment options decide which data LettrLabs adds and what it replaces.
| Option | What it does |
|---|---|
| Enrich Contact | Finds contact details from an email, an address, or a name and a city. |
| Birthday | Finds the birthday from an email, a name or a mailing address. |
| Skip if Last Update | Skips a person that was updated less than the number of days ago. |
| Always Keep Mine | Keeps each name that exists. Only a blank name gets the enriched name. |
| Auto Merge | Updates a name when the enriched name is similar enough. |
| Always Override | Uses the latest name. It can replace a name with the name of another person in the same household. |
FAQ
Related
Send your first campaign
Mail the people you added.
Suppressions
Keep people off your mail.
Service Areas
Draw the areas where you work.
Steps checked 2026-11-16.