Buy a list
Pick an area and the households you want, buy the list, and send mail to it.
Overview
You can buy a list of households in an area that you pick. LettrLabs finds the households that match your filters, and you pay for each household on the list. The list is saved in your Address Book under Purchased Lists, and you can send mail to it.
You can use Buy a list to:
- Mail homes in an area where you have no customers yet.
- Pick only homeowners or renters, and the type, value and age of the home.
- Buy fewer households than an area holds.
- Send mail to a list that you bought before.
Buy a list of households
Buy a list when you want to mail new households in an area. You draw the areas, pick who to mail, and check the list before you pay.
In the left navigation, under Audiences, click Address Book.
Click Purchase list. The New Recipient Search page opens on the Where step.
Under Draw with, select Radius, Polygon, ZIP codes or Address. The table below tells you how to use each tool.
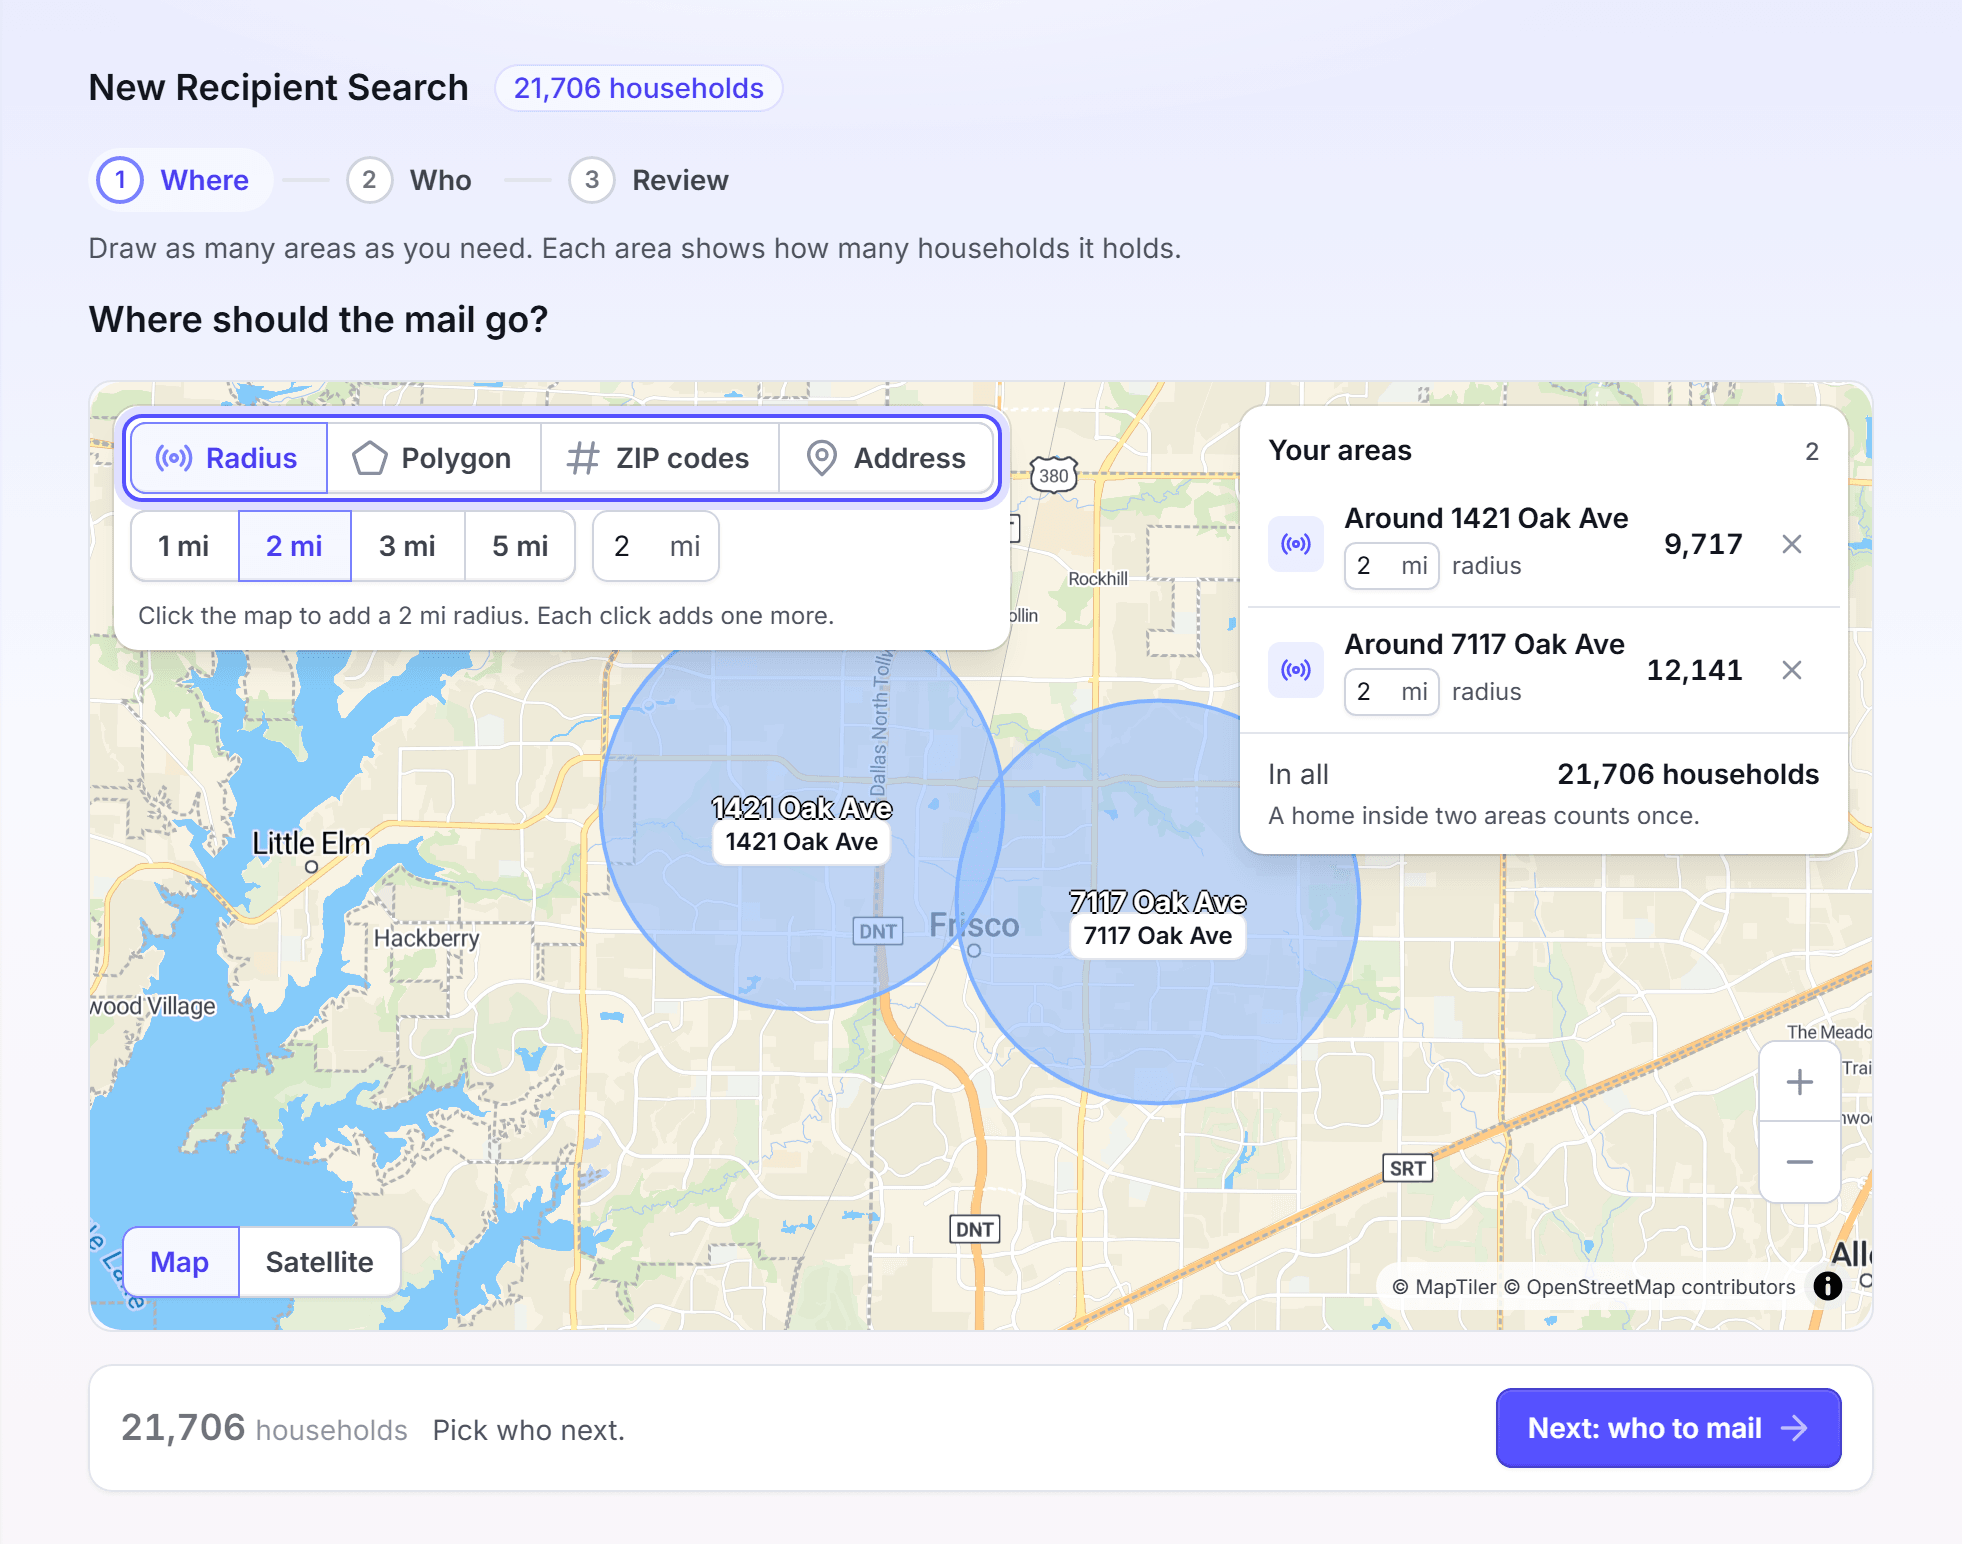
Add one or more areas. Read the household count of each area in the Areas card.
Click Next: who to mail. The Who step opens.
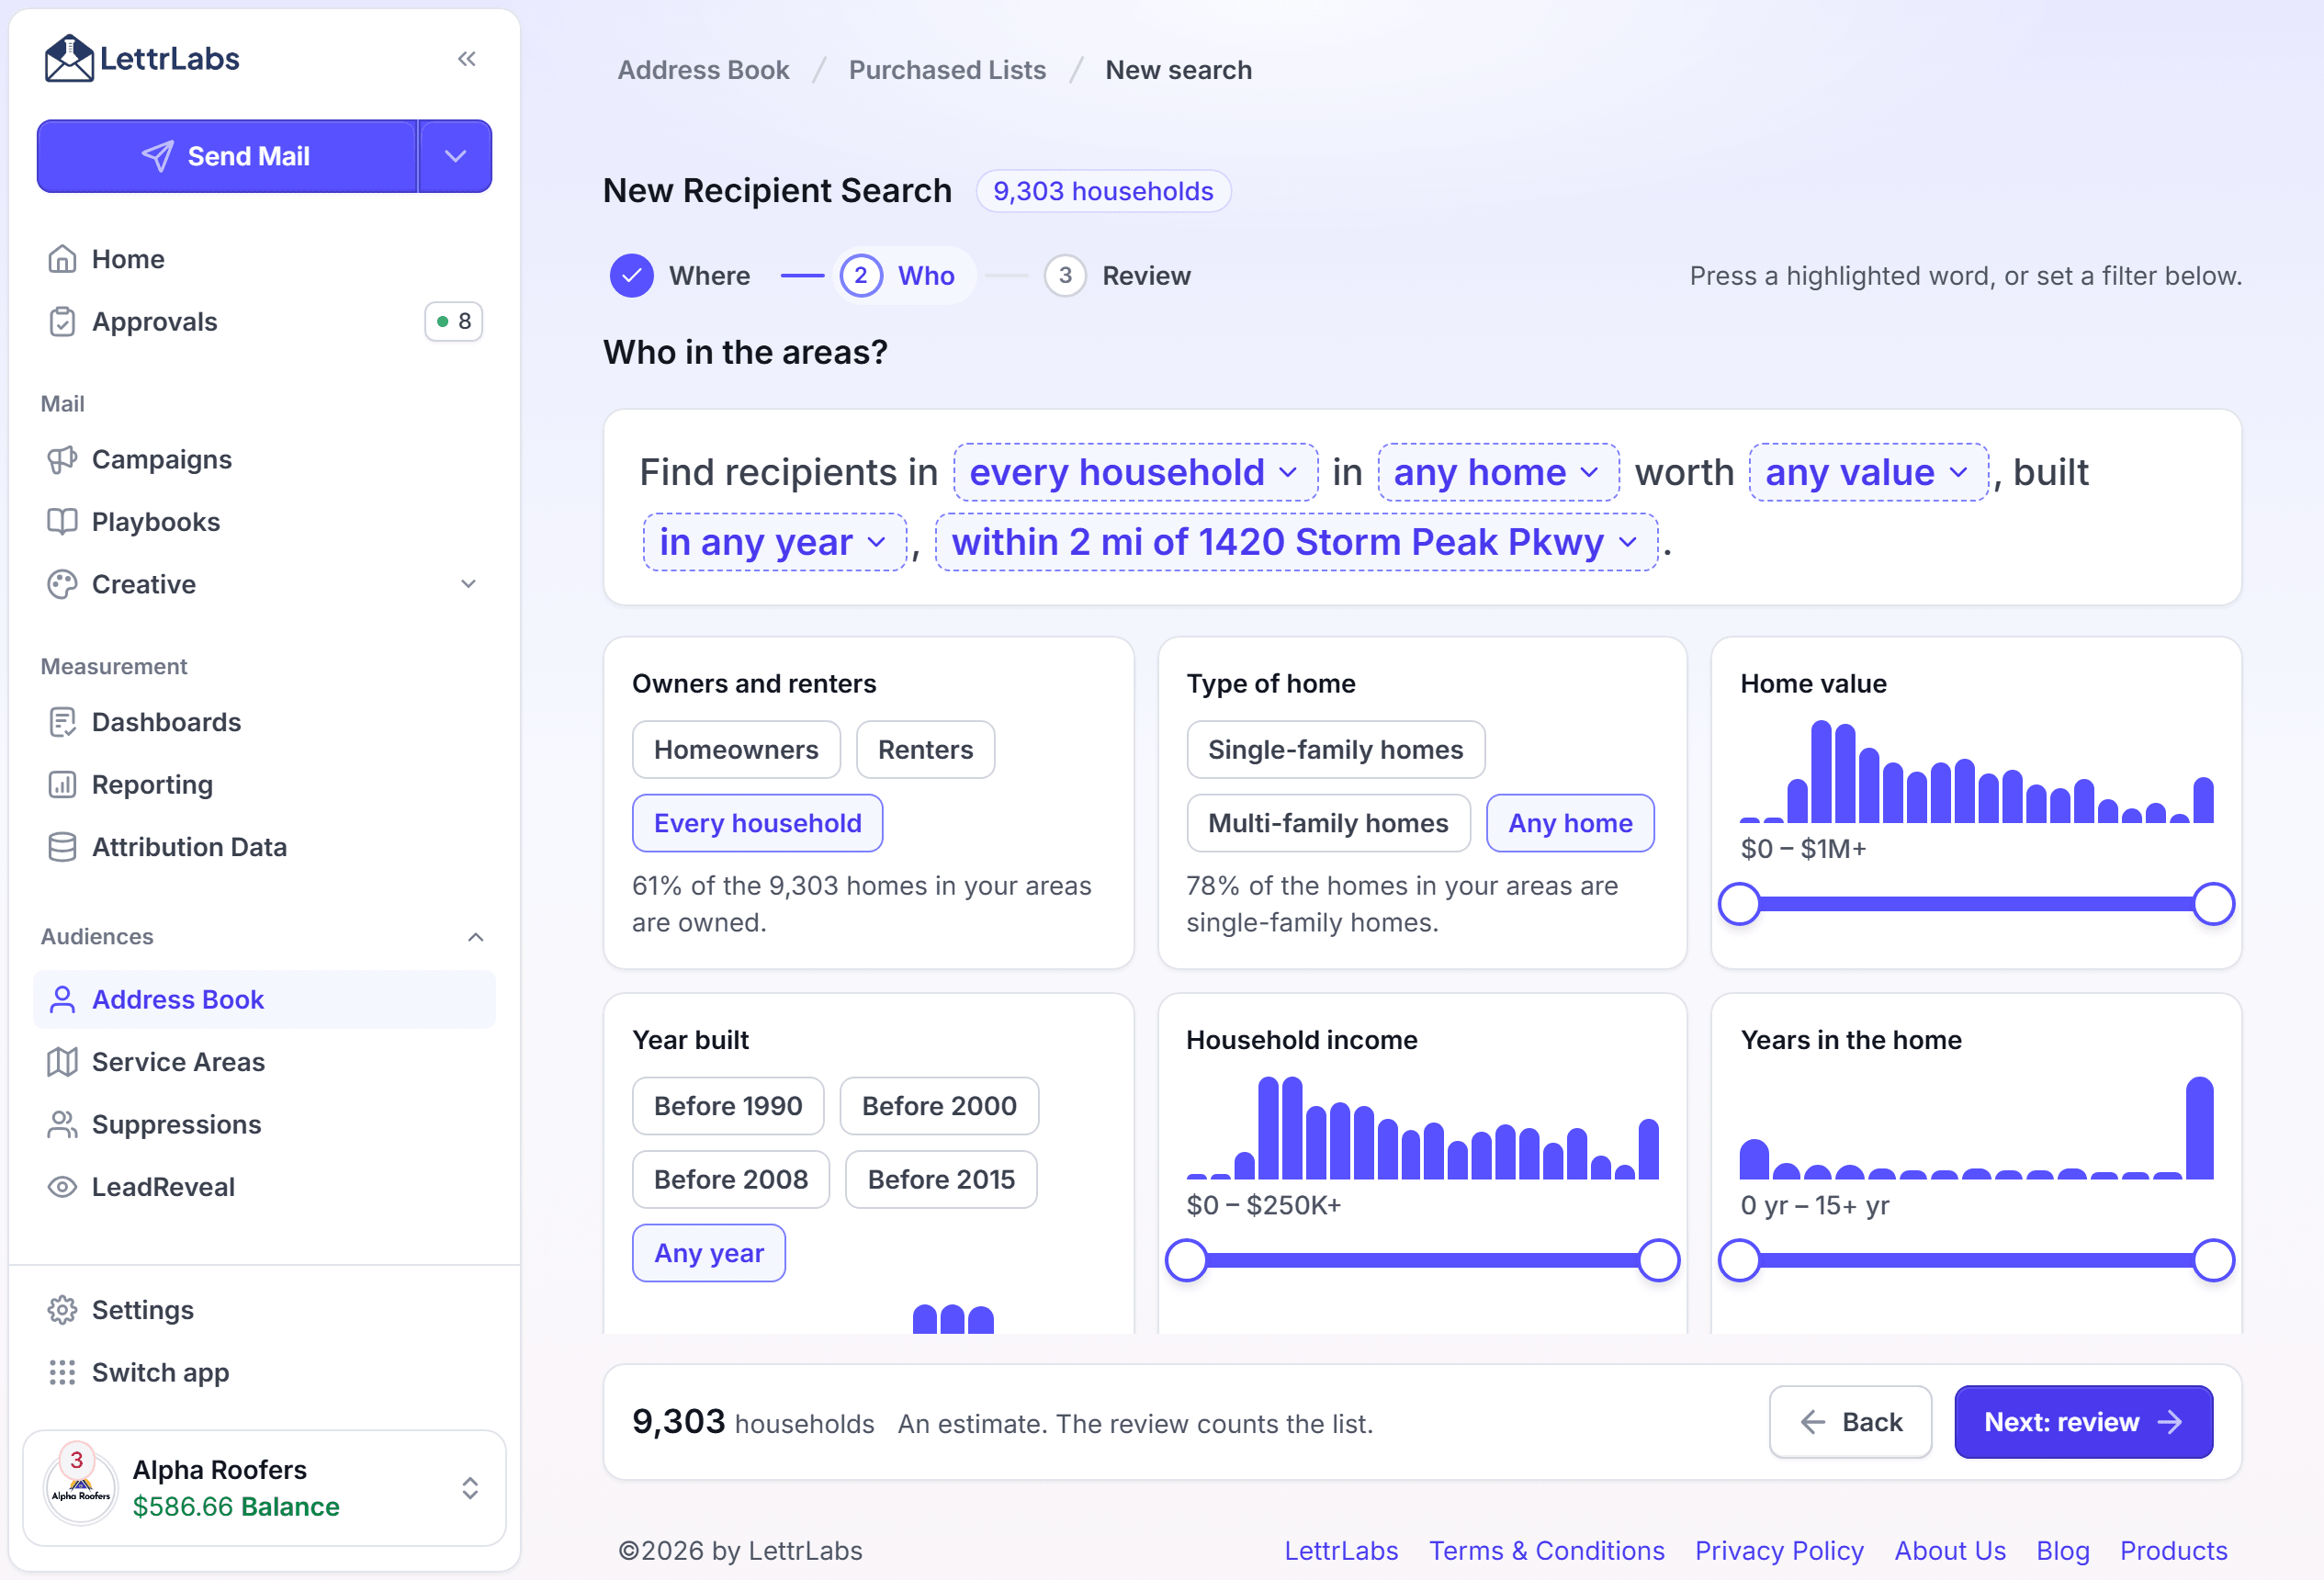
Set the filters that you need: Owners and renters, Type of home, Home value, Year built, Household income and Years in the home.
Click Next: review. LettrLabs counts the households in each area.
Read the list under Your order: Households, Price each and Total.
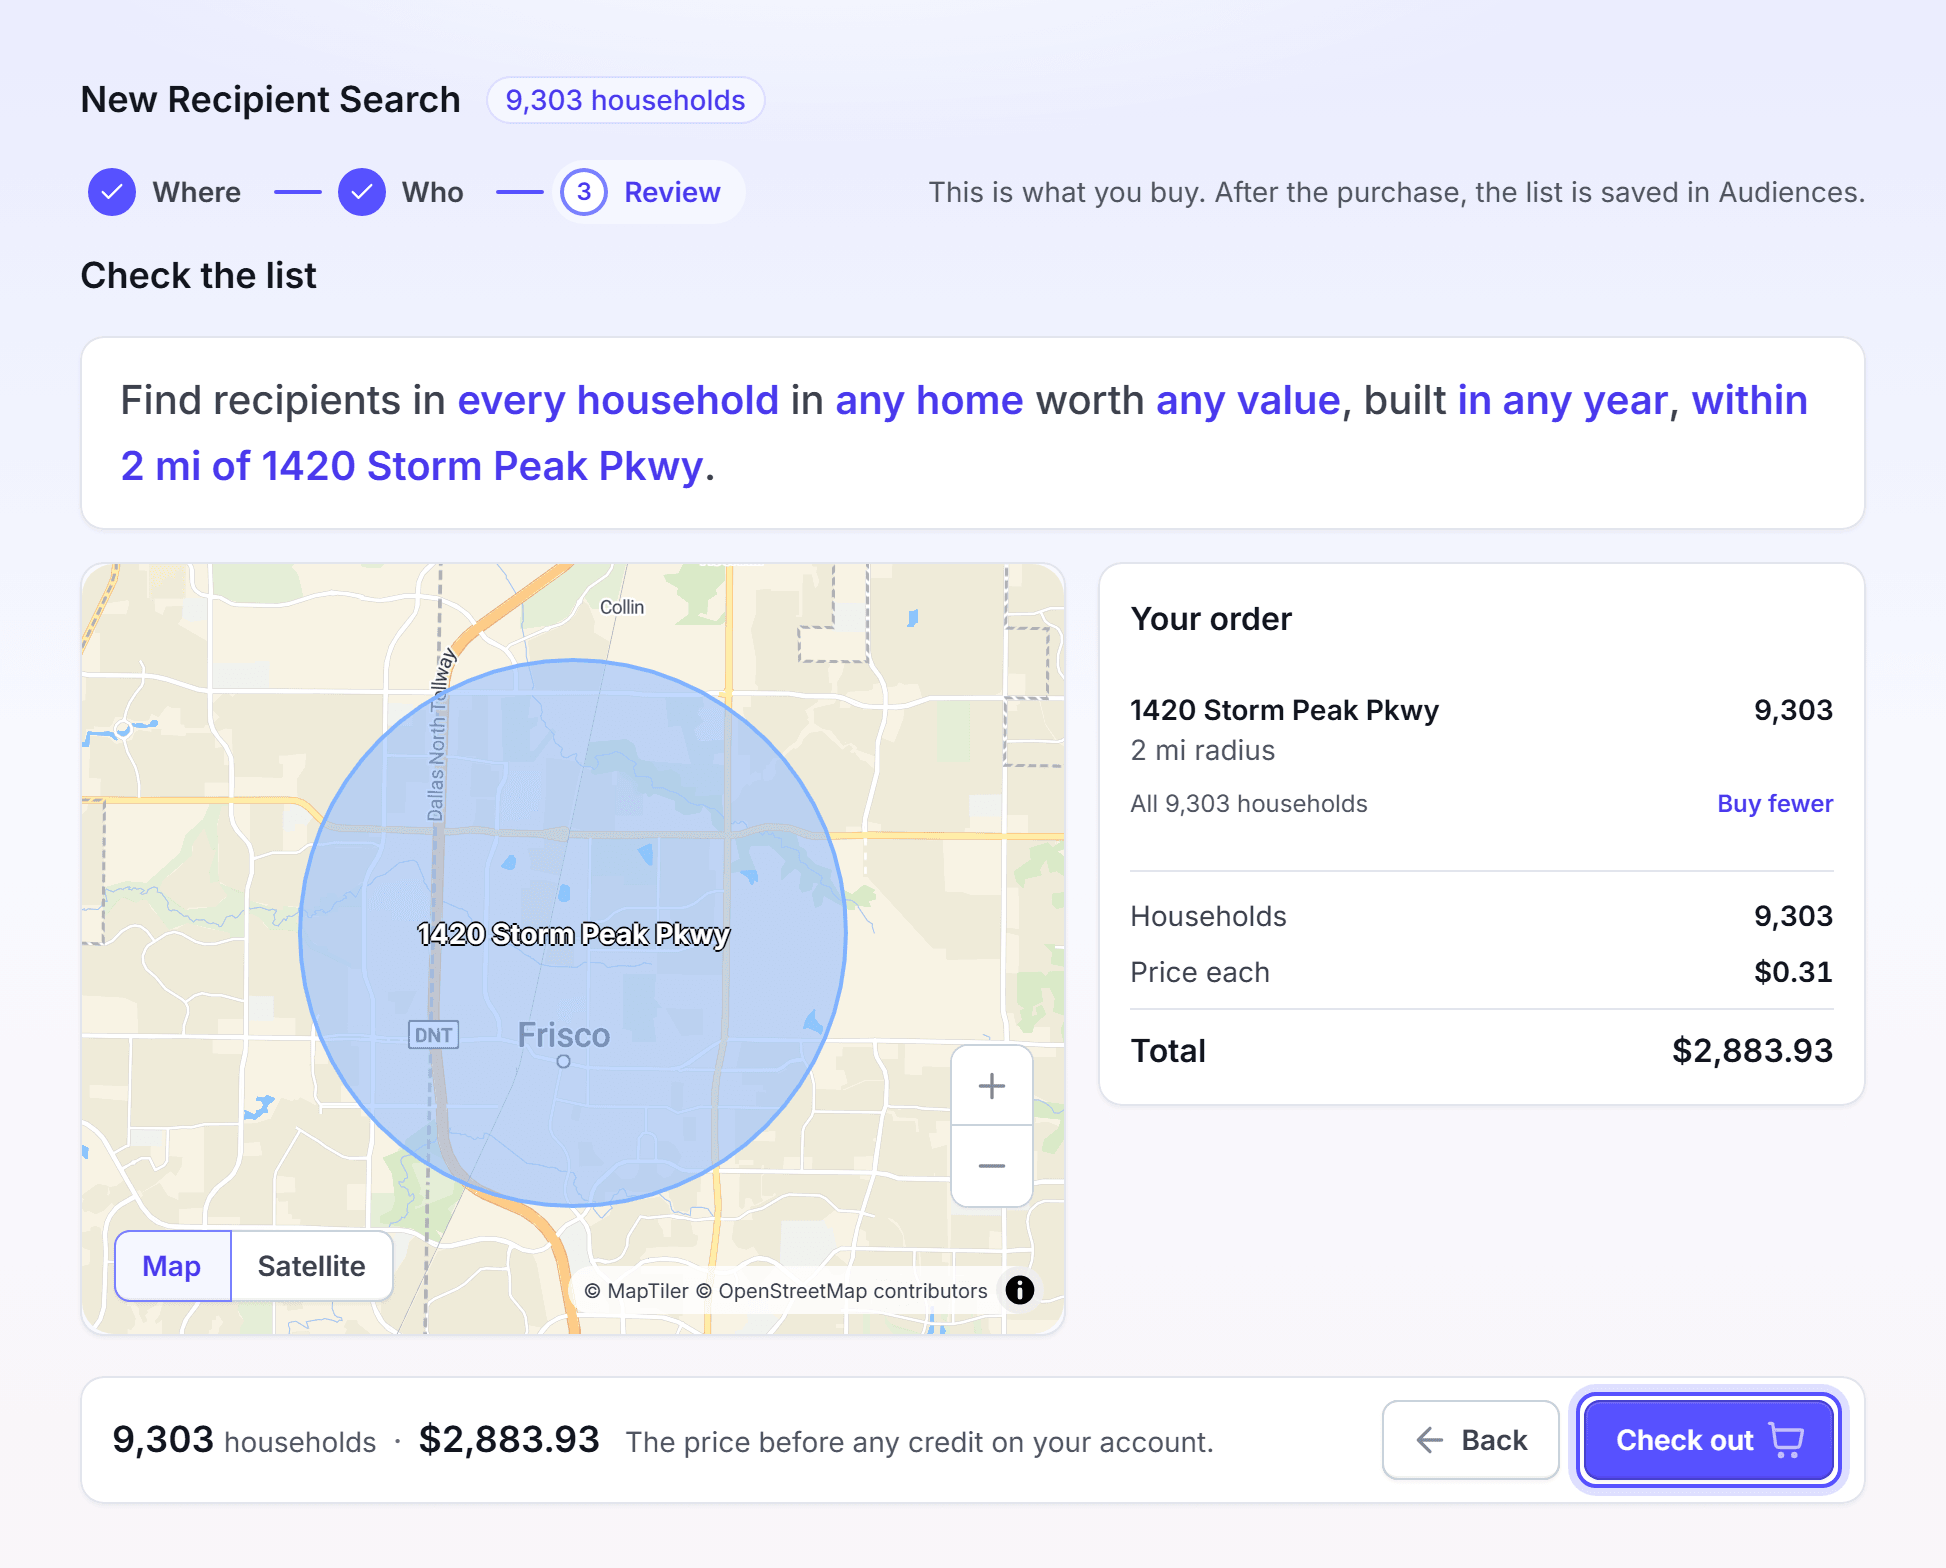
Optional: To buy fewer households in an area, click Buy fewer on that area. Set the number, then click Done.
Click Check out. The Checkout window opens.
The tools to add an area are in the table below.
| Tool | What you do |
|---|---|
| Radius | Select a distance, such as 1 mi, or enter a distance in miles. Then click the map. Each click adds one more circle. |
| Polygon | Click the map at each corner. To close the shape, click the first corner or click Finish Polygon. |
| ZIP codes | Click a ZIP code on the map to add it. Click it again to remove it. |
| Address | Search an address, such as 6111 Main St. The address gets a circle of the distance that you select. |
A home inside two areas counts one time. You must buy at least 25 households from your radius areas together. You must also buy at least 25 households from your drawn shapes and ZIP codes together.
You're done with the search when the Check out button is available. Next, pay for the list.
Pay for the list
Pay for the list in the Checkout window. The window shows the price summary before you pay.
In Search Name, enter a name for the list, for example Frisco owners fall.
Read the price summary.
If the window shows payment methods, select one. The window shows them when your account credit does not pay for the whole list.
Click Checkout.
In the Order placed window, close the window. The Purchased Lists tab opens.
LettrLabs builds the list after the purchase. This can take up to 30 minutes. Refresh the Purchased Lists tab to see the new status.
You're done when the list shows the status Complete on the Purchased Lists tab. The price on the review step is the price before any credit on your account.
See your purchased lists
The Purchased Lists tab shows each search that you saved or bought.
Click Address Book.
Click the Purchased Lists tab.
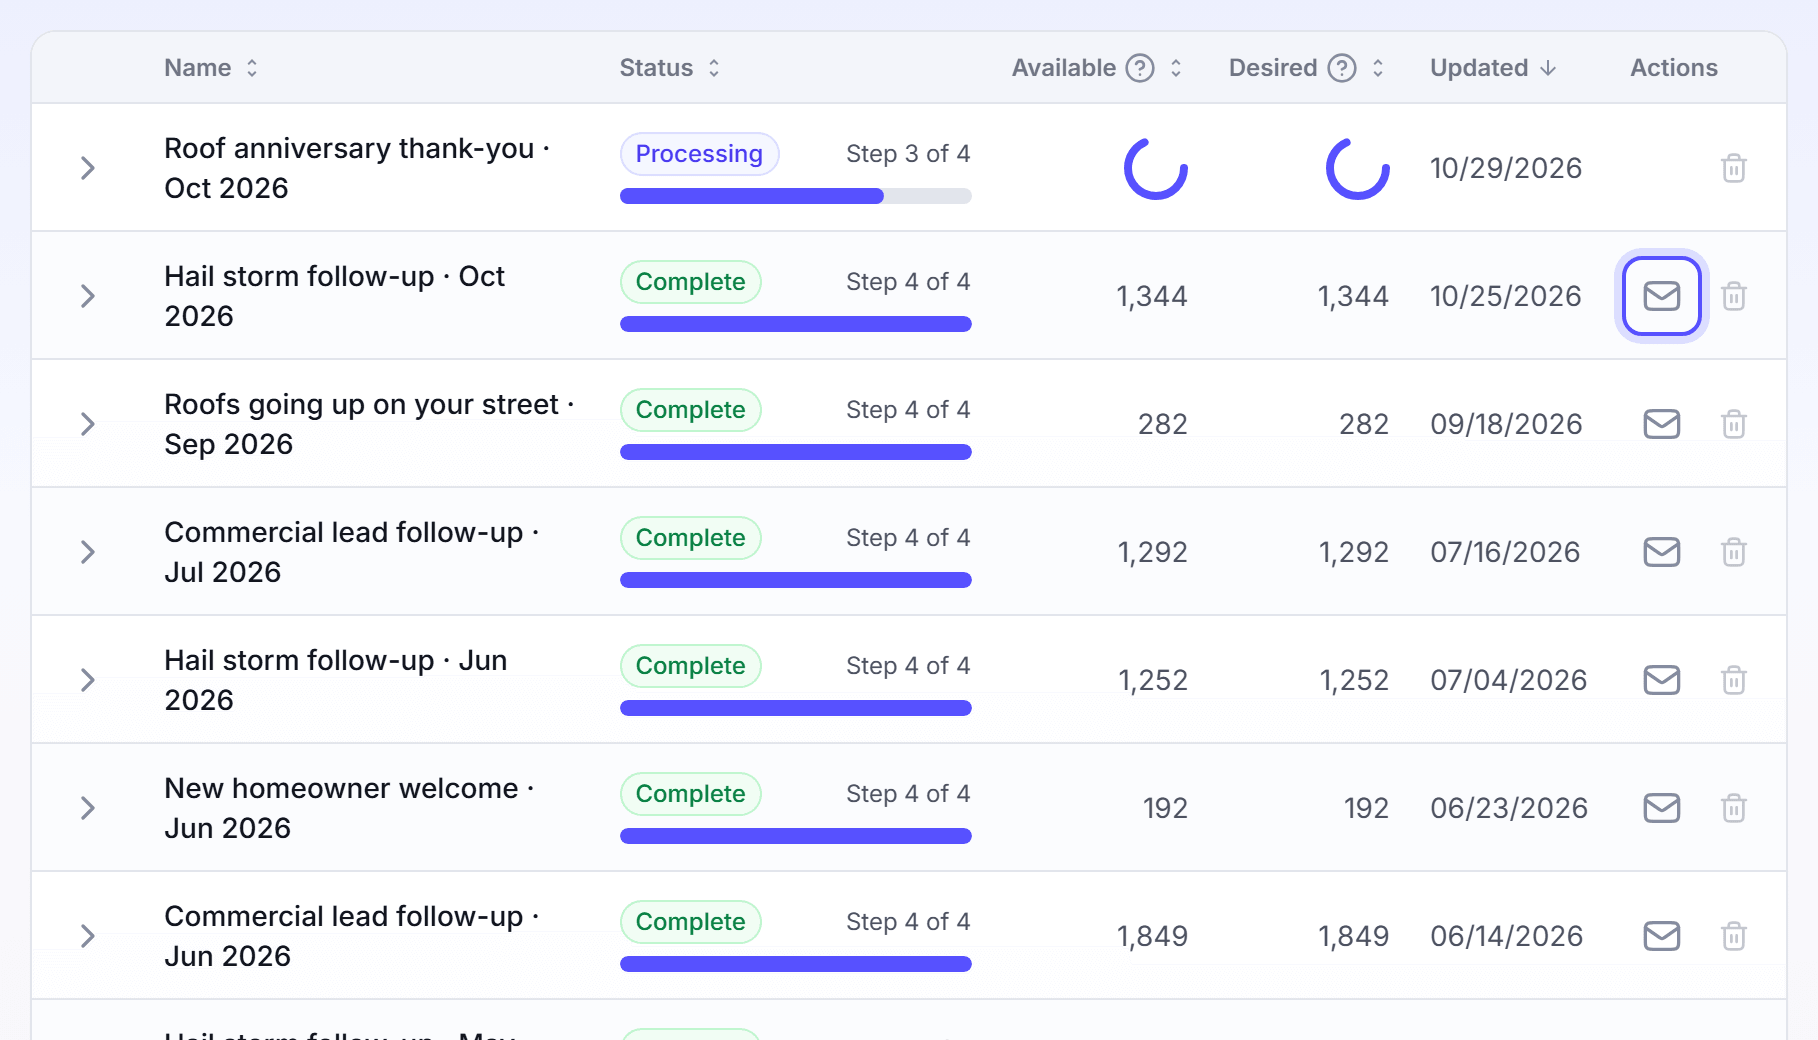
Read the Status, Available, Desired and Updated columns.
Click a row to see its areas, its filters and its name.
The table below gives the meaning of each status.
| Status | Meaning |
|---|---|
| Draft | You saved the search, but LettrLabs did not count it. |
| Checkout | LettrLabs counted the search. You can pay for it. |
| Processing | You paid, and LettrLabs builds the list. |
| Complete | The list is ready. You can mail it. |
Available is the number of households that the search found. Desired is the number of households that you buy.
You're done when you find the list and its status. Reading the tab changes nothing.
Mail a list you bought
Send mail to a list after its status is Complete. The Create Order button shows only on such a list.
Click Address Book, then click the Purchased Lists tab.
On the row of the list, click Create Order. The Create new order window opens.
Select how to start: New Design, From a template or Free Card Designs.
Follow the window to pick the design and the product, and to name the order.
On the order page, complete the Product, Design, Recipients and Checkout steps.
You're done when the order is placed in the Checkout step. LettrLabs charges the mail at checkout, separately from the list.
Add more households to a list
To buy more households with the same filters, copy the search. The copy is a new search, and you pay for it separately.
On the Purchased Lists tab, click the row of the list.
Click Add More Recipients. The Copy Order window opens.
In Order Name, enter a name for the copy.
Click Okay. The page of the new search opens.
Change the areas or the quantities. Click Calculate Targets, then click Checkout.
You're done when the new search shows on the Purchased Lists tab.
Rename or delete a search
You can rename a search at any time. You can delete a search only when it is a draft or at checkout.
On the Purchased Lists tab, click the row of the search.
To rename it, click Edit Name next to Name:. Enter the new name, then click Save Name.
To delete it, click Delete Recipient Search on the row. Then click Delete in the window.
You're done when the message "Updated successfully." shows, or the search leaves the list.
FAQ
Related
Address Book
Add, tag and export the people you mail.
Service Areas
Draw the areas where you work.
Payment methods
Add a card or a bank account.
Steps checked 2026-11-16.