Set up a webhook
Create the webhook URL, and protect it with an API key or a signature.
Overview
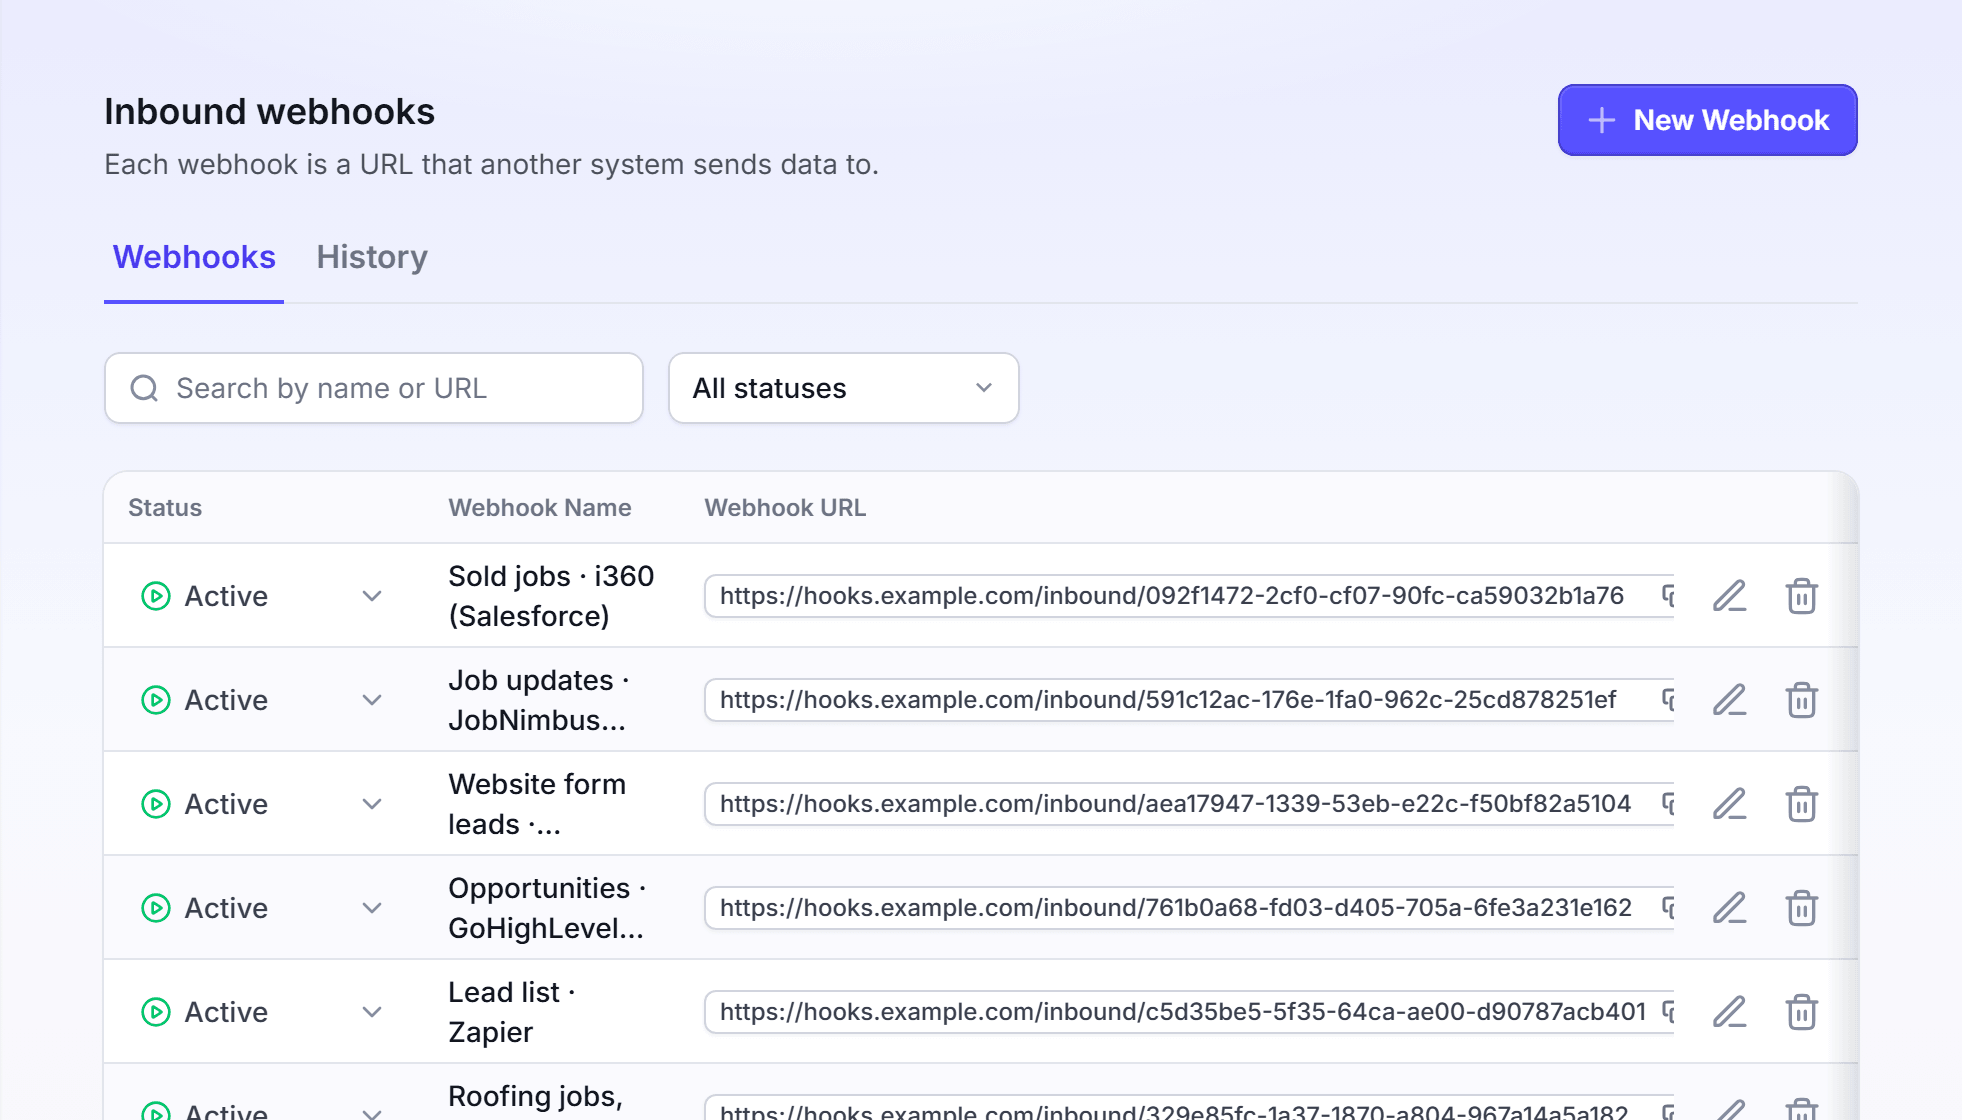
A webhook is a URL that your own system sends records to. You create and manage your webhooks on the Inbound webhooks page. The page has two tabs: Webhooks and History.
You can use this page to:
- Create a webhook and copy its URL.
- Ask each call for an API key, a signature, or both.
- Set a webhook to Active, Test mode or Inactive.
- Edit or delete a webhook.
A webhook alone mails nothing. To mail the records, add the webhook to a campaign. See Mail to recipients and Radius Mail.
Create a webhook
Create a webhook before you set up your own system. The webhook gives you the URL that your system sends records to.
In the left navigation, under Integrations, click Webhooks. The Inbound webhooks page opens on the Webhooks tab.
Click New Webhook. If you have no webhook yet, you can also click Create Inbound Webhook. The Create New Inbound Connection drawer opens.
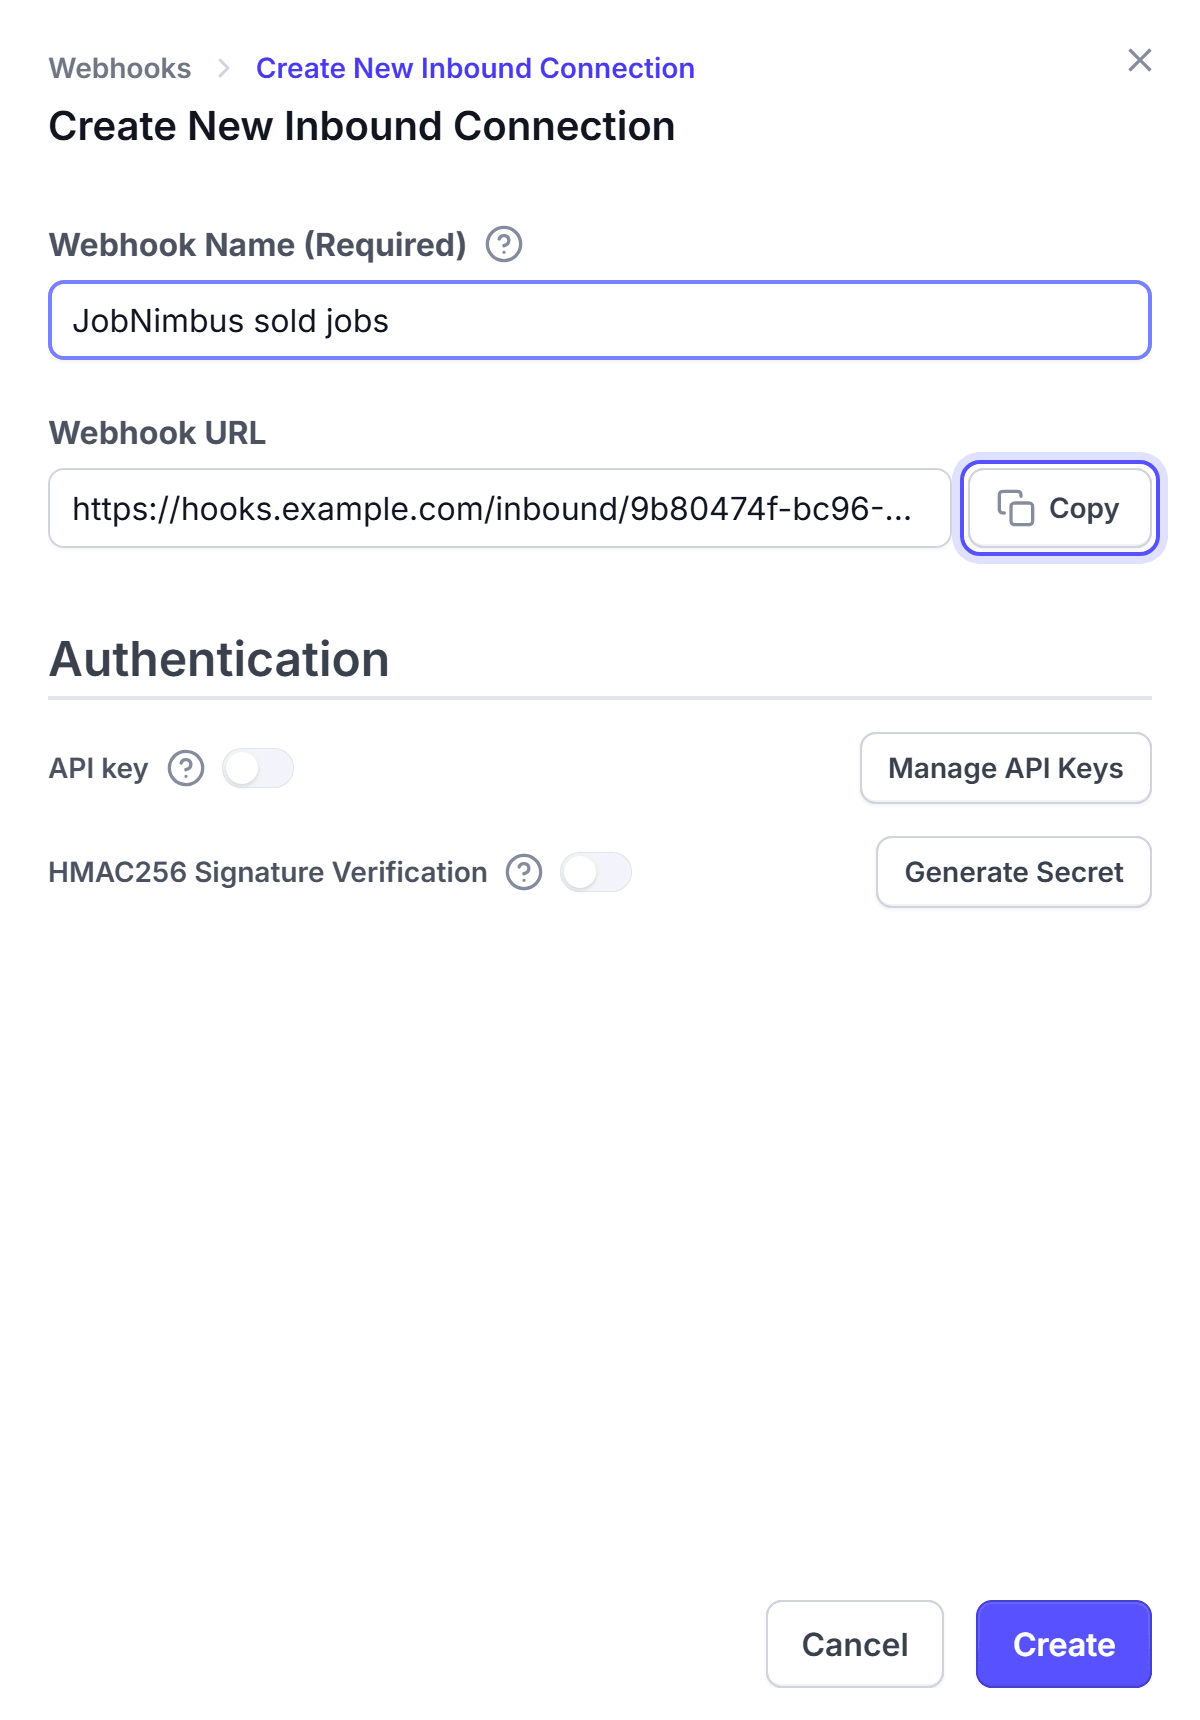
In Webhook Name (Required), enter a name, for example JobNimbus sold jobs. The name tells you later which system sends to this webhook.
In Webhook URL, click Copy. Keep the URL for your own system.
Optional: Turn on the API key toggle or the HMAC256 toggle. The next two sections tell you how.
Click Create.
You're done when the message "Webhook created successfully!" shows. The webhook shows in the table with the status Test mode.
If you click Cancel or close the drawer, LettrLabs deletes the new webhook. Its URL does not work.
Protect a webhook with an API key
Ask for an API key when you want only your own systems to send to the webhook. The sender must put a LettrLabs API key in the X-API-KEY header of each call.
Open the webhook. To do this, click its row, or click Edit webhook (the pencil icon) at the end of the row.
In Authentication, turn on the API key toggle.
Click Manage API Keys. The Manage Open API dialog opens.
In Description, enter a name for the key, for example the name of the system that sends. Click Generate Key.
Copy the key, and add it to your system. Then close the dialog.
Click Update.
You're done when the message "Webhook updated successfully!" shows. The Open API Key column of the row shows Enabled.
The key must belong to the same LettrLabs account as the webhook. A call with no key, or with a key of another account, gets no record.
Protect a webhook with a signature
Ask for a signature when your system can sign each call with a secret. LettrLabs then refuses a call that a person changed on the way.
Click Generate Secret only when you are ready to copy the secret. LettrLabs shows the secret one time. A new secret replaces the old one, so a sender that uses the old secret stops working.
Open the webhook.
In Authentication, turn on the HMAC256 Signature Verification toggle.
Click Generate Secret. The Webhook secret dialog opens.
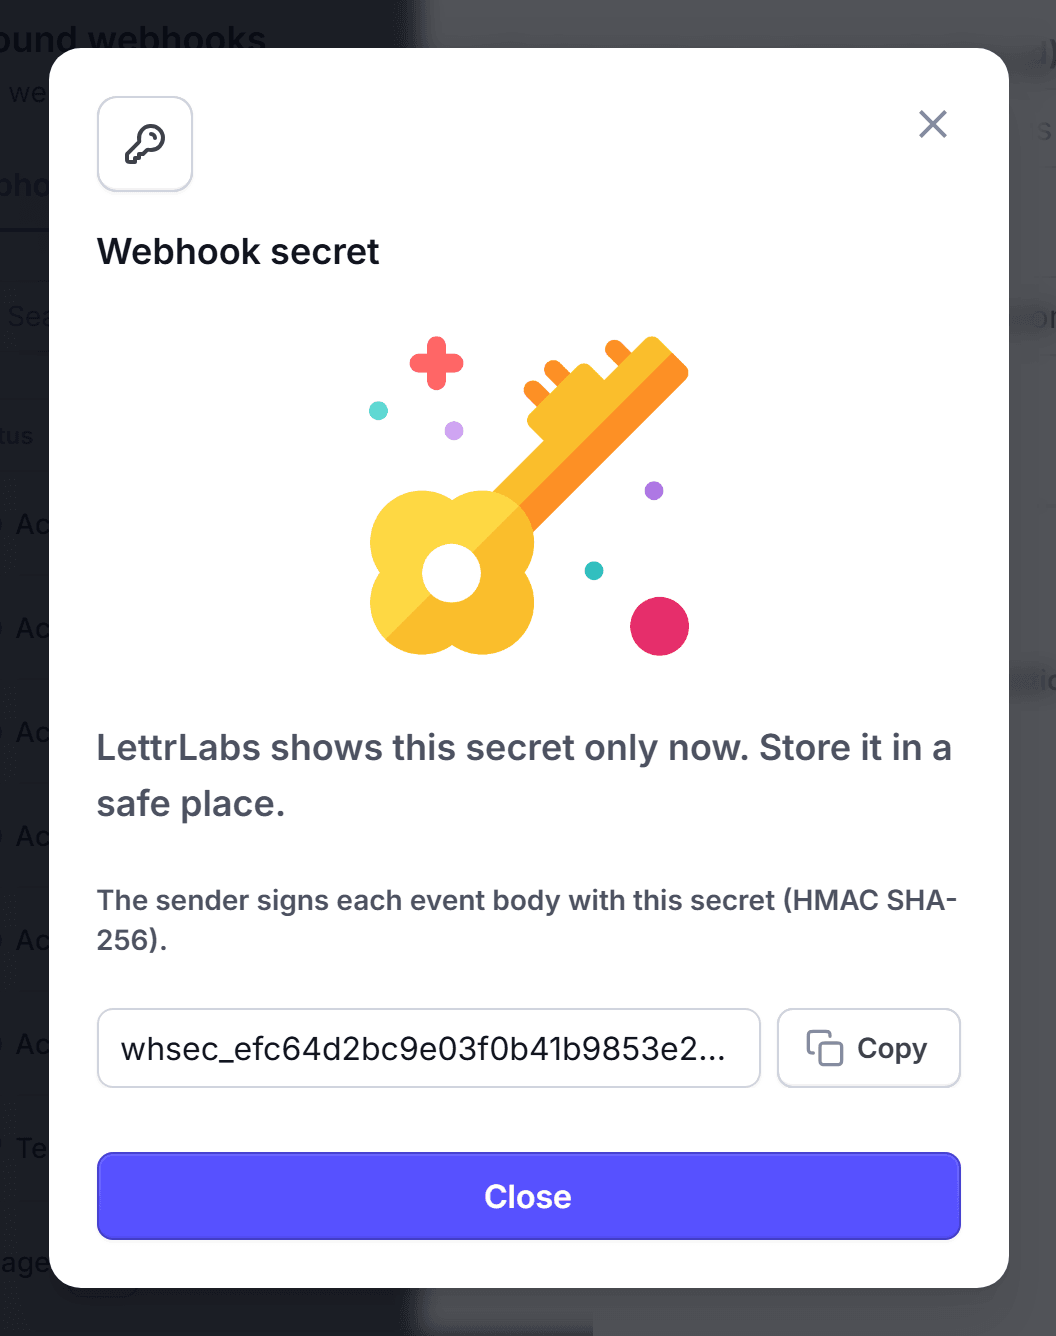
Copy the secret, and keep it in a safe place. Add it to your system. Then click Close.
Click Update.
You're done when the HMAC256 Auth column of the row shows Enabled.
Your system signs the body of each call with the secret (HMAC SHA-256). It sends the signature in a header. The inbound webhooks developer page names the headers.
Set the status of a webhook
The status tells LettrLabs what to do with each call. A new webhook starts in Test mode.
| Status | What LettrLabs does with a call |
|---|---|
| Test mode | It keeps the record, but it runs no action. No mail goes out. |
| Active | It keeps the record, and each campaign that uses the webhook reads it. |
| Inactive | It keeps nothing, and it runs no action. |
On the Webhooks tab, find the webhook. You can search by name or URL, or filter by status.
In the Status column, click the status of the webhook.
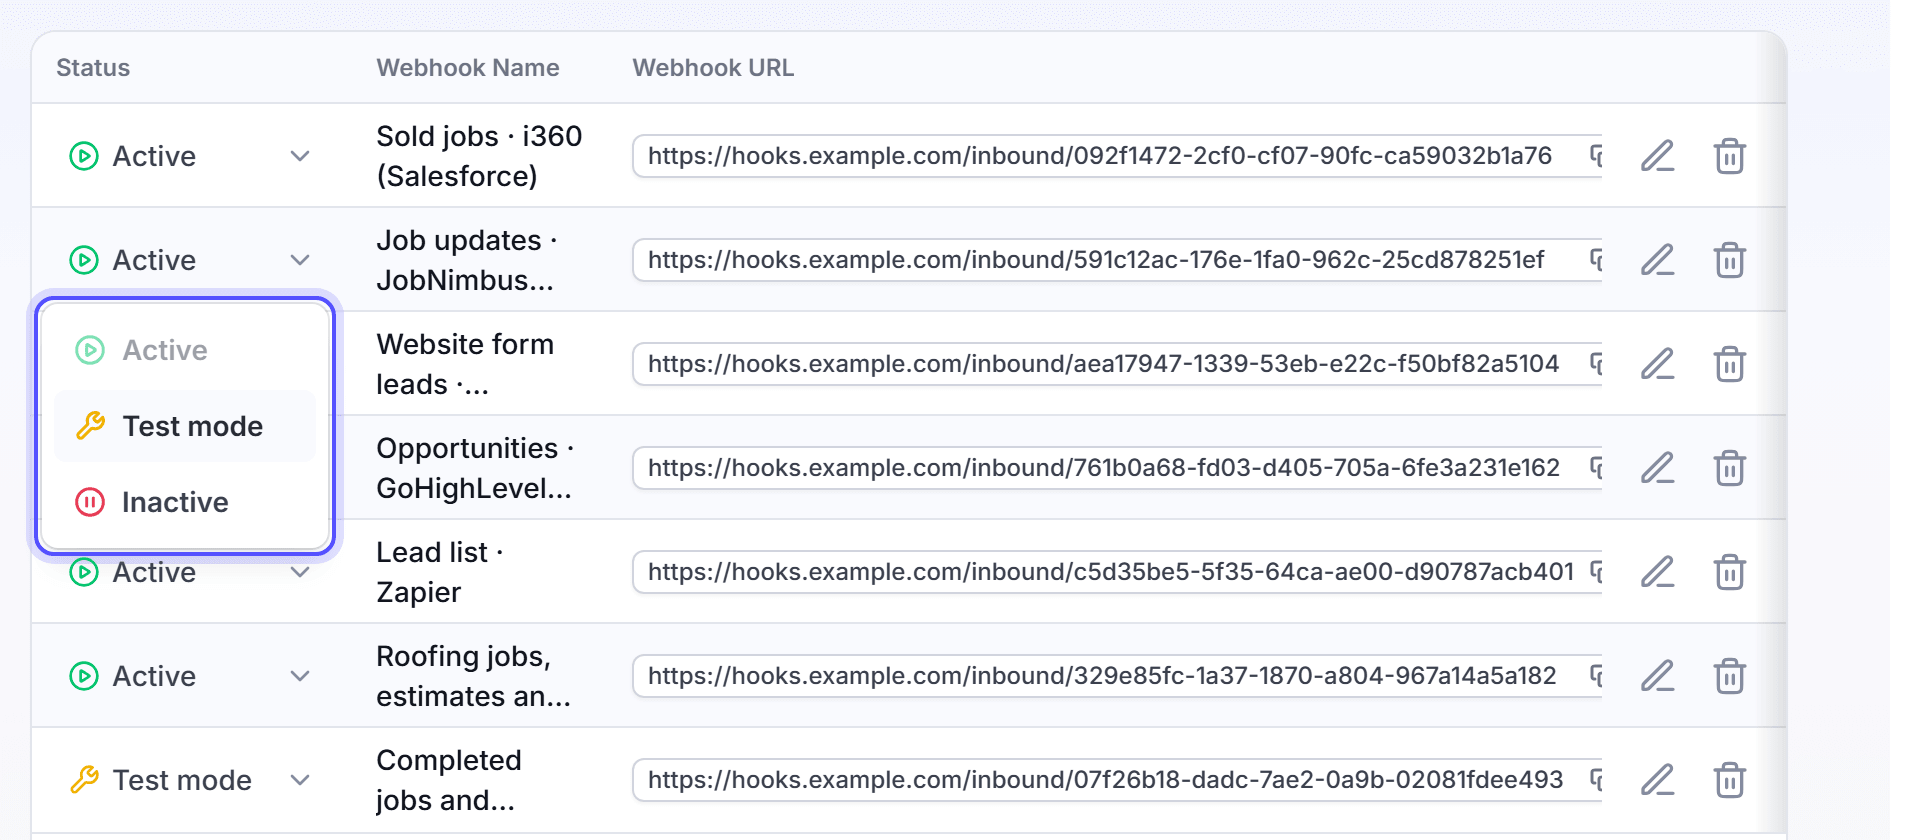
Select Active, Test mode or Inactive.
You're done when the message "Webhook status updated successfully!" shows.
Use Test mode while you set up your system. Send one test record, then use it to map the fields in your campaign. Set the webhook to Active before the campaign goes on.
Edit a webhook
Edit a webhook to change its name or its protection. The URL does not change.
On the Webhooks tab, click the row of the webhook. The Edit Webhook drawer opens.
Change the name, or turn a toggle on or off.
Click Update.
You're done when the message "Webhook updated successfully!" shows.
Delete a webhook
Delete a webhook that no system uses.
You cannot undo a delete. The URL stops working at once, and each campaign that uses the webhook gets no more records.
On the Webhooks tab, click Delete webhook (the bin icon) at the end of the row. The Delete Webhook dialog opens.
Click Delete.
You're done when the message "Webhook deleted successfully!" shows.
FAQ
Related
Mail to recipients
Mail the person in each record that the webhook receives.
Webhook history
See each call and the actions it ran.
Webhooks
How a webhook and its actions work together.
Steps checked 2026-11-10.