Mail to recipients
Mail the person in each record that the webhook receives.
Overview
The Mail to Recipients action mails the person in each record that a webhook receives. You set it up as an automated campaign in Send Mail. The campaign mails each record when it arrives.
You can use Mail to recipients to:
- Mail a thank-you card when your CRM marks a job as sold.
- Mail each new lead that your web form sends.
- Put fields from the record on the card, such as the first name.
- Mail only the records that pass your filters.
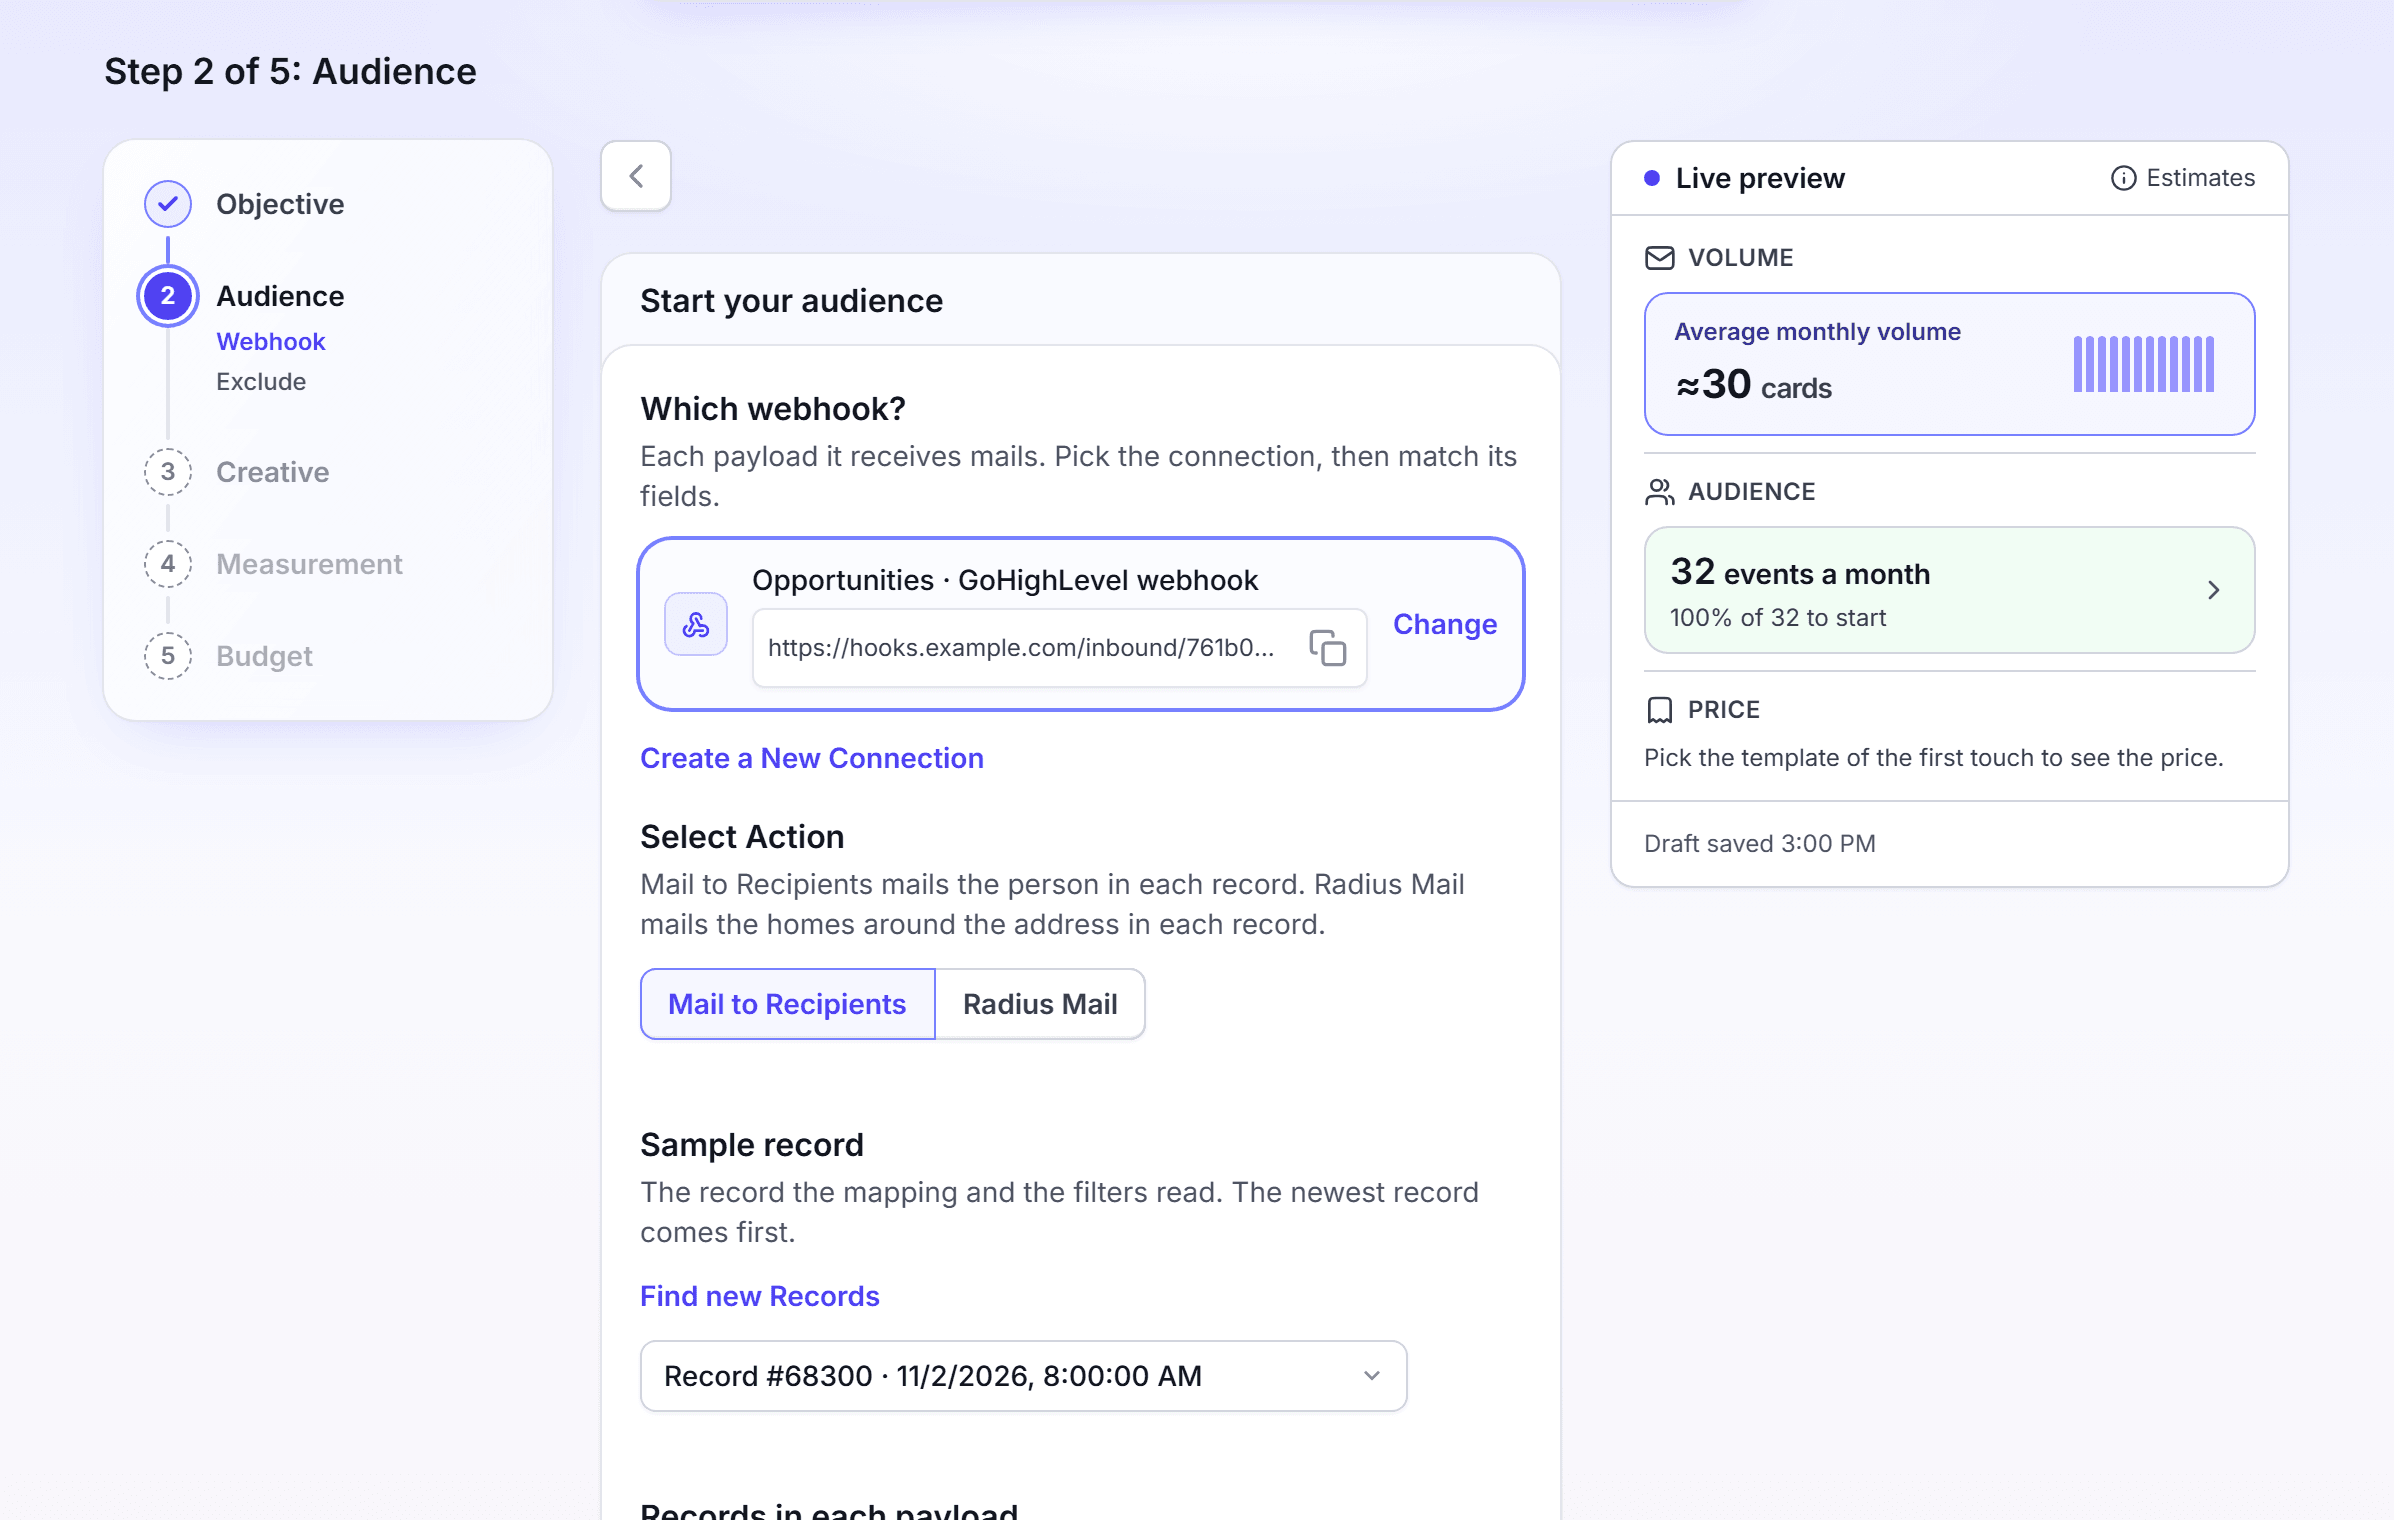
Mail each person a webhook sends
Make this campaign after your webhook received one test record. The field mapping reads the fields of that record.
In the left navigation, click Send Mail.
In Campaign Type, select Automated Campaign. A webhook source sends as an automation only.
In How Do You Want to Build This?, select Build a Custom Campaign.
In What Builds the Audience?, select My Data and Integrations.
In Which Data Source?, select My System Sends Them.
In How Does Your System Send Them?, select Webhook. A webhook campaign needs the Premium plan to turn on. On a lower plan, the Webhook option shows a Premium tag and the note "A Webhook campaign needs the Premium plan to turn on. Zapier and OpenAPI come with your plan."
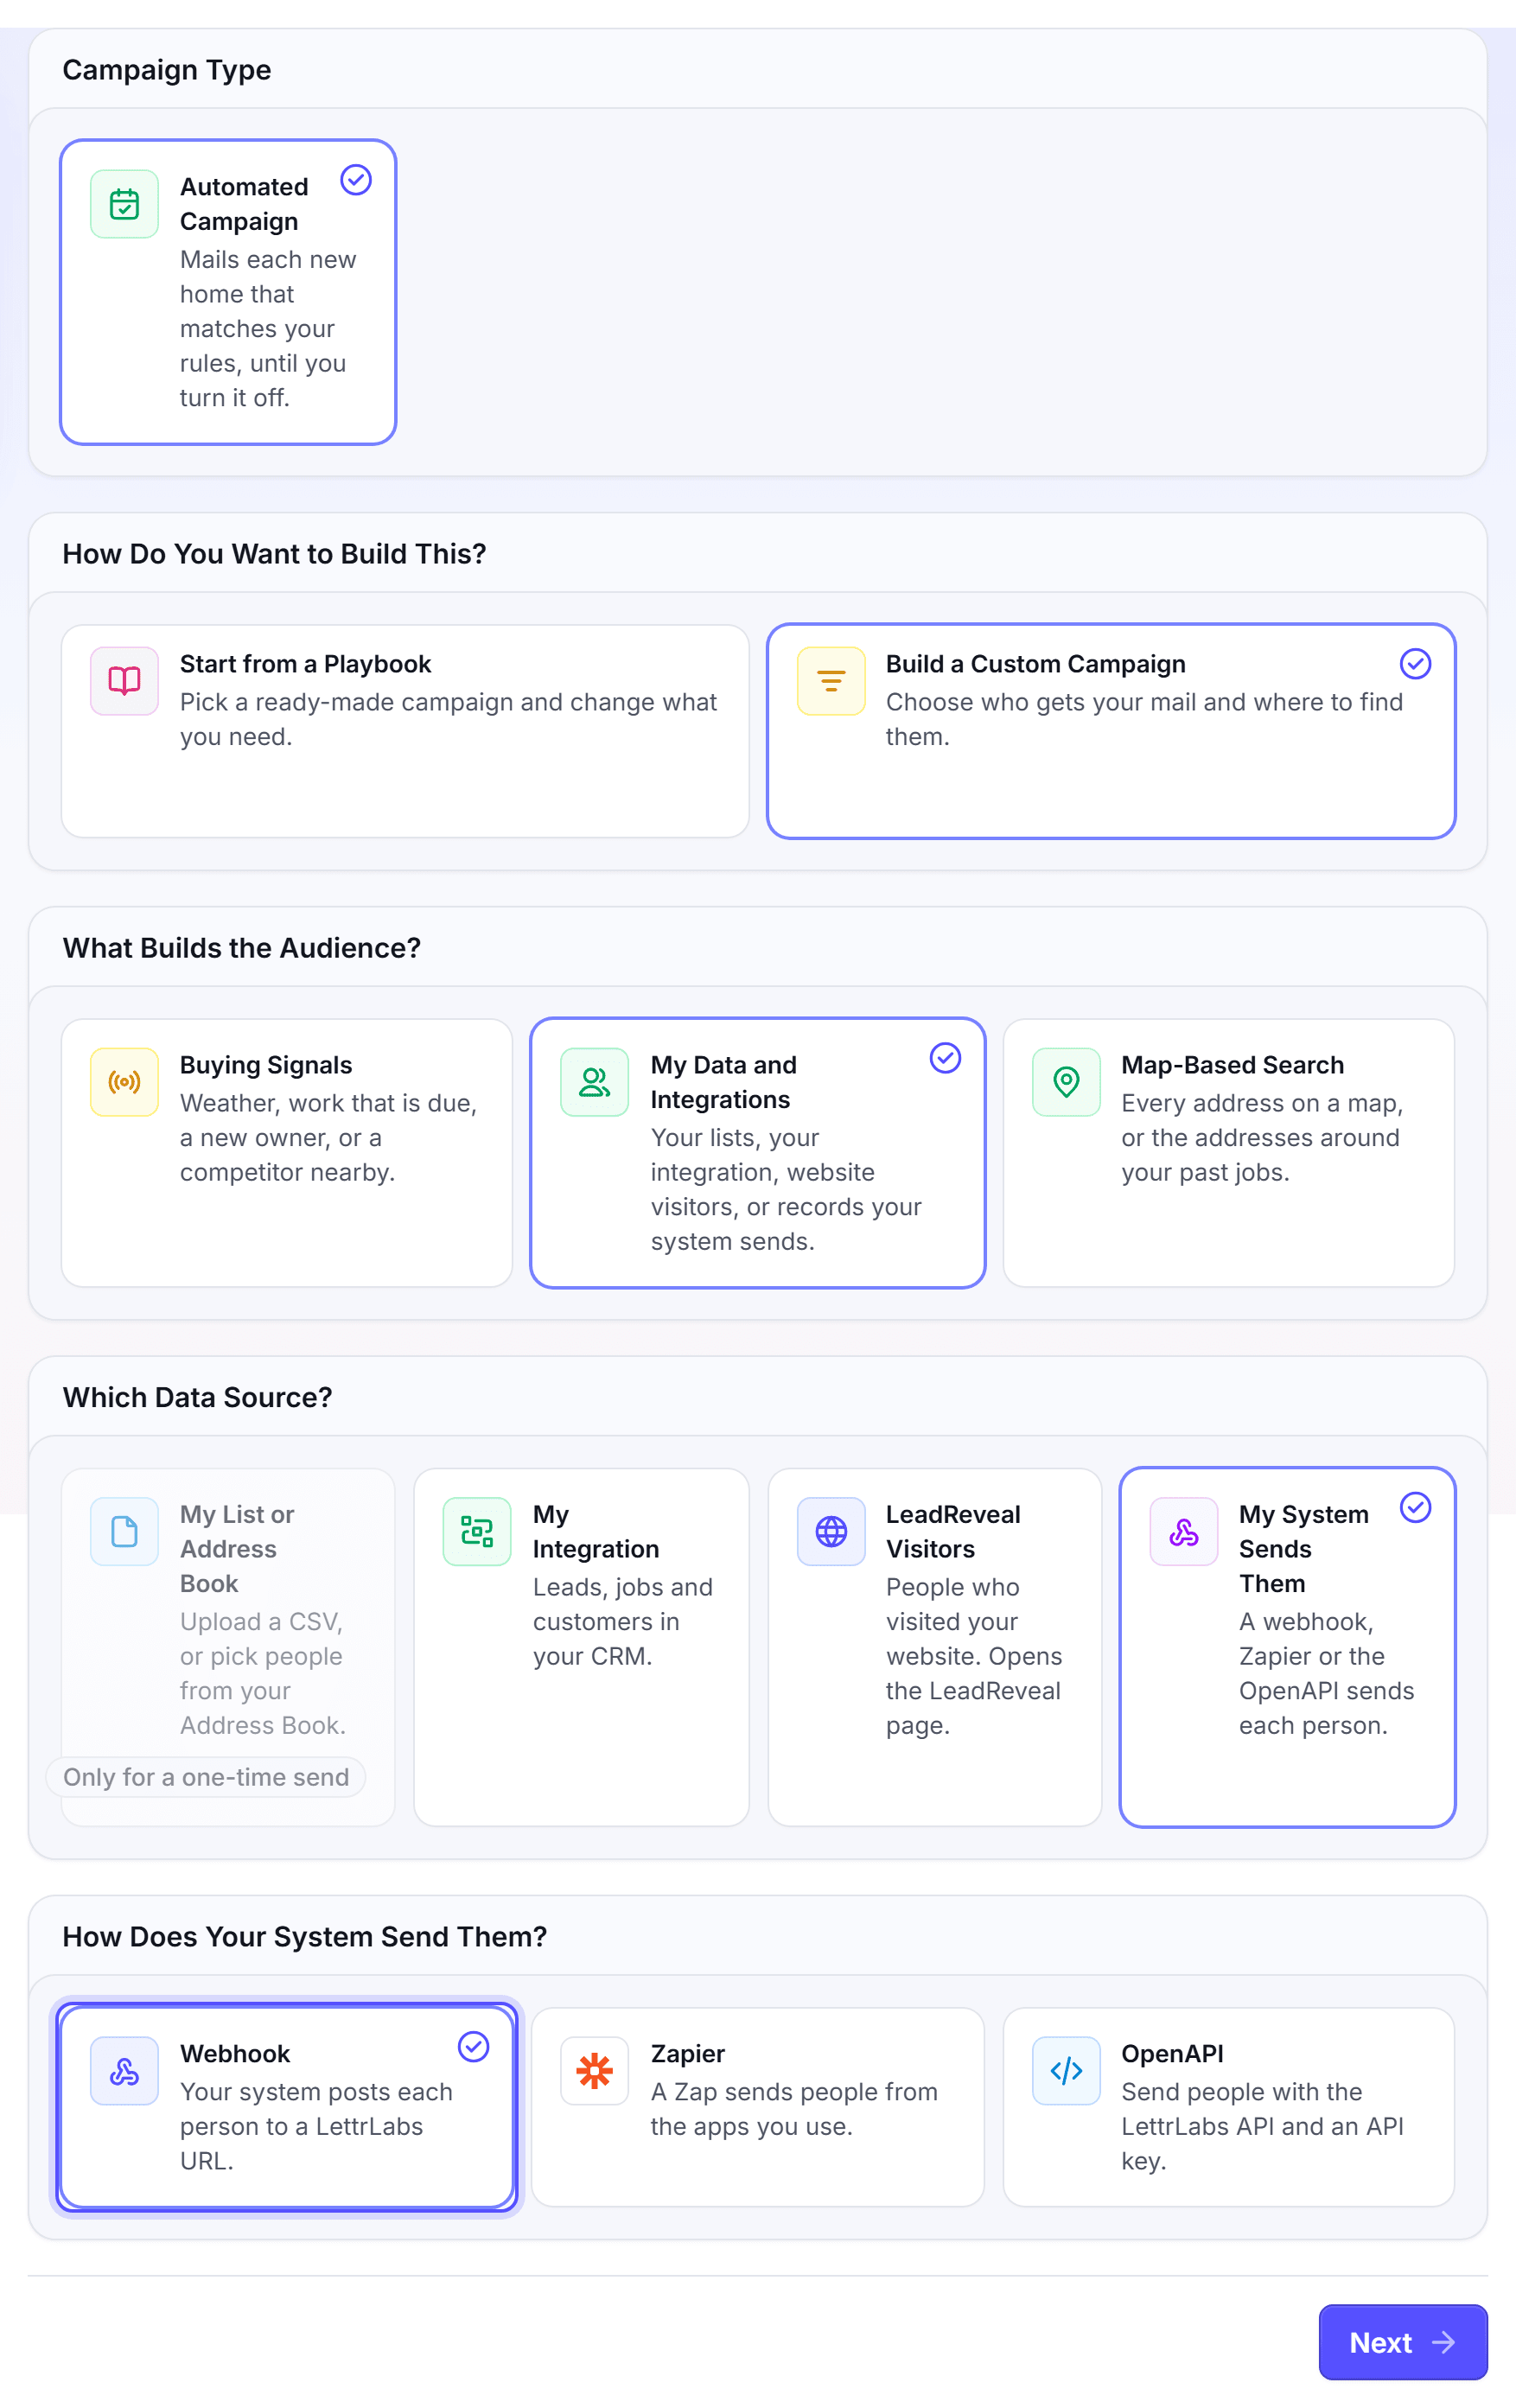
Click Next. The Audience step opens on Start your audience.
In Which webhook?, select your webhook. Each row shows the webhook URL under its name.
In Select Action, keep Mail to Recipients.
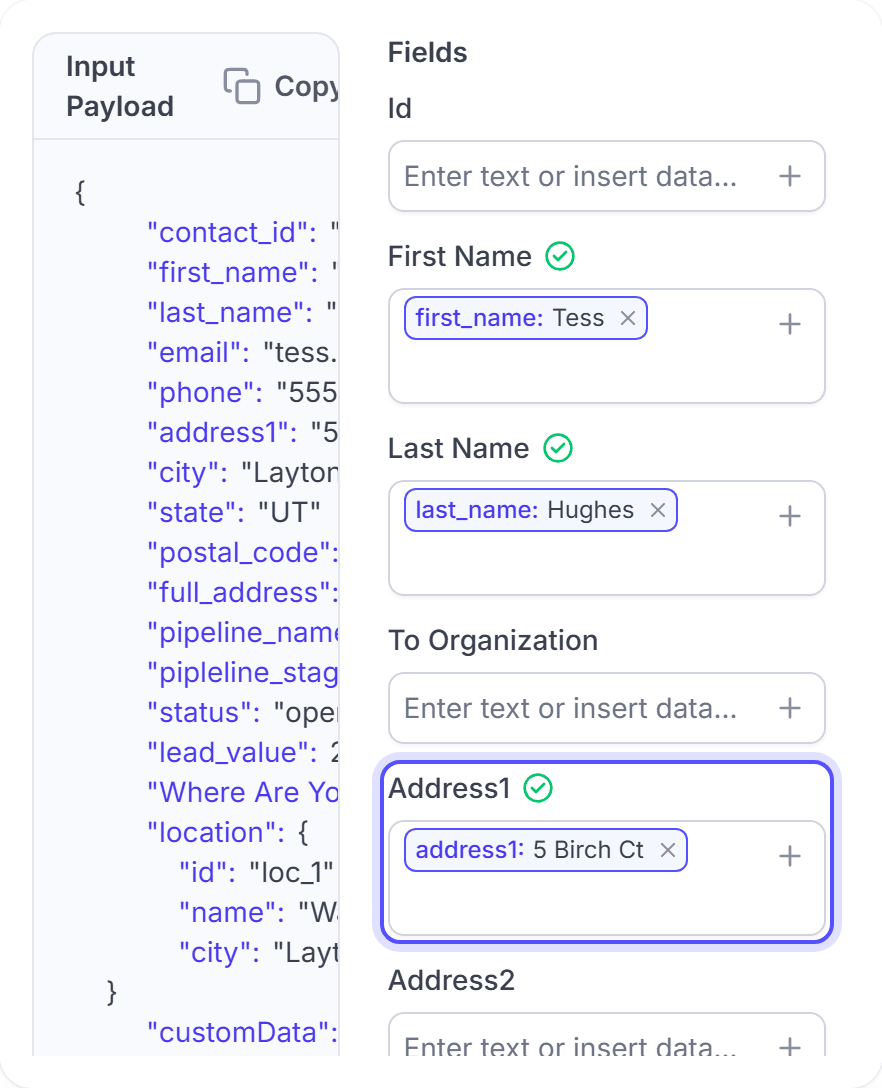
In Match the payload to the Mail to recipient fields, check the fields that LettrLabs matched for you. Map at least the address. Fields and filters tells you how.
Optional: Under Filters, click Advanced settings, and add the filters.
Optional: In Variable Images, turn on Map variable images. Then map each template image to a field of the record.
Read the line under the setup. It says what the campaign mails, for example: "When JobNimbus sold jobs receives a payload, mail the person in each payload, for every payload."
Click Next. Finish the Creative, Measurement and Budget steps, as for each automated campaign.
Click Turn it on.
You're done when the message "Your automation is on" shows. The campaign shows in Campaigns with the status Active.
Each record that passes the filters mails, and LettrLabs charges for each piece, up to the budget. Set the webhook to Active only when your system sends the right records.
Create a webhook from Send Mail
You can create a webhook without leaving Send Mail. Do this when Which webhook? has no webhook for your system.
In Which webhook?, click Create a New Connection. The Connect a webhook drawer opens on Name and security.
In Sender, select the system that sends the records. In Name, keep the name or enter a new one.
In Security, select API key, or one of the two advanced options. Then click Create the webhook.
On Receive a test event, copy the Webhook URL, and paste it into your system. Send one record.
When the record shows, click Enable webhook. The drawer closes, and Send Mail picks the new webhook.
You're done when the new webhook shows in Which webhook? with Change beside it.
Change the webhook setup of a campaign
You can change the webhook, the field mapping or the filters after the campaign is on.
In Campaigns, open the campaign. Click Edit.
In the Send to row, click Edit. The Webhook dialog opens.
Change the webhook, the mapping or the filters. Close the dialog.
Click Save changes.
You're done when the Send to row shows the new line, for example "Webhook · JobNimbus sold jobs · Mail to recipient".
FAQ
Related
Fields and filters
Match the record to the mail fields, and choose which records mail.
Radius Mail
Mail the homes near the address in each record.
Automated campaigns
The Creative, Measurement and Budget steps.
Steps checked 2026-11-16.